Integrating with Finmap via Zapier lets you automate financial processes, reducing manual work and improving the efficiency of cash flow management. It’s a simple solution for those who want clear control over their finances by syncing data from different platforms without complex setup.
How do you make Finmap receive data from all the other services you use without manual entry? One answer is integration via Zapier. This service lets you connect Finmap with hundreds of other tools: CRM systems, e-commerce platforms, accounting and service systems, and set up automatic data transfer between them.
About Zapier
Zapier is a cloud automation platform that lets you connect different services to each other without development or programming.
Zapier helps automatically transfer data between systems. For example:
- a new deal appeared in your CRM → the information automatically ended up in Finmap;
- a paid order appeared in Shopify → an income was created in Finmap;
- a deal moved to the «Paid» status in HubSpot → the payment status was updated in Finmap.
Such automations in Zapier are called «Zaps». Each Zap consists of a trigger (an event that starts the scenario) and one or more actions (what Zapier does in response).
What Finmap in Zapier Is
Finmap in Zapier is the official connector that lets you:
- transfer data from other systems into Finmap;
- automatically create financial operations;
- update payment statuses;
- build automation scenarios between Finmap and CRM, ERP, e-commerce or service platforms.
The core idea of the integration — Finmap becomes the single place where a business sees:
- forecasted money;
- actual receipts;
- payment status;
- the financial picture across sales, orders or projects.
How the Integration via Zapier Works
Zapier lets you integrate Finmap with other services in just a few steps, without writing code. You choose a source service (a CRM, online store, accounting system, etc.), specify the event that should start the automation, choose Finmap as the data recipient, and set up exactly which fields to transfer. After that, the system automatically transfers data between platforms — in near real time.
What You Can Do via Zapier + Finmap
1. Create forecasted payments
When a deal in your CRM moves to the «Won» status, an order is created in Shopify, or an invoice is issued in a service system — a planned payment is automatically created in Finmap with the following data: amount, currency, date, client, manager, source.
2. Update payment statuses
When the system receives a payment, the status in Finmap changes automatically:
expected→paid;expected→partially_paid;expected→overdue;expected→cancelled.
3. Transfer actual financial data
You can automatically create incomes, expenses, refunds, fees, deliveries and adjustments.
4. Run reverse sync
After an actual payment appears in Finmap, you can:
- update the deal status in your CRM;
- change the payment status;
- add a note/comment;
- update custom fields.
What Data You Can Pull from Finmap
Through Zapier and the Finmap API you can work with the following data:
Financial operations — incomes, expenses, transfers, refunds.
Payment statuses — paid, partially_paid, overdue, cancelled.
Client data — client name, client ID, manager, company.
Payment data — amount, currency, date, expected payment date, reference/document number.
Technical fields — source_system, source_entity_id, source_entity_type, source_entity_number.
Which Systems Work Best with Finmap via Zapier
Zapier connects Finmap with thousands of apps, but the strongest scenarios come from the following systems:
Shopify — for e-commerce:
- orders;
- payments;
- refunds;
- delivery;
- fees.
Xero — for invoice/payment scenarios:
- invoices;
- payments;
- accounts receivable;
- partial payments.
RemOnline — for service businesses:
- orders;
- repairs;
- payment statuses;
- revenue.
Besides these, Finmap works well via Zapier with popular CRMs (Pipedrive, HubSpot), e-commerce platforms (WooCommerce), payment services (Stripe, PayPal) and many other tools.
👉 You can see the full list of available integrations at this link: Finmap integrations via Zapier.
Automation Examples
Example 1. Shopify → Finmap
A customer places an order in Shopify. Zapier receives the new order, creates an expected payment in Finmap, and after the actual payment automatically changes the status to paid.
Result: the owner sees the forecast and the actual money in one place.
Example 2. Pipedrive → Finmap
A manager moves a deal to the «Won» status. Zapier creates an expected payment in Finmap and passes the deal amount, date and client. After the actual payment, Finmap updates the deal status in the CRM.
Result: the manager sees which sales should bring in money, which deals are not yet paid, and where there is a gap between the sales pipeline and cash flow.
Example 3. Xero → Finmap
An invoice is created in Xero. Zapier creates an expected payment in Finmap, and after the invoice is paid it automatically closes the payment as paid.
Result: Finmap becomes the management center for controlling cash flow and accounts receivable.
⚙️ How to Connect Finmap to Zapier: Step-by-Step Guide
📍 Registering in Zapier
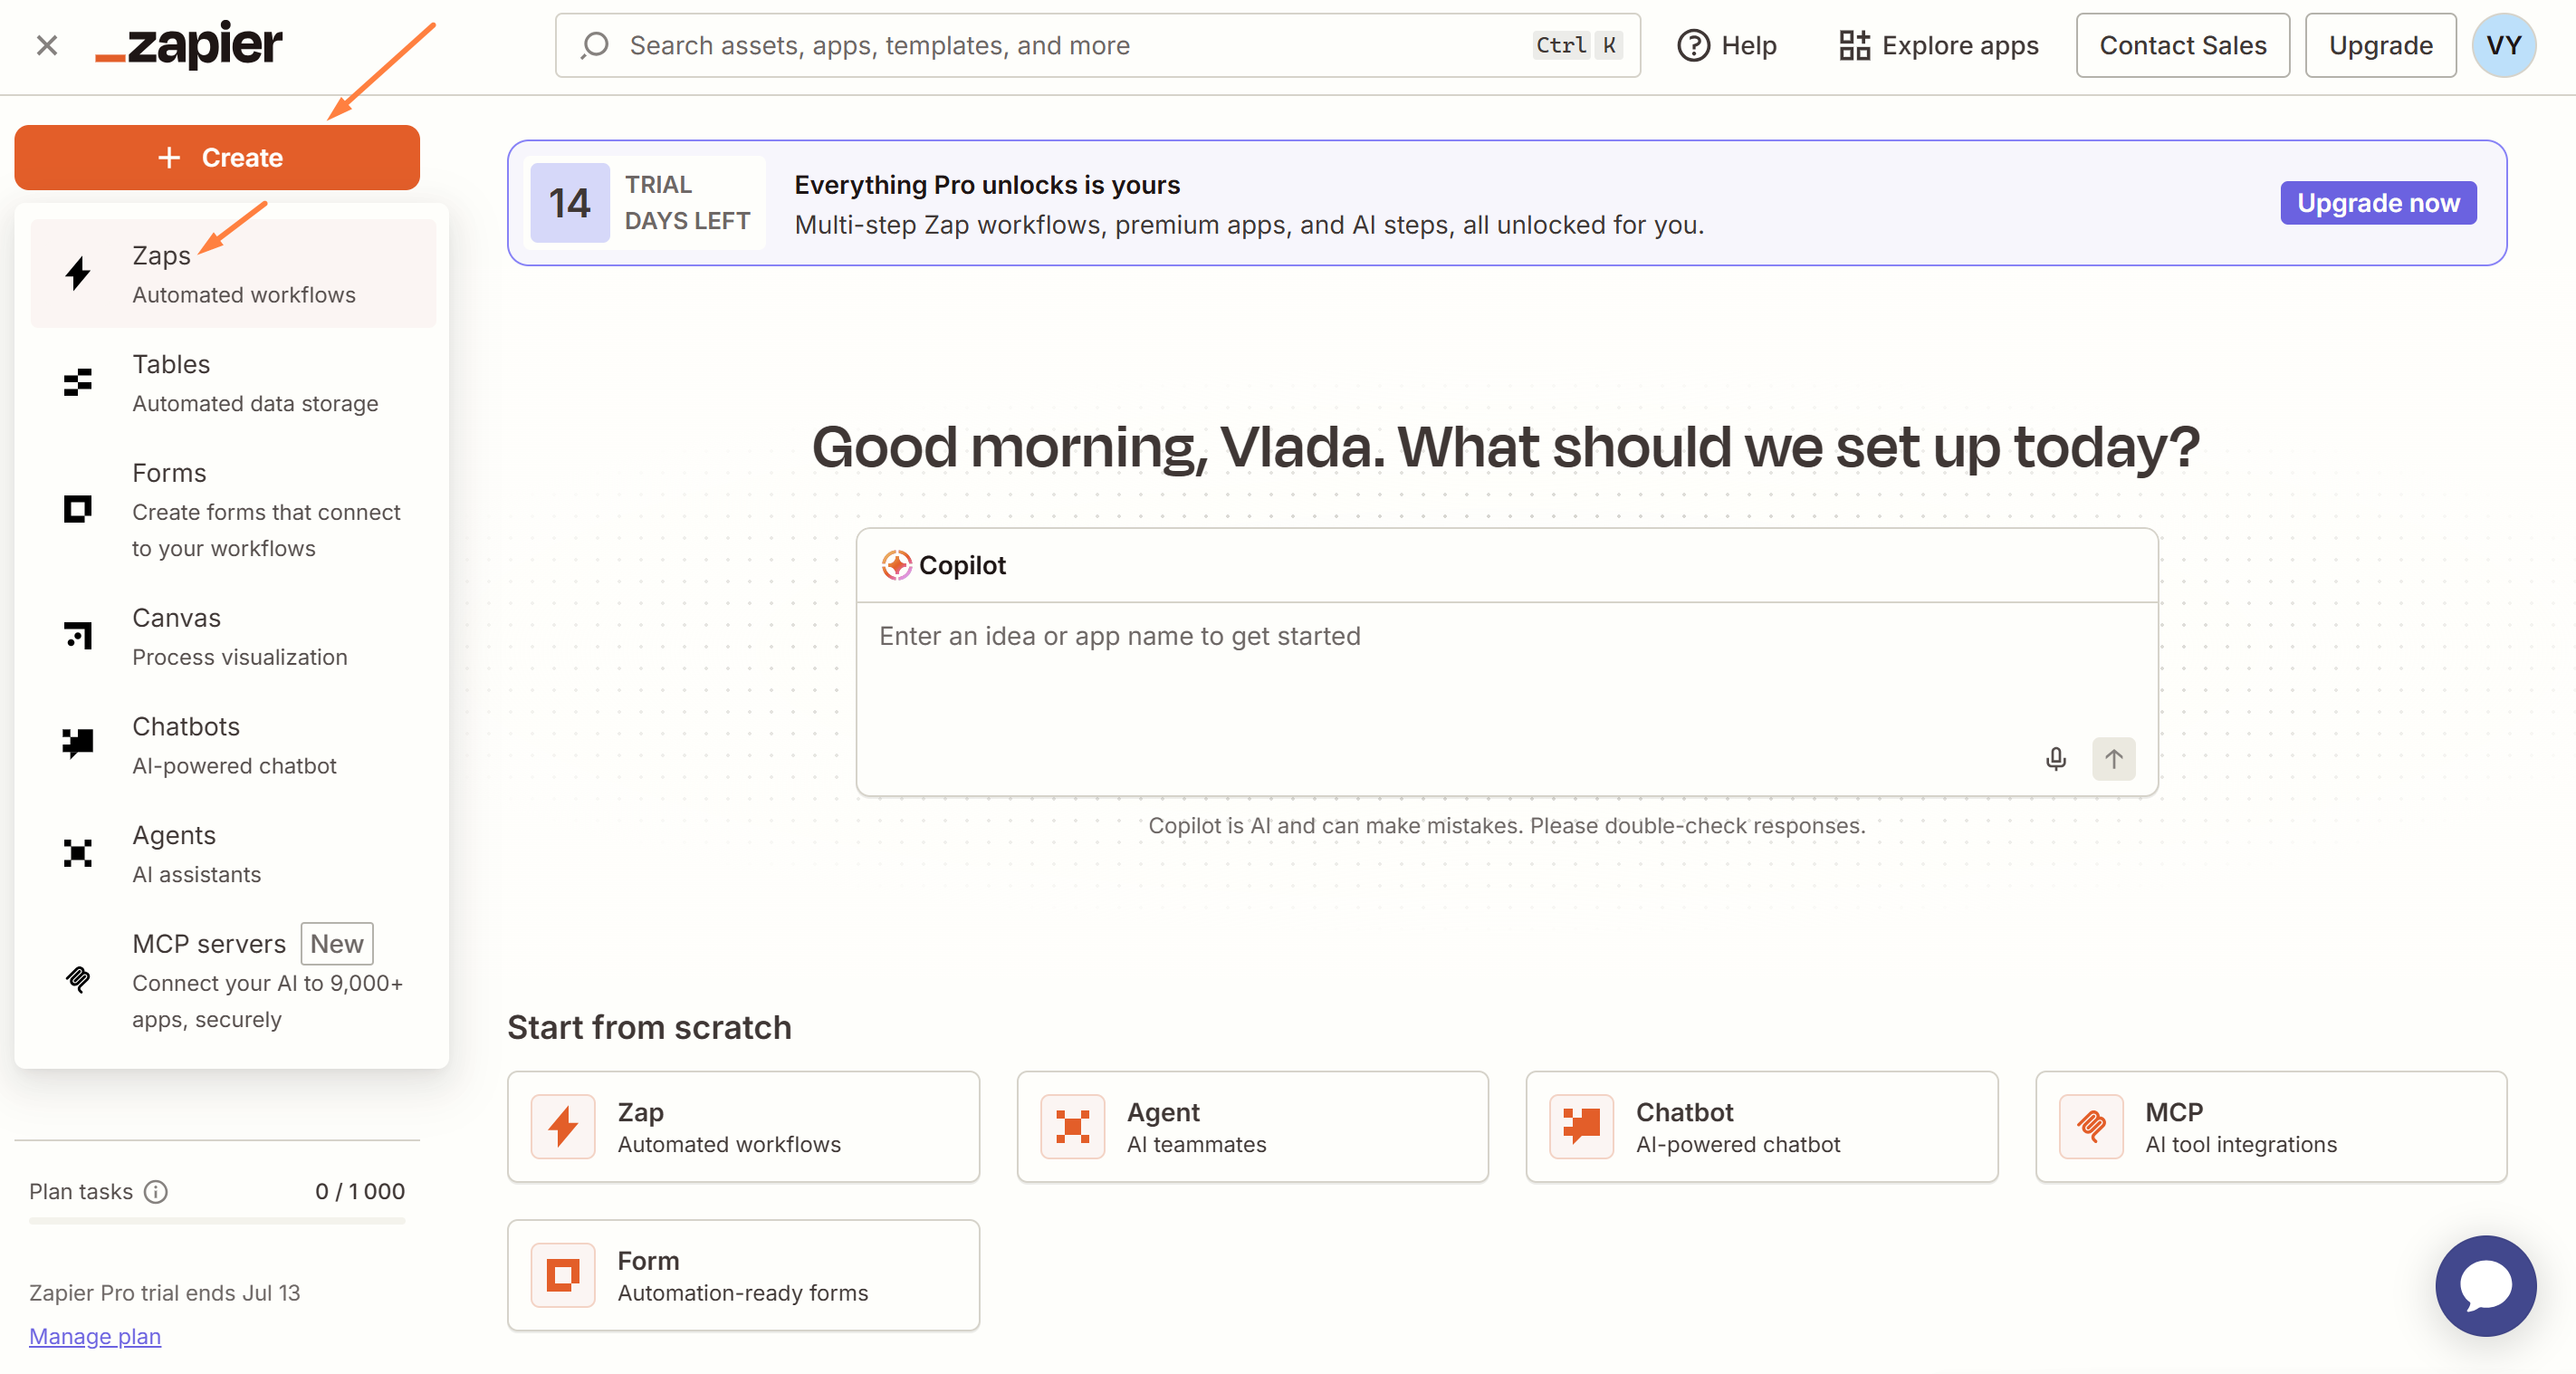
First, register an account on Zapier using email or another available method. The free plan is enough for test scenarios.
📍 Creating a New Zap
After signing in, click Create Zap and go to the automation setup.
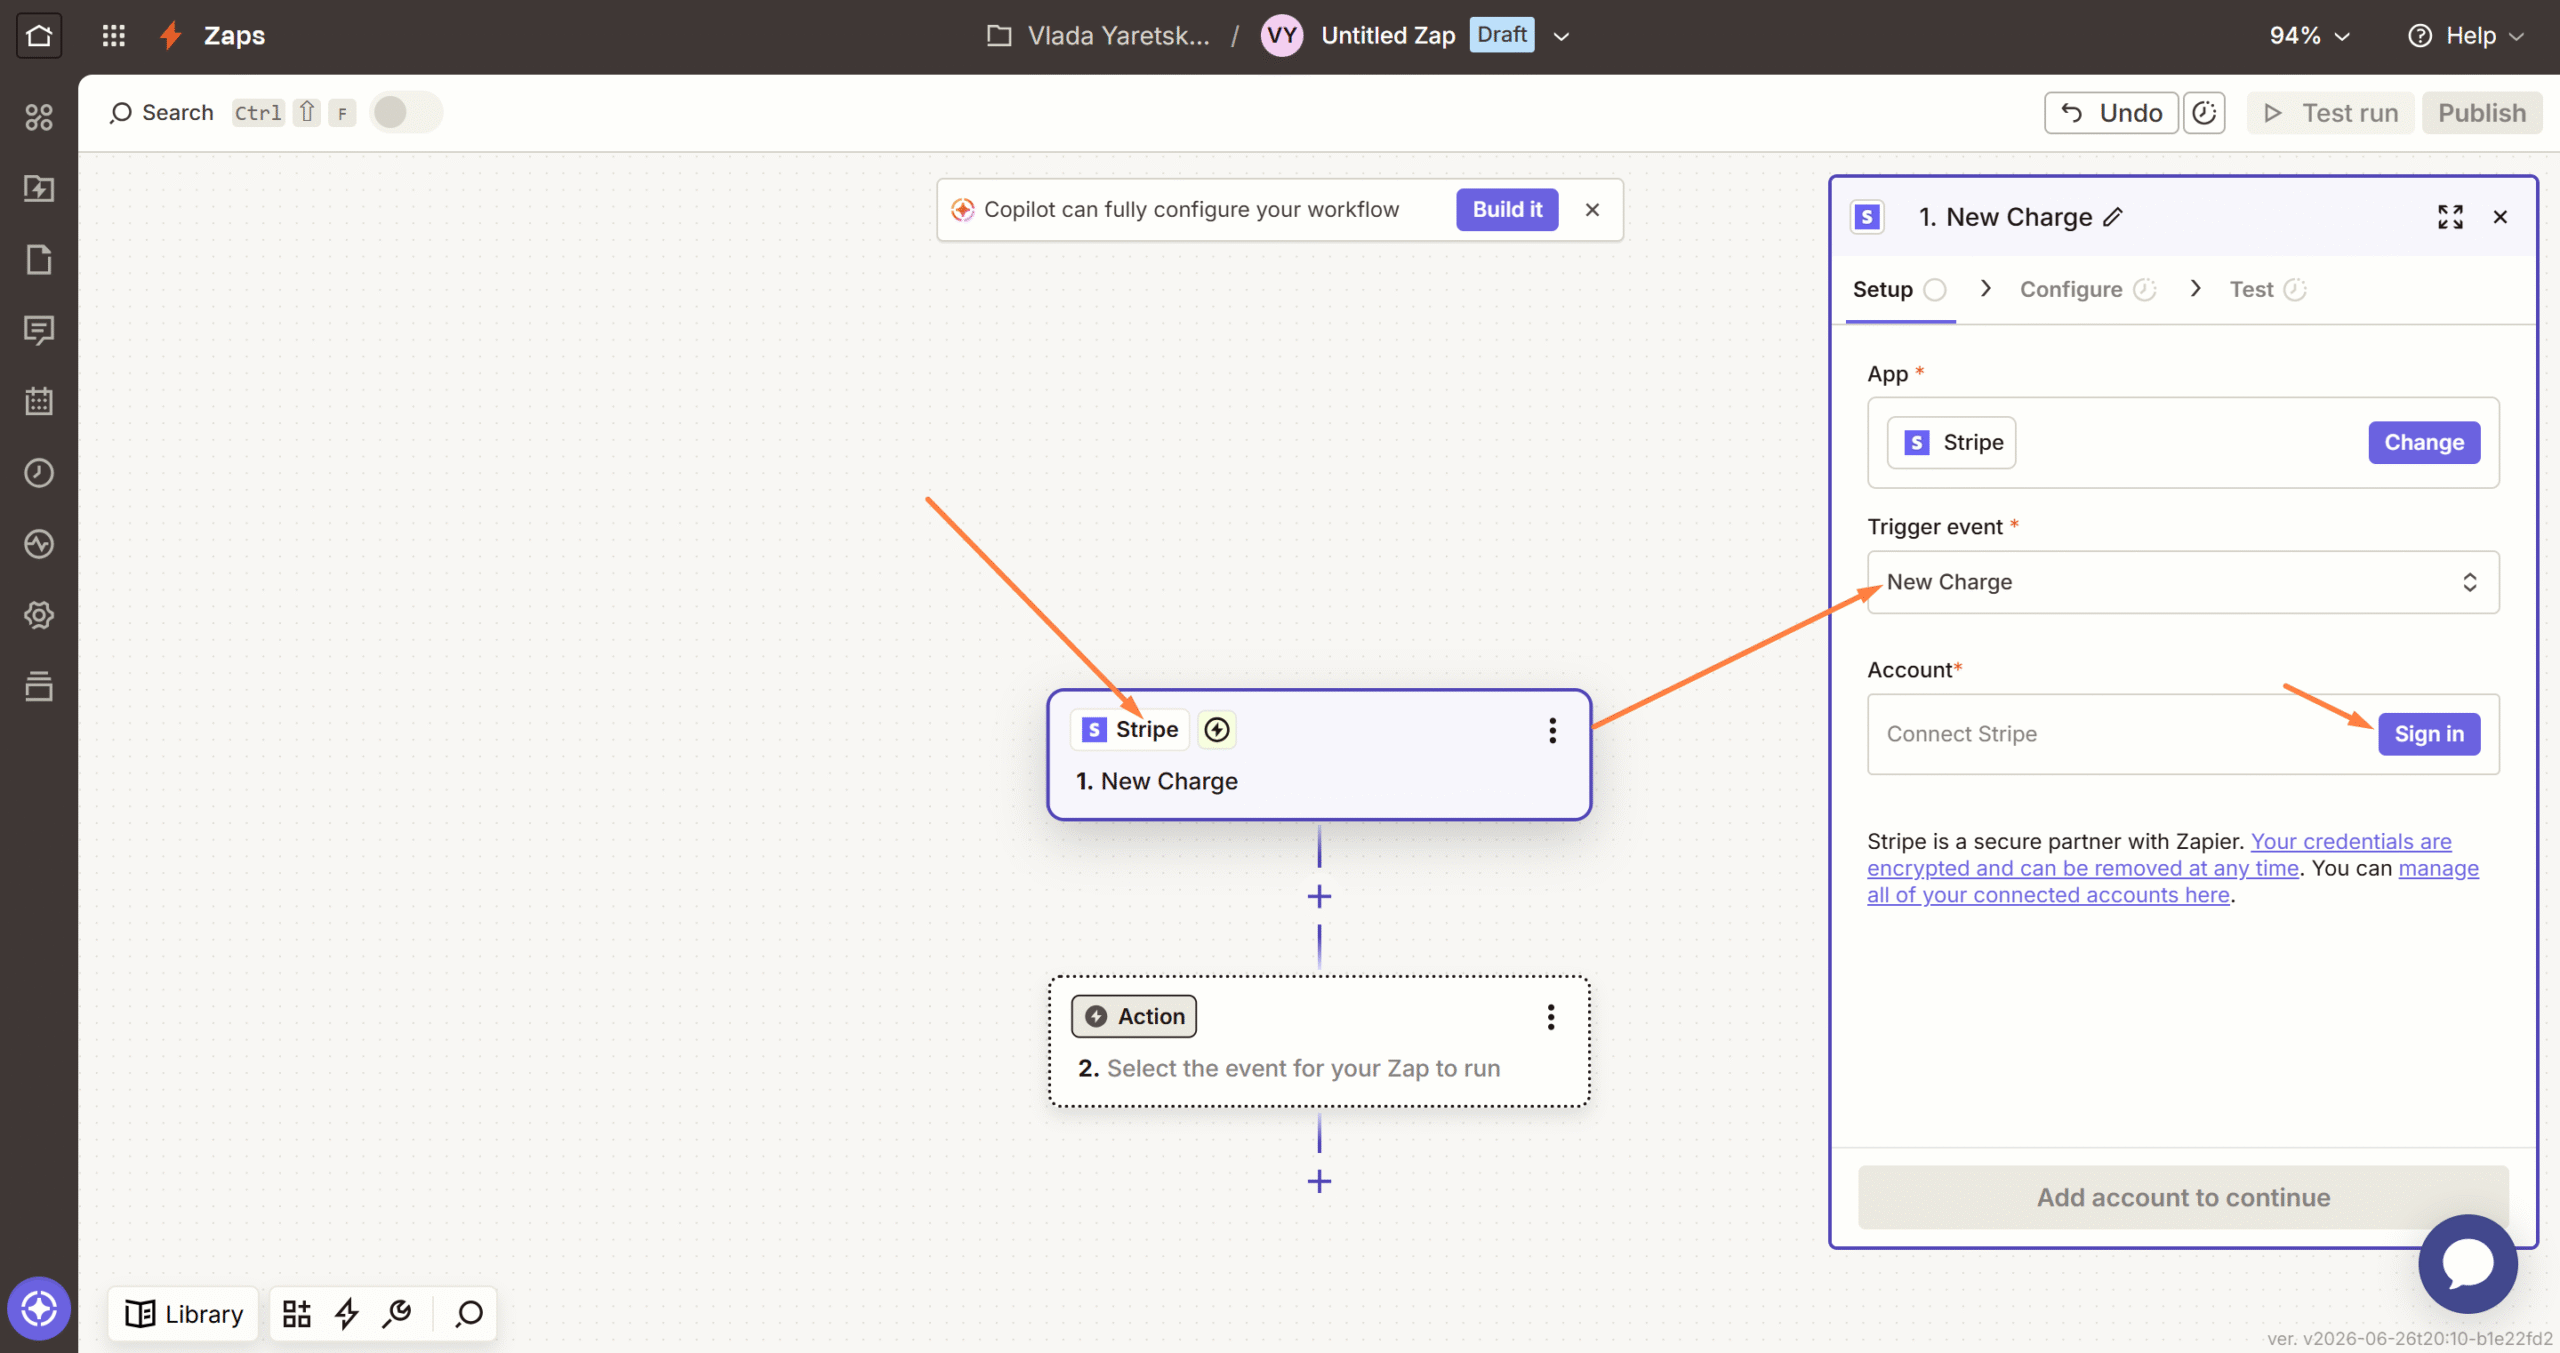
📍 Setting Up the Trigger
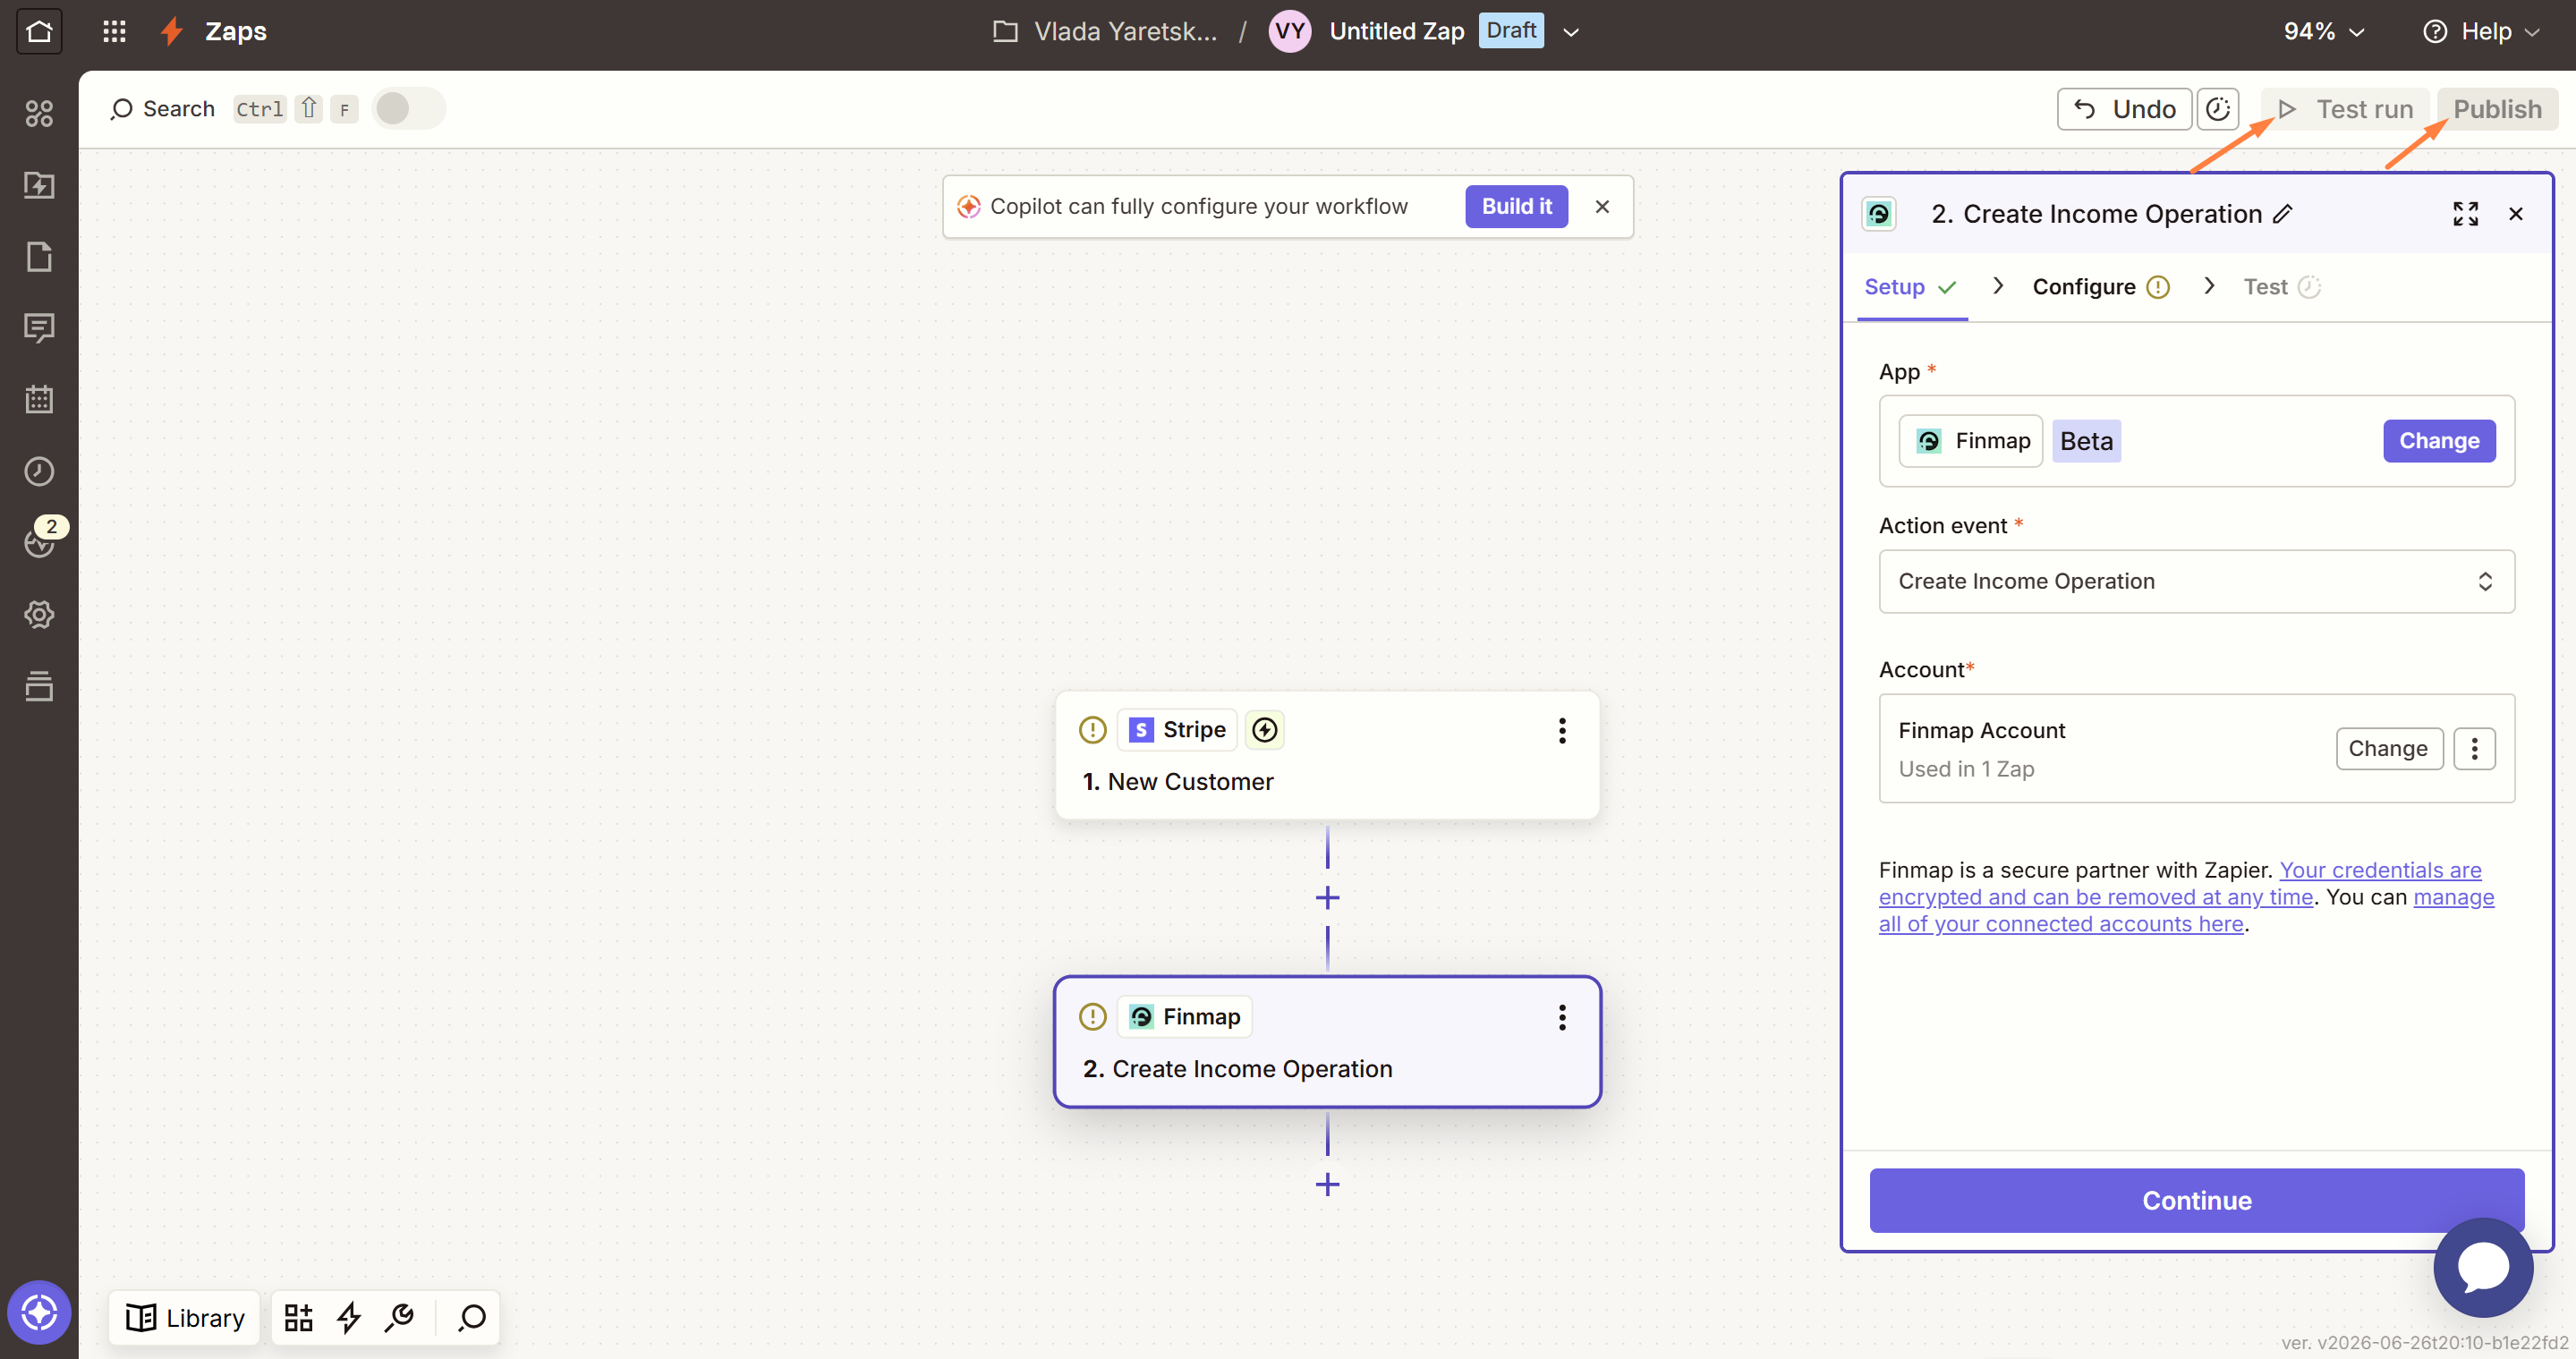
Choose a source service (for example Stripe, Shopify, Pipedrive or Xero) and the event that should start the Zap, and connect that service’s account.
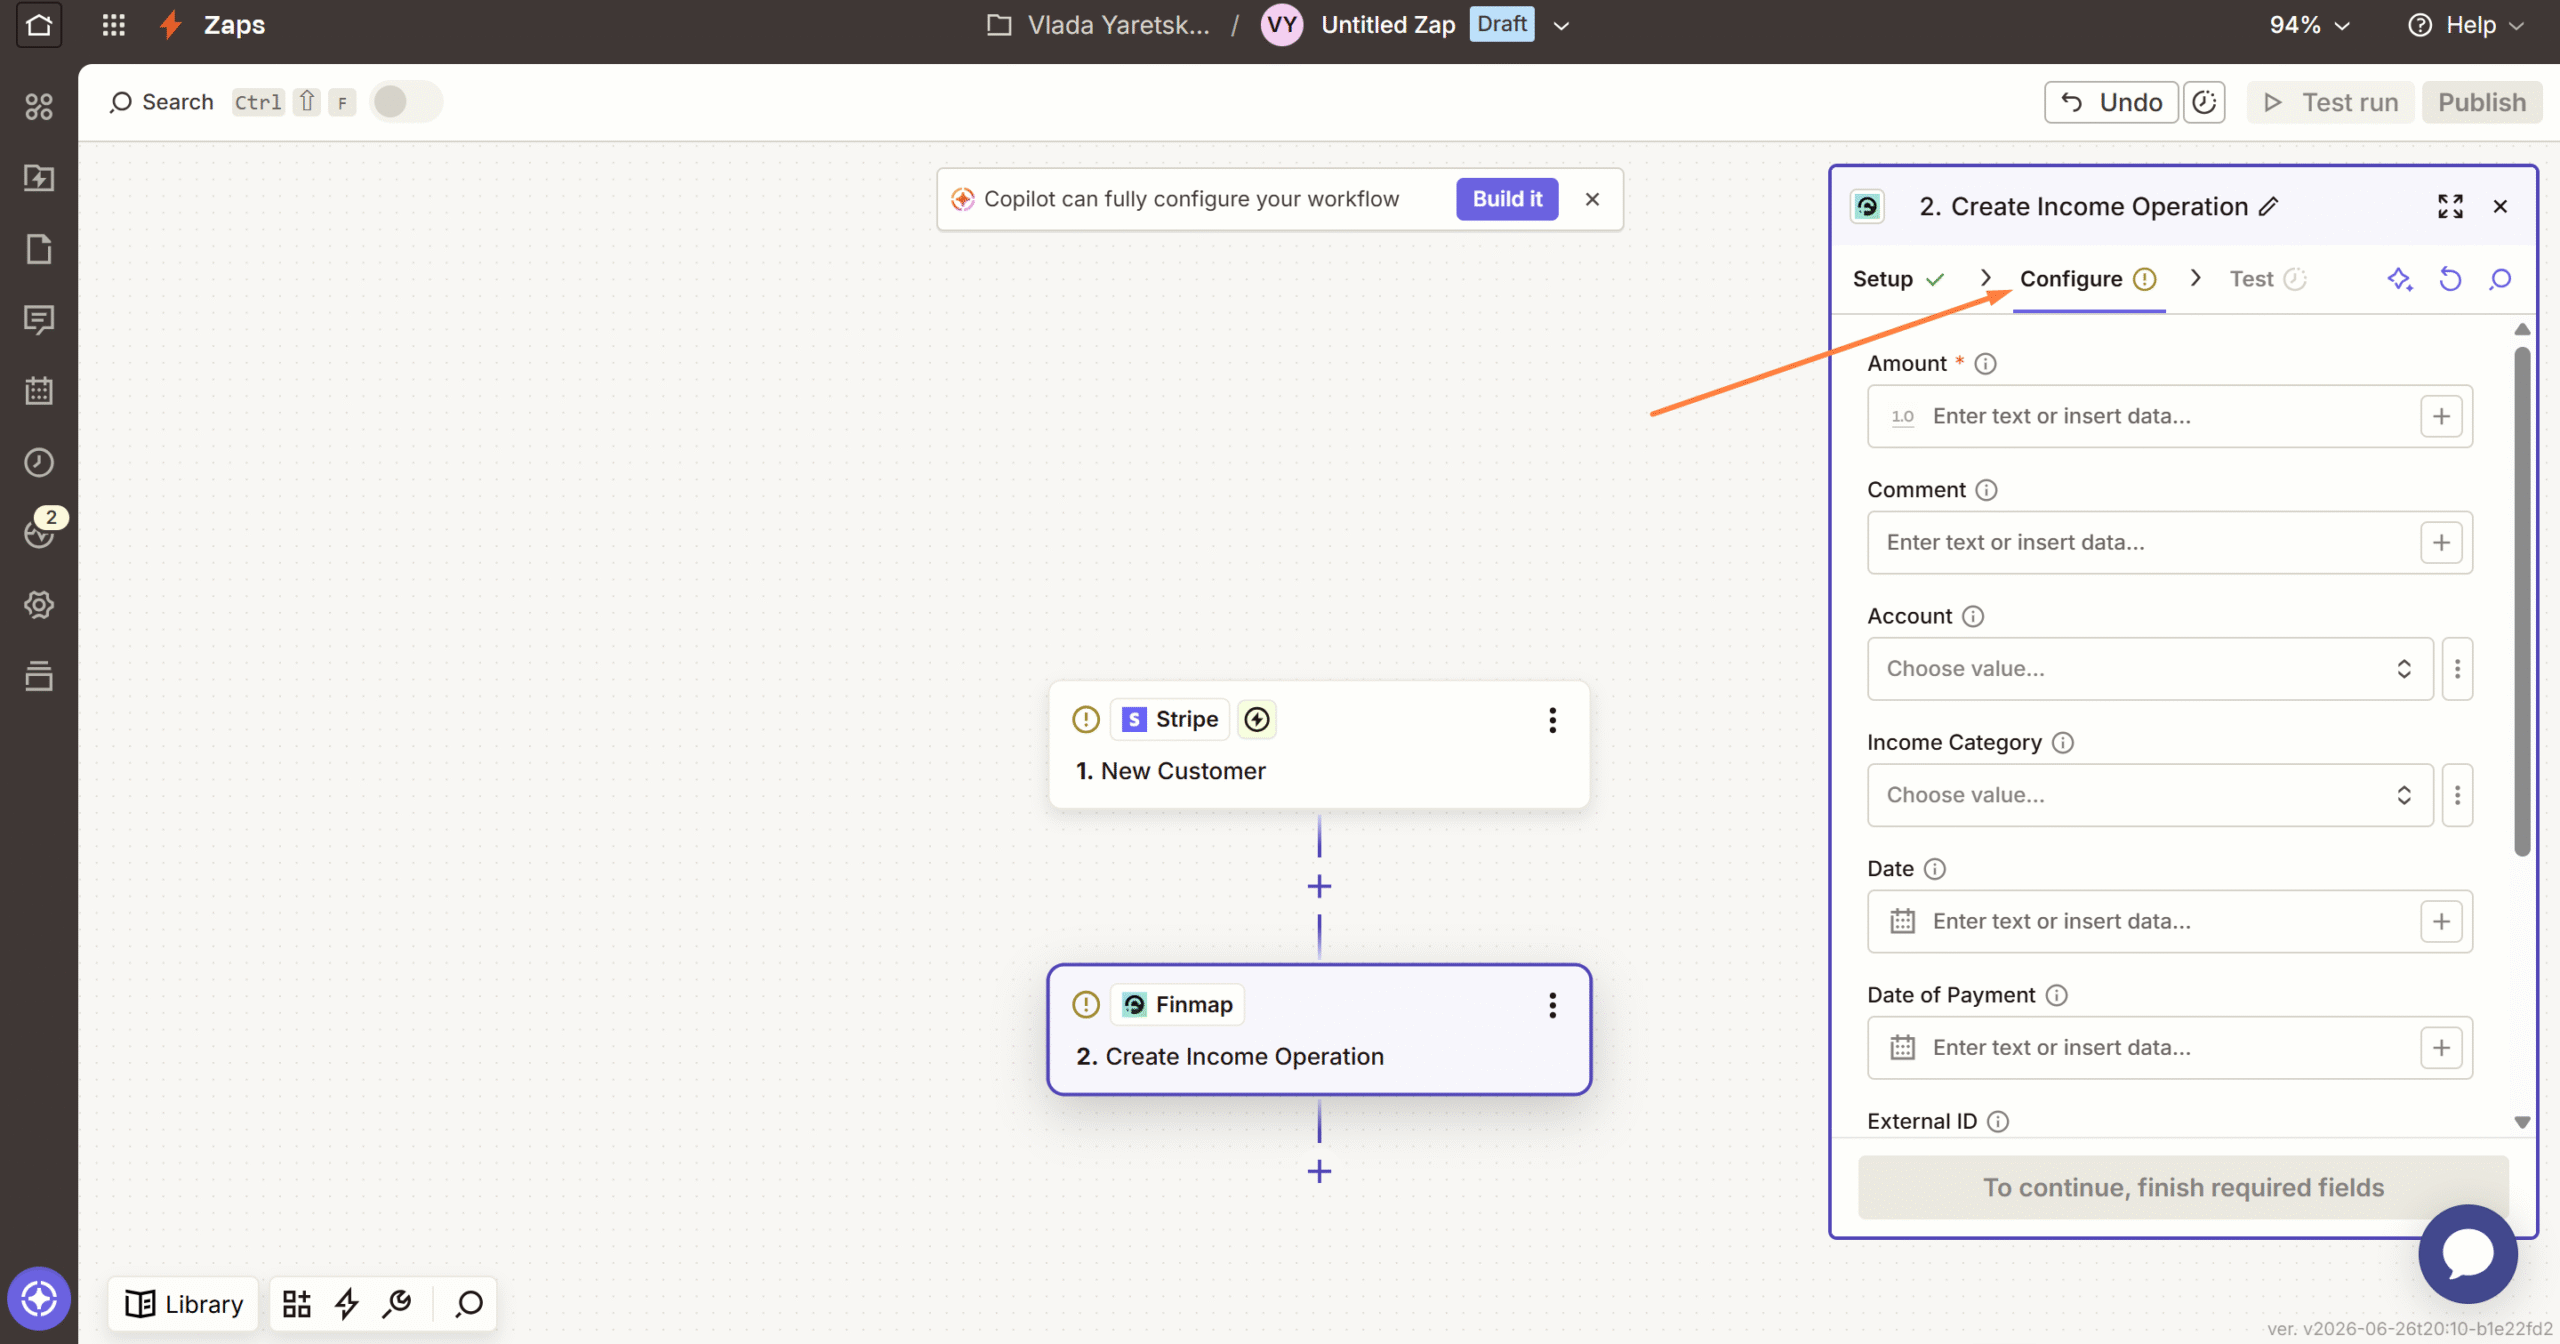
📍 Choosing the Action and Selecting Finmap as the Data Recipient
Add an action and choose the service the data will be transferred to. If Finmap is the recipient, all data from the selected source will automatically go into Finmap for financial accounting.
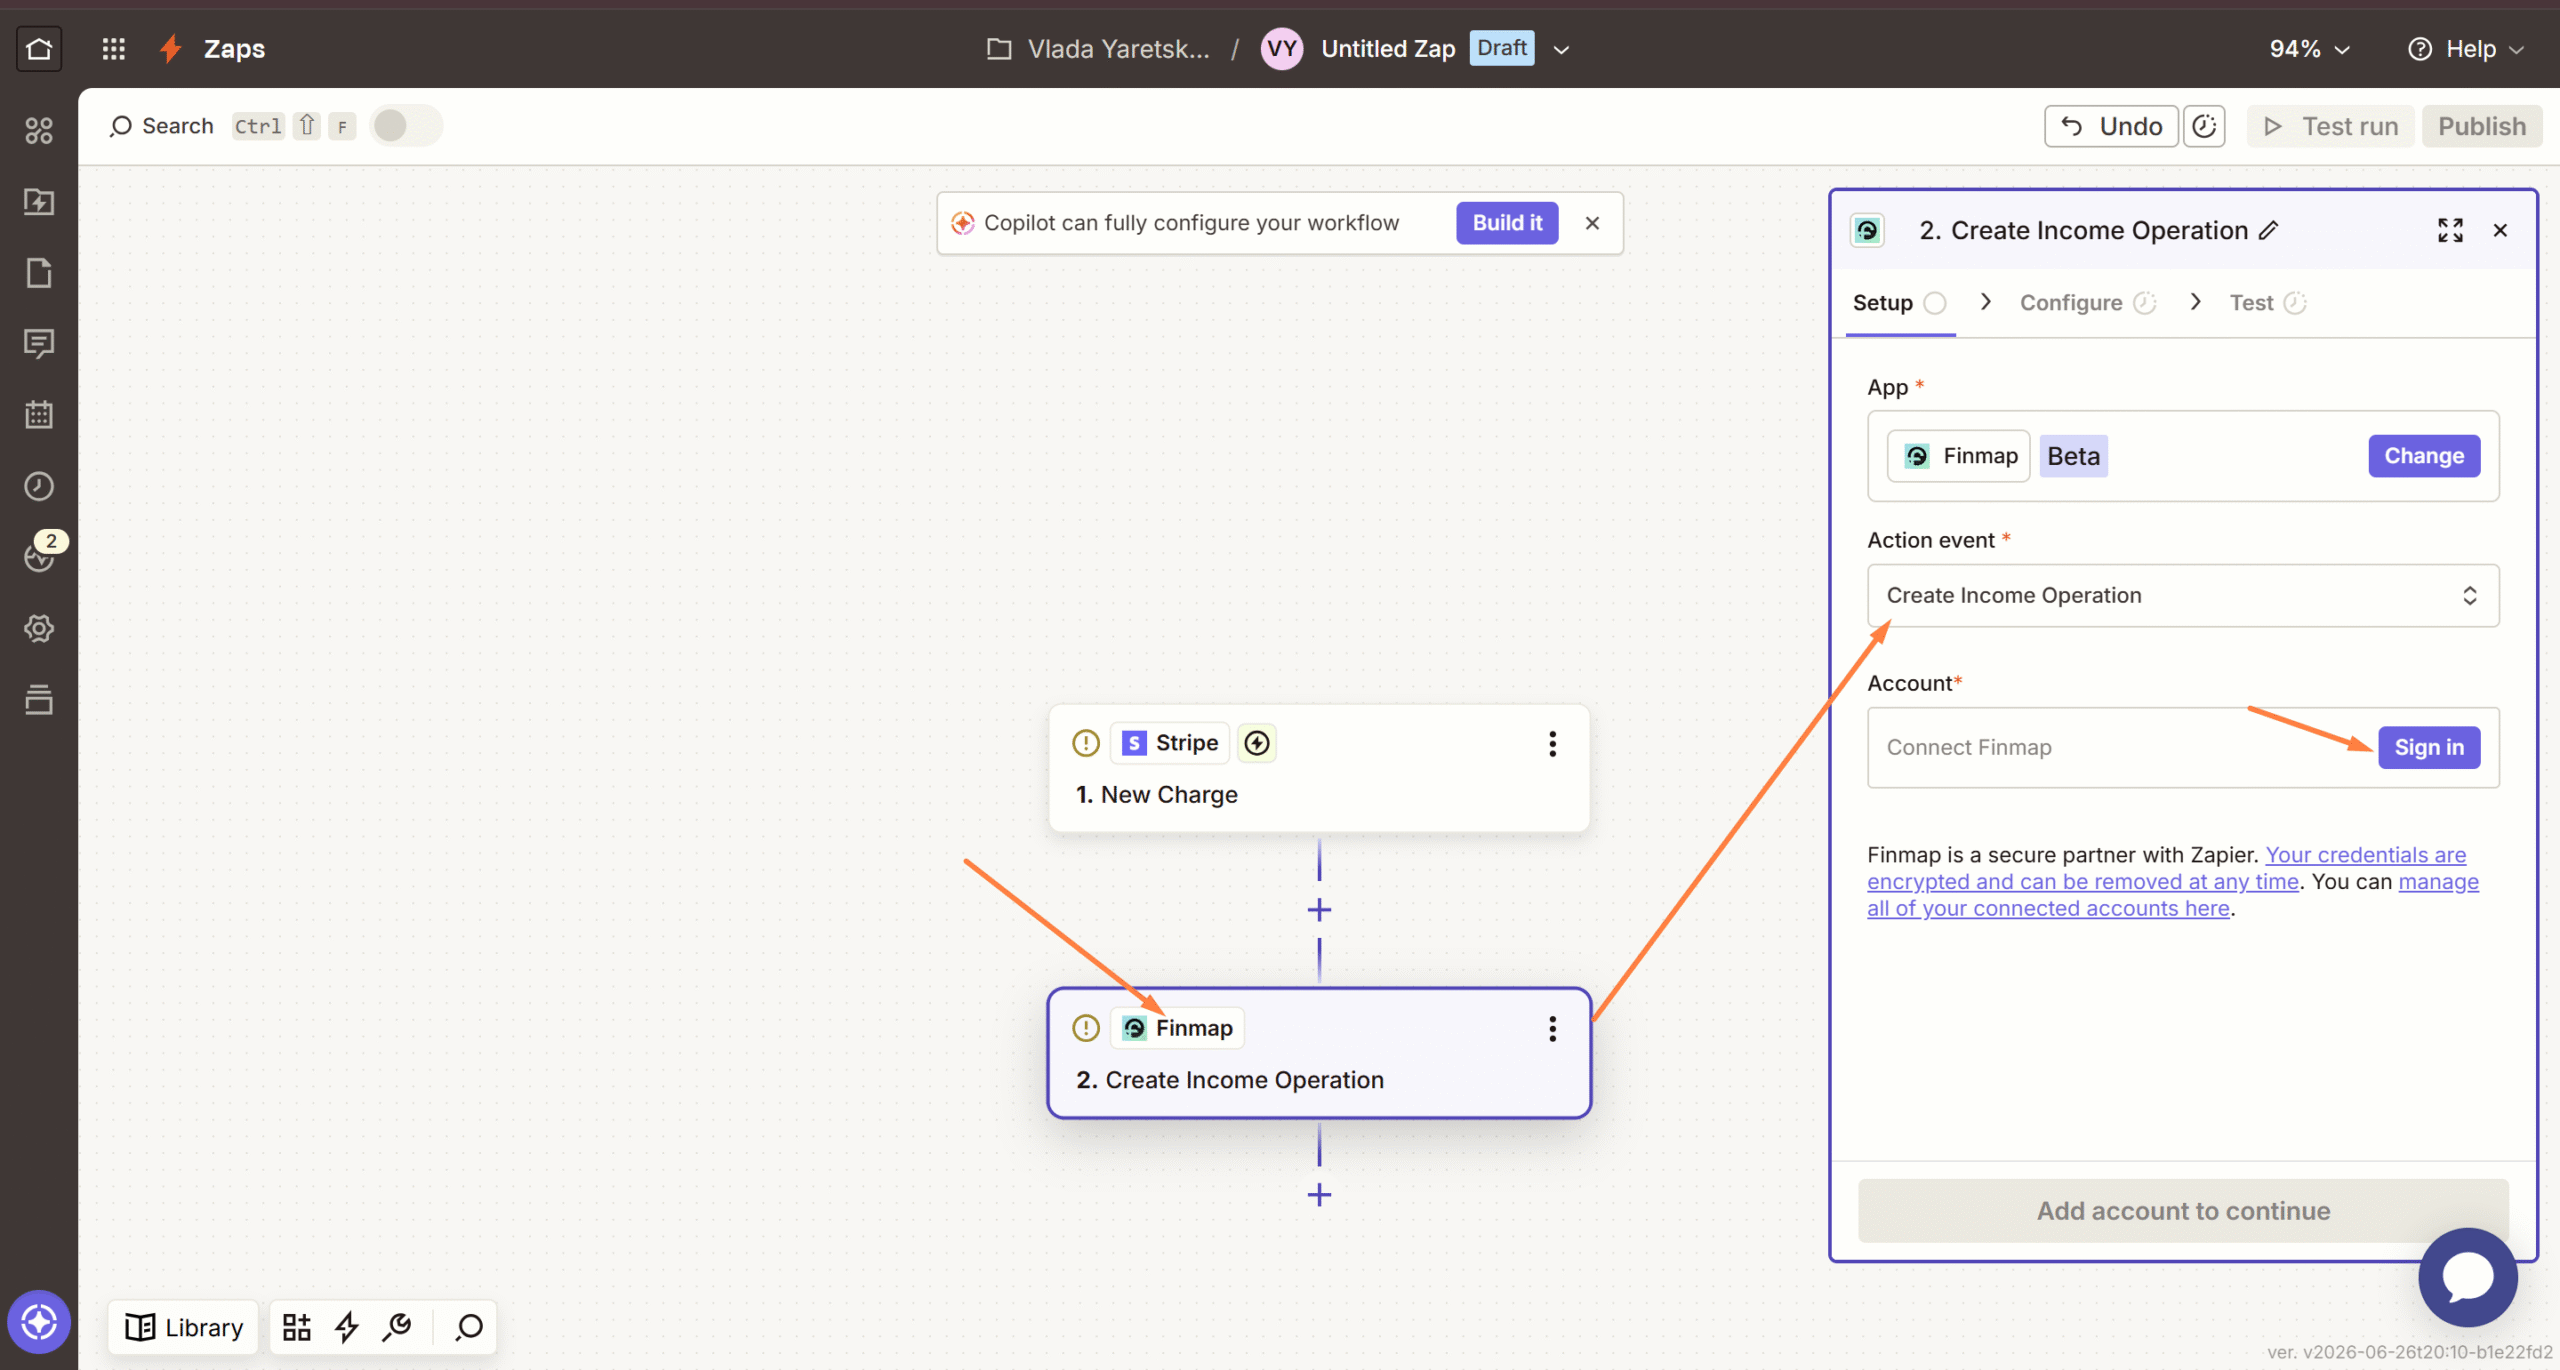
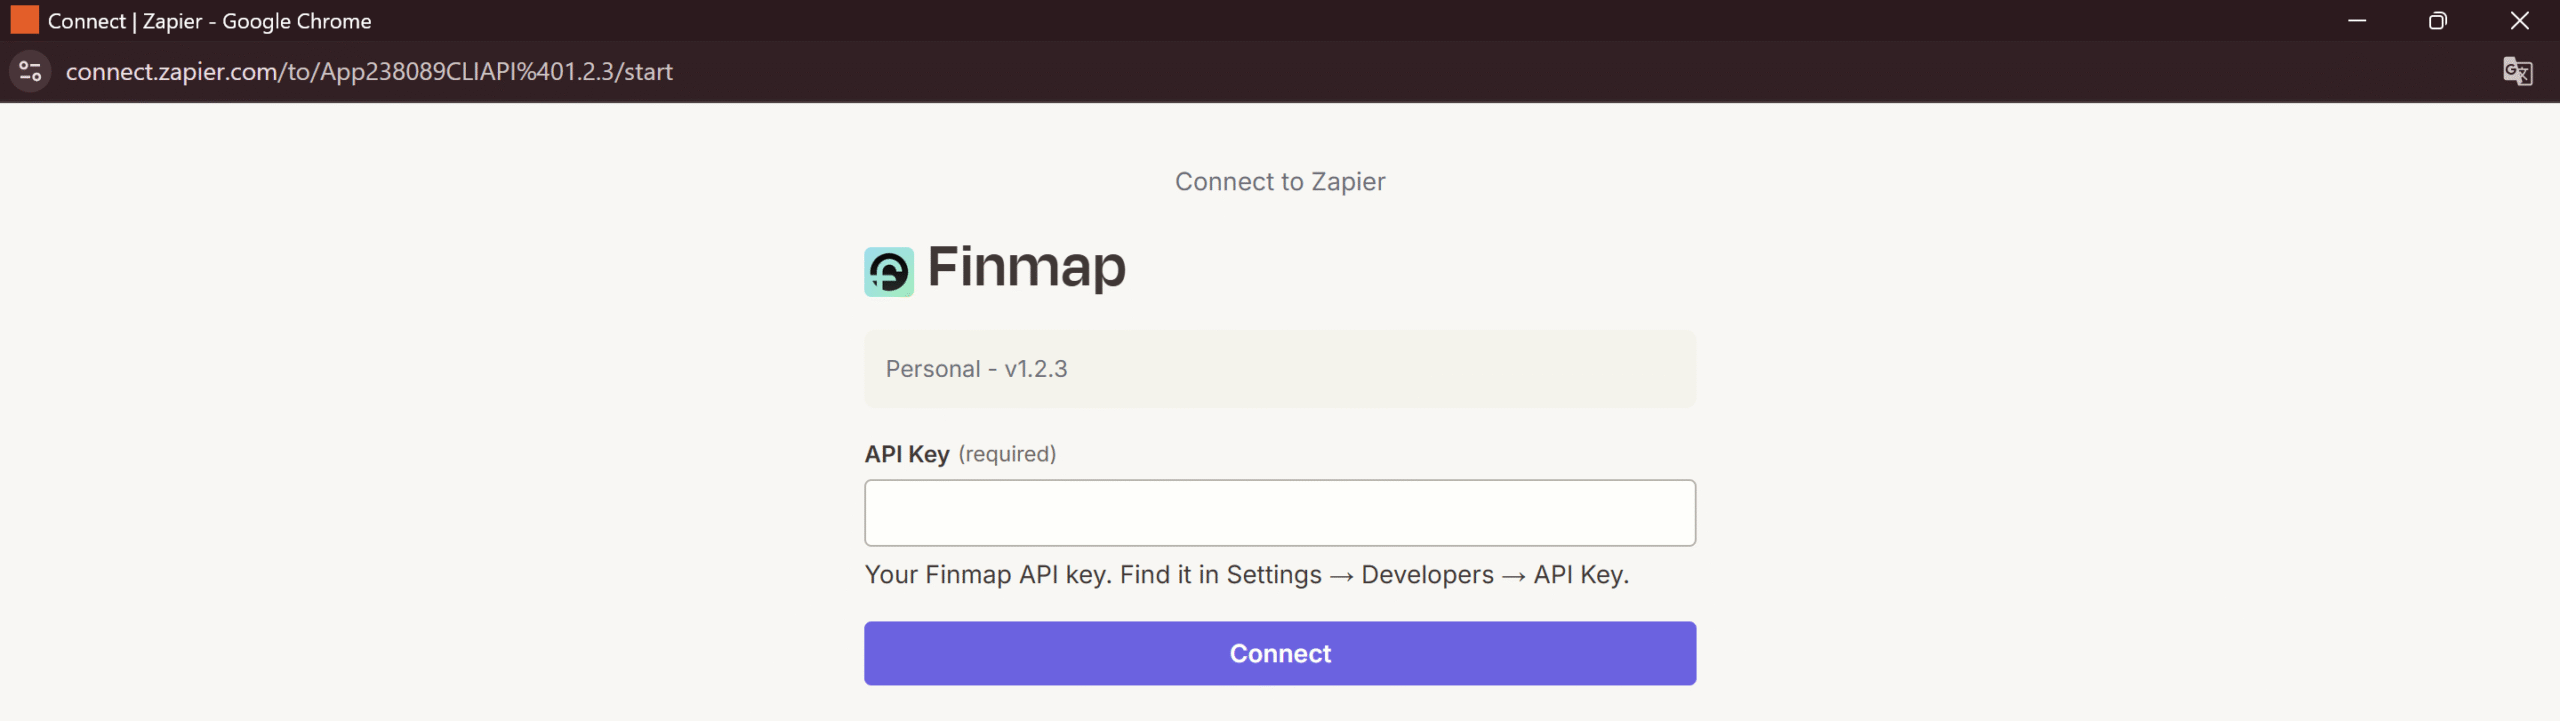
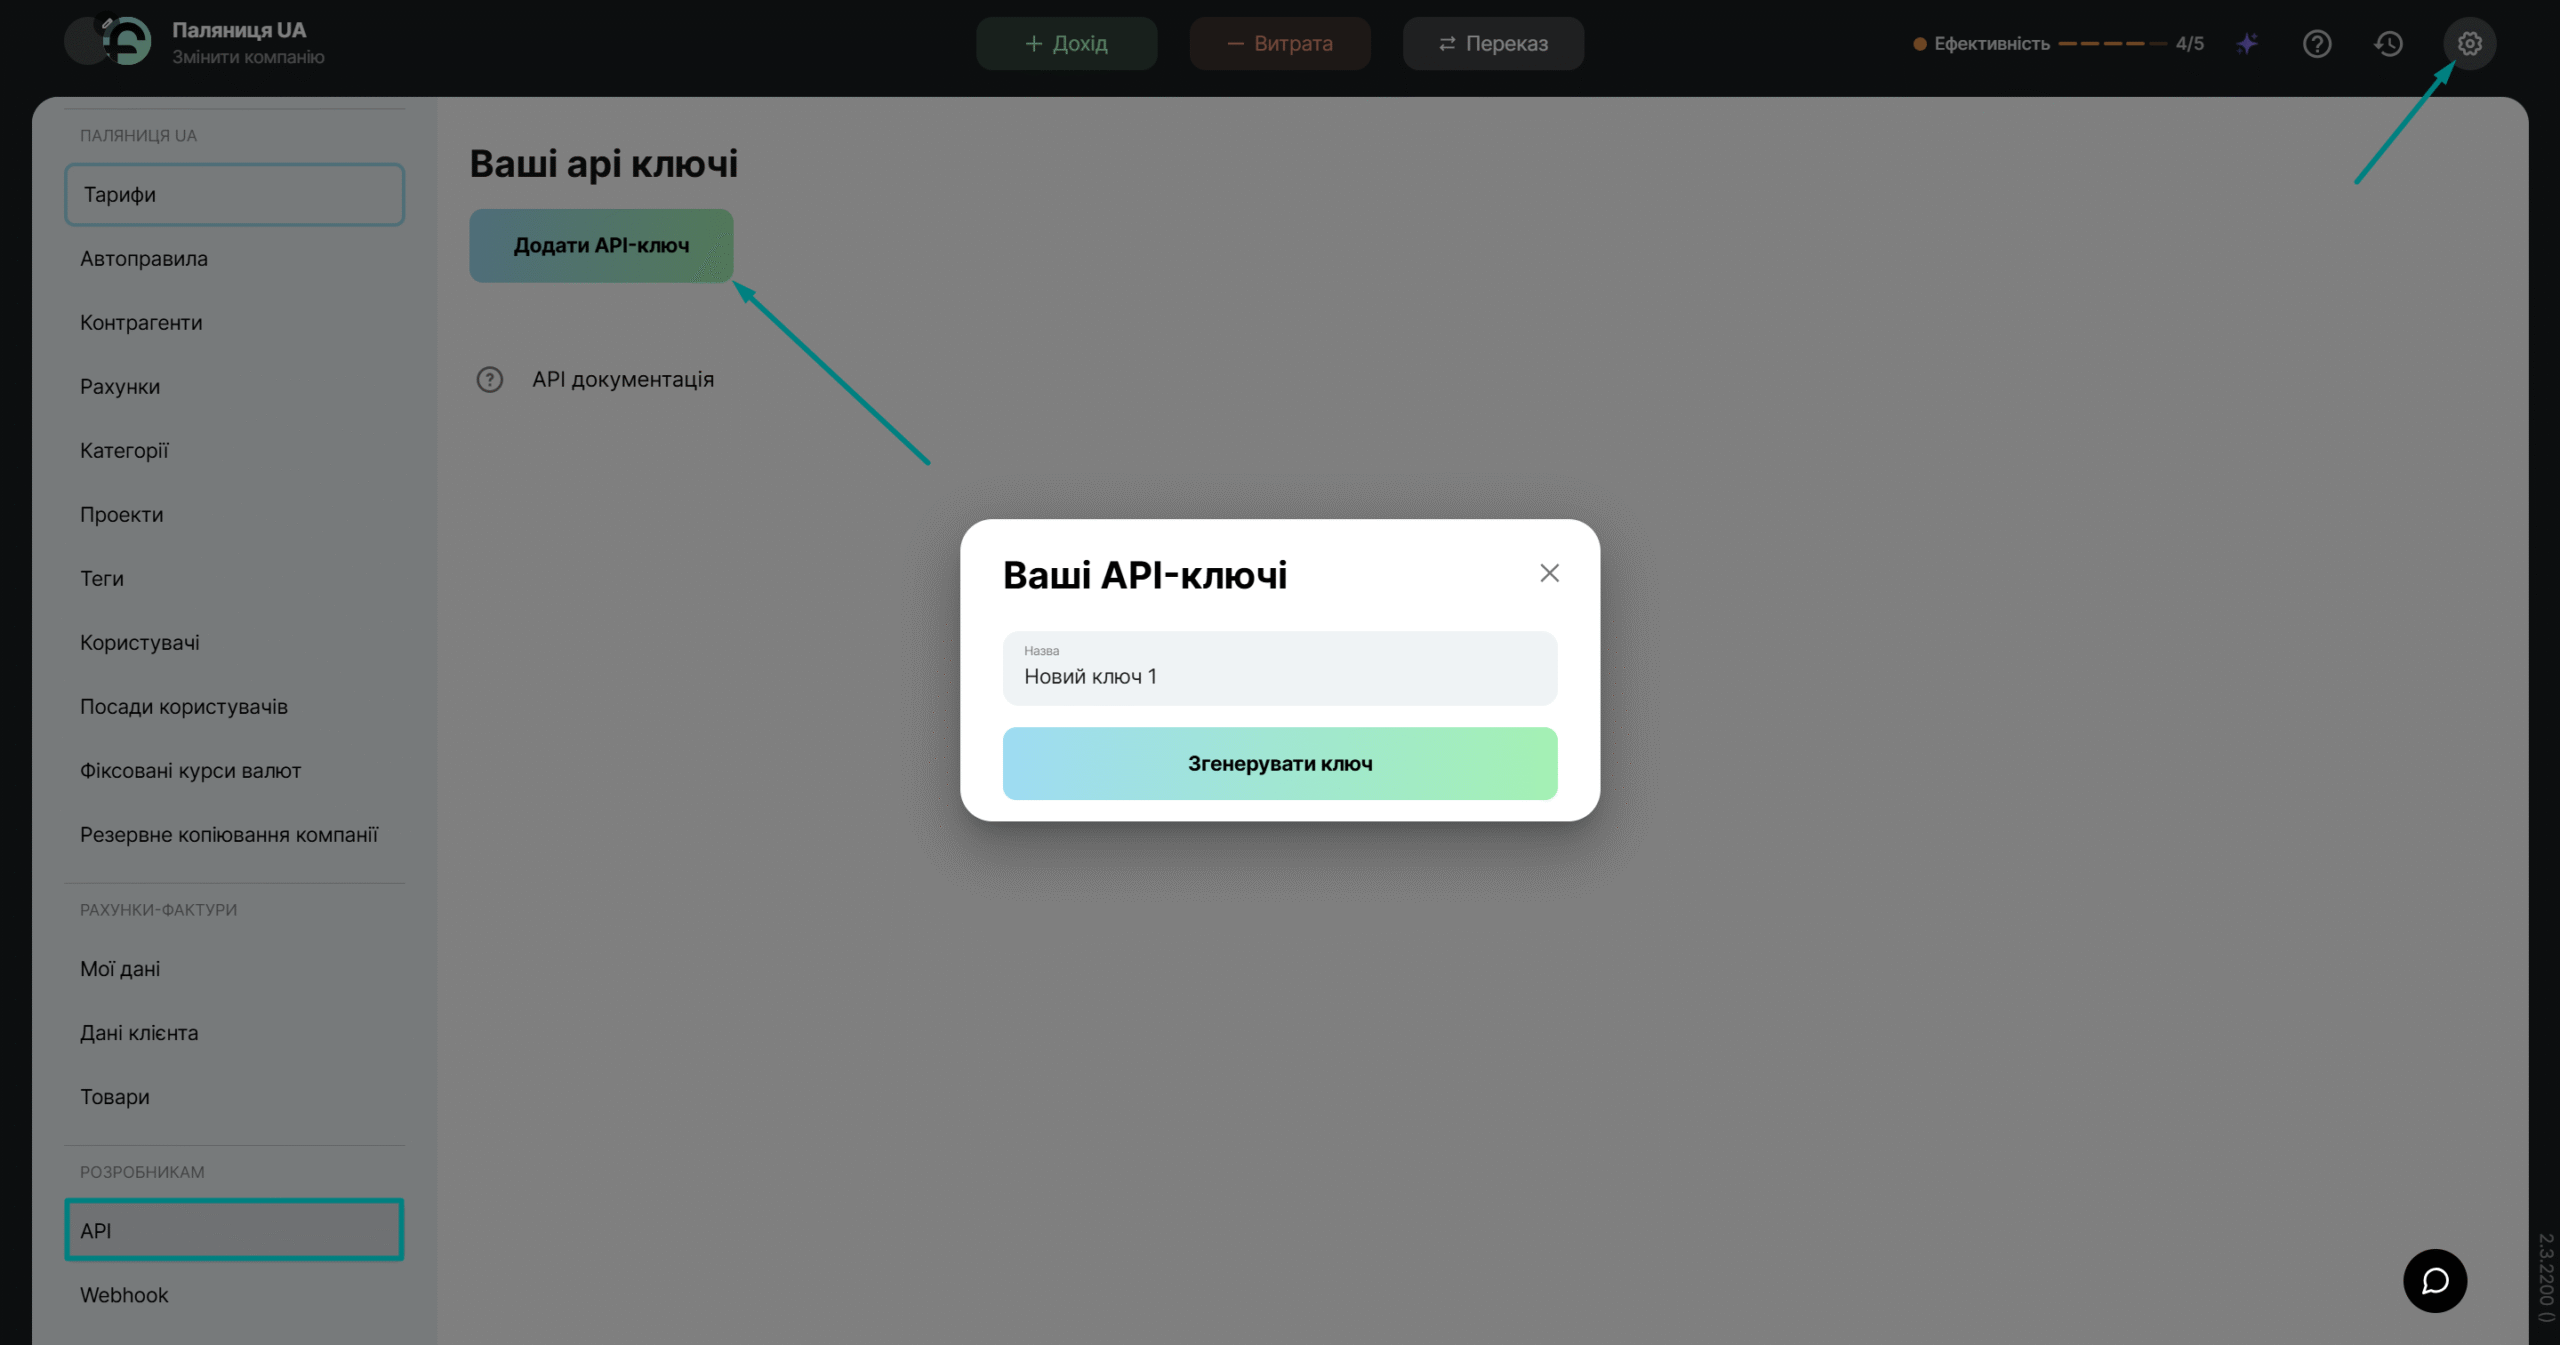
To connect Finmap, you’ll need an API key (you can find or create it in the Settings → Developers → API section).
📍 Setting Up Data Transfer
Map the source fields (where this is supported for a given service) to the recipient fields. For example, amount, currency, date, client, payment status. This way Zapier will know exactly where to write each value.
📍 Testing the Integration
Zapier lets you test the connection and make sure all data is transferred correctly.
📍 Activating the Zap
After a successful test, click Publish — and data will start transferring between services automatically.
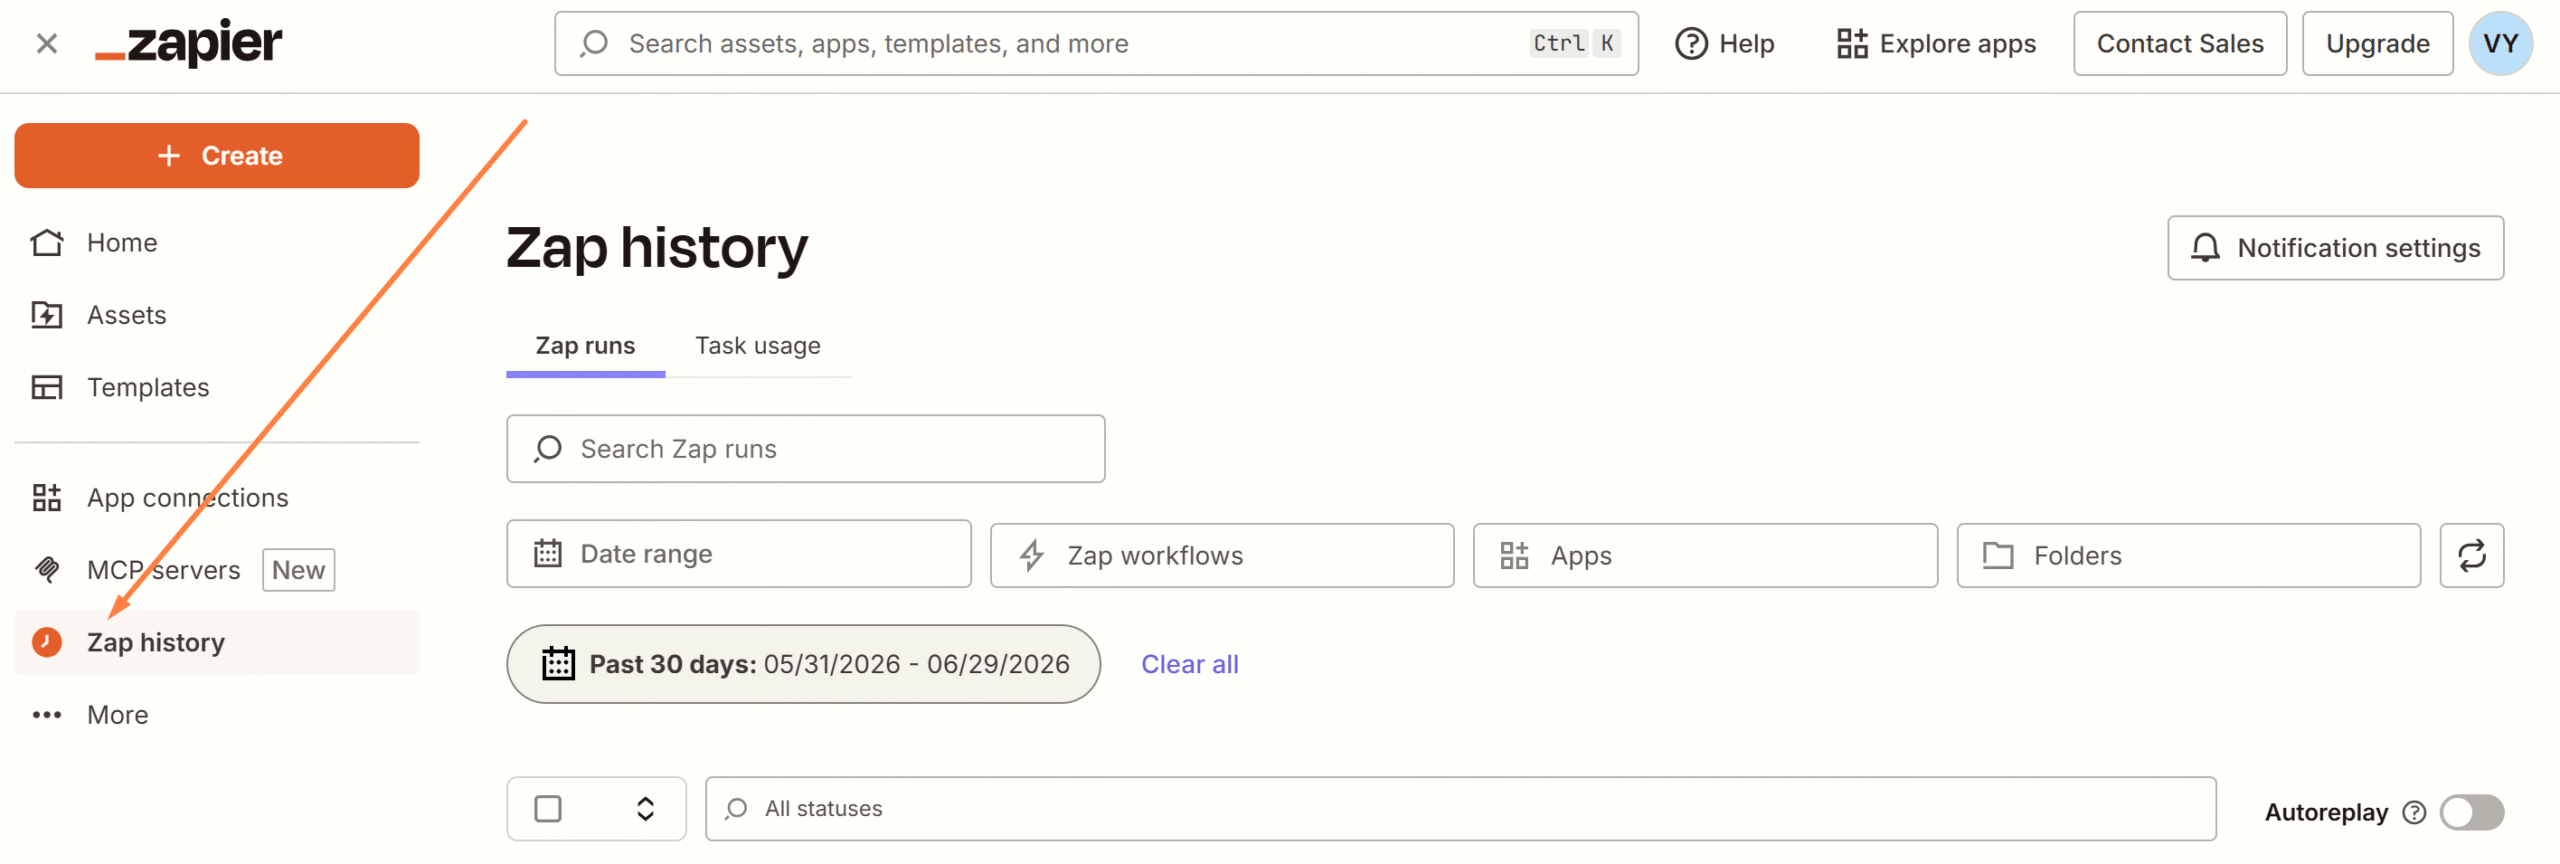
📍 Monitoring and Management
In the Zap History section you can view the status of each run, see errors, edit settings or turn off the automation if needed.
Finmap → Google Sheets Integration via Zapier
To make every new transaction from Finmap automatically appear in a Google Sheet as a separate row, you need to set up the integration as described below.
What you’ll need:
- a Zapier account (the Free plan works and is enough for testing);
- a Finmap API key (Settings → Developers → API);
- a Google account with access to Google Sheets.
Step 1. Prepare the Google Sheet
- Create a new Google Sheet.
- In the first row, add column headers, for example: Date | Type | Amount | Currency | Account | Category | Counterparty | Comment.
- Save the sheet.
Step 2. Create a Zap
- Go to zapier.com → click Create Zap.
Step 3. Set Up the Trigger (Finmap)
- In the Trigger field, find and select Finmap.
- Event:
New Operation. - Account: click Sign in → enter the API key from Finmap.
- Test trigger — Zapier will pull the latest operations from Finmap. If everything is OK, you’ll see a sample transaction with fields (date, amount, type, comment, etc.).
Step 4. Set Up the Action (Google Sheets)
- Click + under the trigger.
- Select Google Sheets.
- Event:
Create Spreadsheet Row. - Account: Sign in → authorize Google.
- Spreadsheet: select the sheet you created.
- Worksheet: select the tab (usually Sheet1).
- In the fields that appear (one for each column of the sheet), click the «+» icon and select the corresponding field from Finmap:
- Date →
Date - Type →
Type - Amount →
Amount - Currency →
Currency Symbol - Account →
Account To Name(orAccount Name) - Category →
Category Name - Counterparty →
Counterparty Name - Comment →
Comment
Step 5. Test
- Click Test step — Zapier will add a test row to the sheet.
- Check that the row appeared in Google Sheets with the correct data.
Step 6. Launch the Zap
- Click Publish.
- Create any new transaction in Finmap.
- Within a few seconds it should automatically appear in the sheet.
If the Integration Doesn’t Work:
- Check whether a webhook is set up in Finmap (the Zap creates it automatically, but sometimes it may not come through on the first try).
- In Zapier, check the Zap History — it shows all runs and errors.
- If the webhook doesn’t arrive, Zapier will fall back to polling (the check happens every 5–15 minutes).