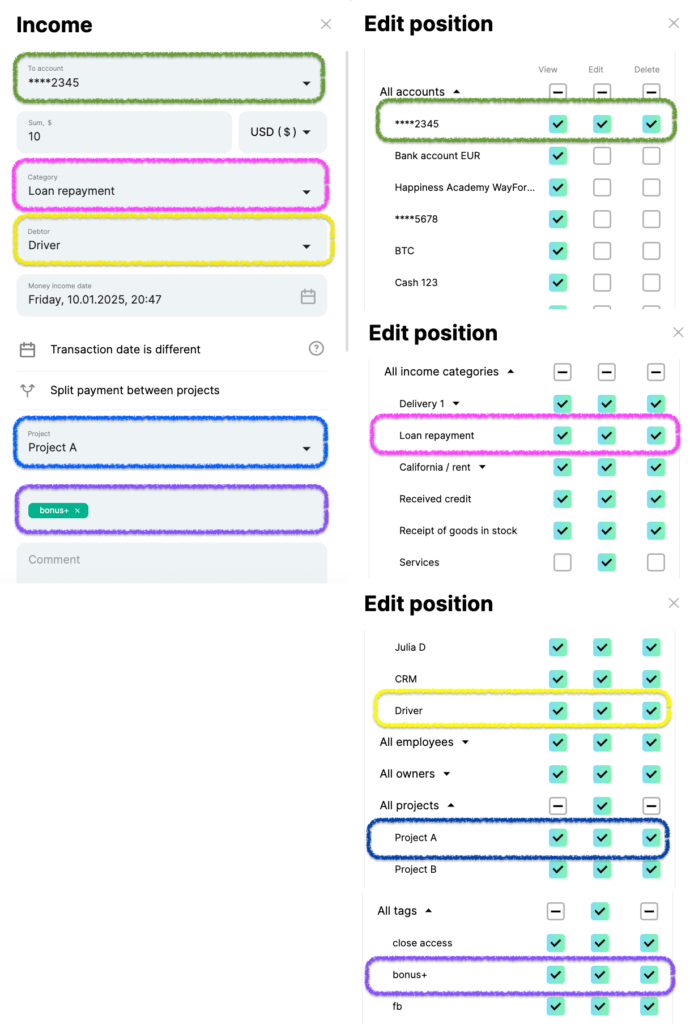
In this material, we will explore various cases of setting up positions in the "Users" section of Finmap.
ㅤ
You will learn how to properly assign roles and positions to employees according to different company requests to ensure effective financial management.
1. No confirmation letter about the invitation to the company
The email is only a notification of being added to the company, it does not contain a confirmation code, etc. that is required for continuation.
Therefore, employees do not have to wait for the letter, but can register immediately at https://my.finmap.online/auth/register/en
After that, they are immediately transferred to the company to which they have been added.
2. You added an employee to your account, but he or she doesn't receive a password to access the company, what should I do?
To get access to Finmap, an employee must register in the service at https://my.finmap.online/auth/register/en (the password is generated by the employee)
3. Where can I find the company to which you were added as an employee?
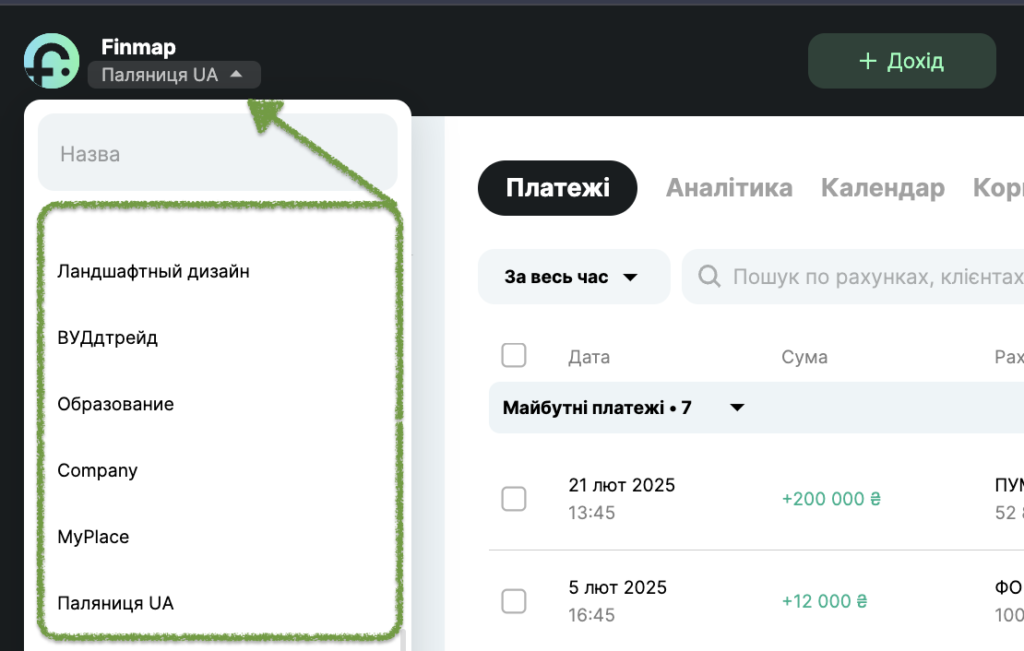
All companies, both your own and those to which you have been added, will be displayed in the Company Menu (upper left corner) or in the Settings https://my.finmap.online/settings/companies
❗️ It is important to note that companies do not overlap with each other, so the Company Owner will not see other companies in your account
4. How do I set up a situation where employees cannot view account balances?
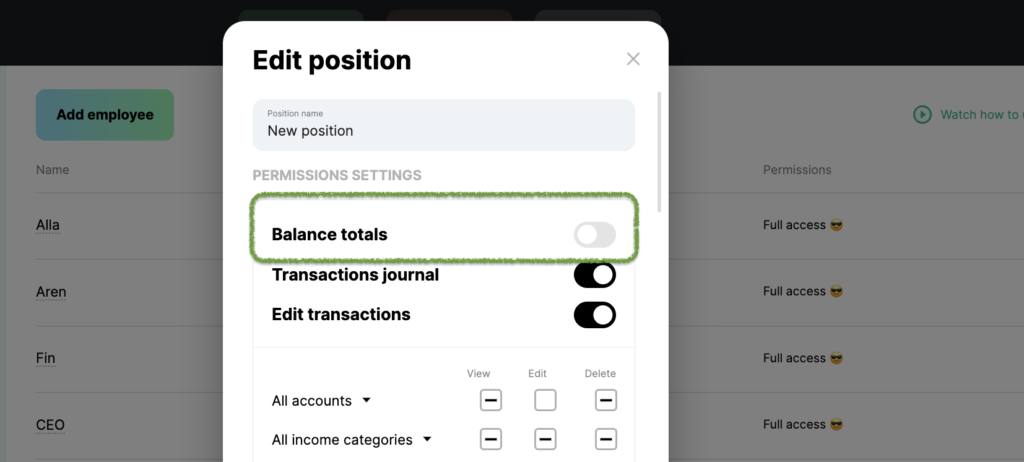
To prohibit an employee from viewing the balance of certain accounts and the Total on accounts, it is enough to disable this indicator
5. How can I give an employee access to only one account?
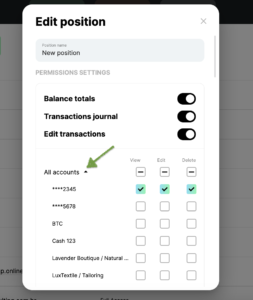
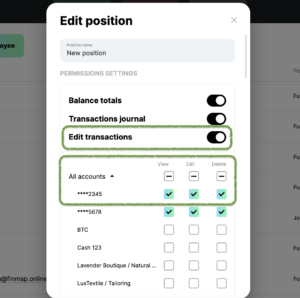
To give an employee access to only one account, open the first All accounts block in their position.
Select the account(s) that your employee should work with.
6. What are the minimum access rights for a position so that an employee can connect synchronization with the bank?
You will need to add access to:
– All 3 accesses are enabled: Balance sheet display, transaction log, transaction editing
– Access to edit and view the invoice for which synchronization will be connected
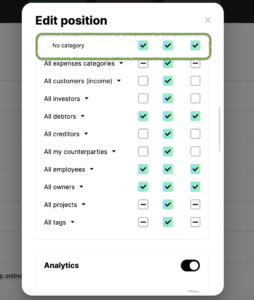
– Access to No income categories and No expense categories
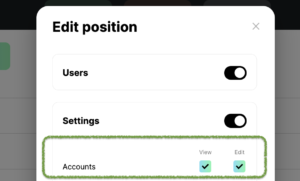
– And access to the Accounts in the Settings block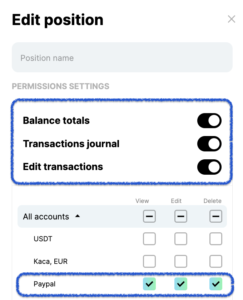
7. How can I give an employee the ability to combine payments into a transfer?
To give an employee access to combine income and expense payments into a transfer, you need to grant the following accesses:
1. edit access to both accounts that will participate in the transfer
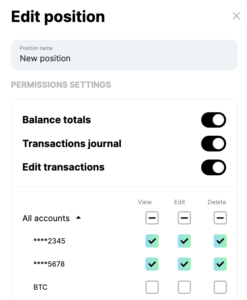
2. access to delete No income categories and No expense categories
8. What should I enable in the position so that the employee can import a bank statement?
In order for an employee to import a bank statement, they must:
1. have access to Edit transactions
2. have access to the account to which the statement will be downloaded
3. and in the Settings, the functionality of Editing accounts is selected

9. How can I prohibit an employee from viewing transfers on a particular account?
Since the transfers contain 2 accounts between which the transfer takes place, you can
you can close access to them as follows:
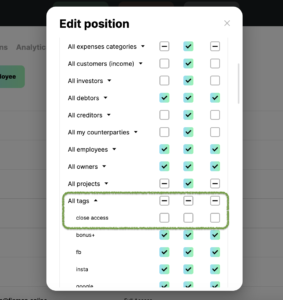
To all transfers that should be hidden, add a tag, for example, with the name “close access”
Next, in the employee’s position, you need to completely close access to this tag
10. How do I set up a position so that an employee can work with Invoices?
Since Invoices in the service are created without specifying an account and category, an employee must have access to the position to view them:
– counterparties that we plan to indicate in the Invoices,
– the “No accounts” position,
– the “No category” position.
11. An employee can't see the information they need, what should they do?
If a user cannot see or edit certain operations, you should check their position settings.
Pay attention to whether you have access to view/edit all the entities specified in the transaction: account, category, counterparty, project, tag.
We recommend making comparisons in two separate windows to compare each entity:
1. the window with the transaction
2. employee position settings
