Reading time – 11 minutes
Finmap provides simple and fast tools for setting up the financial bookkeeping of your business. Follow these 6 simple steps that will allow you to use the service efficiently in the future and save time!
In this guide:
Step 1: Add accounts (2 min)
Step 2: Automate data acquisition (2 min)
Step 3: Delegate duties to employees (1 min)
Step 4: Verify information coming into the service (1 min)
Step 5: Set up income and expense categories (2 min)
Step 6: Get income information (3 min)
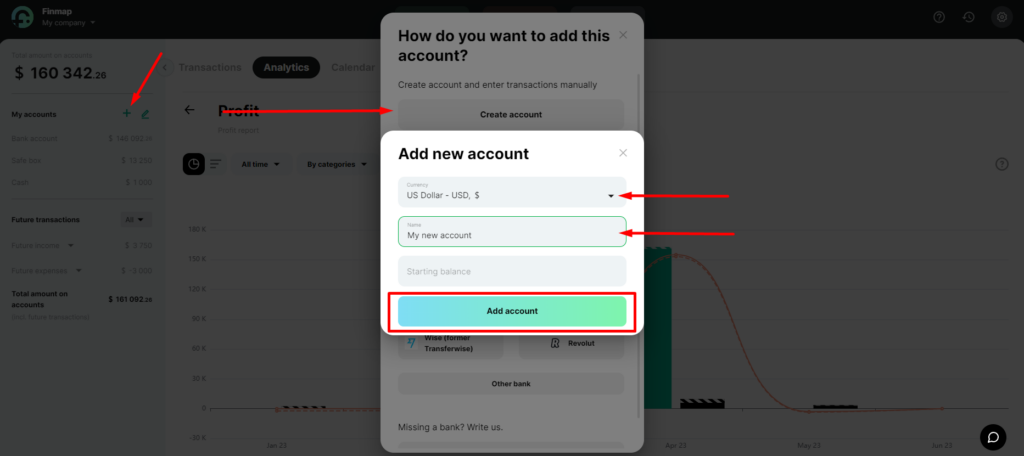
Step 1: Add accounts
To add an account, follow these steps:
- Click on the ➕ sign on the accounts panel on the left to add an account
- Click “Create Account”
- Enter the account name and select the account currency. You can specifi starting balance at any time.
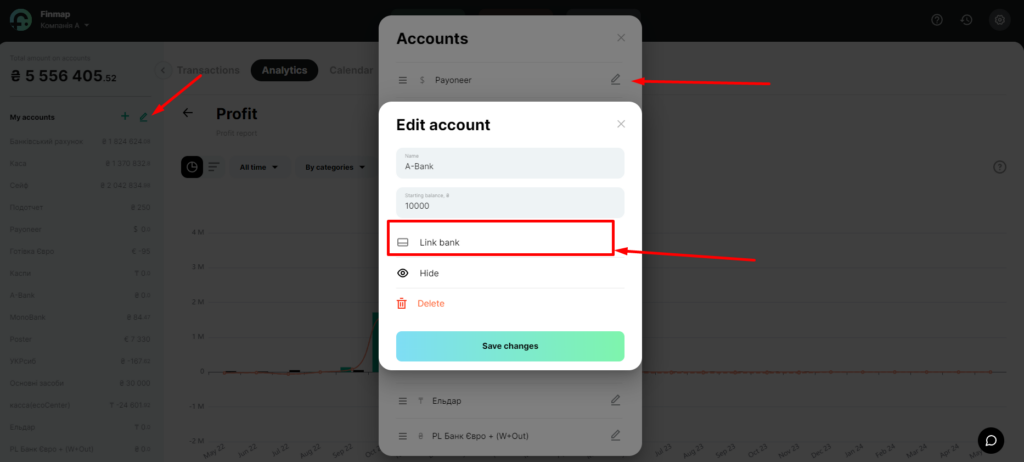
Step 2: Automate data acquisition
- Click on the edit icon ✏️ on the accounts panel on the left
- Select the desired account and click on ✏️
- Click “Link Bank“. The service will automatically display a list of available integrations according to your location
- Click “Other Bank” if you need to choose a bank from another country
This can be useful:
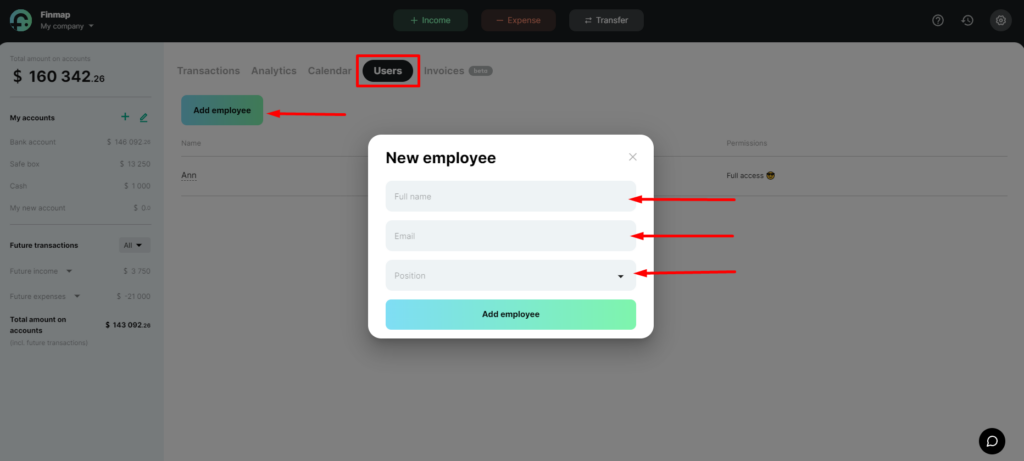
Step 3: Delegate duties to employees
- Go to the Users section
- Click on Add Employee
- Enter the employee’s name, email, and position type
This can be useful:
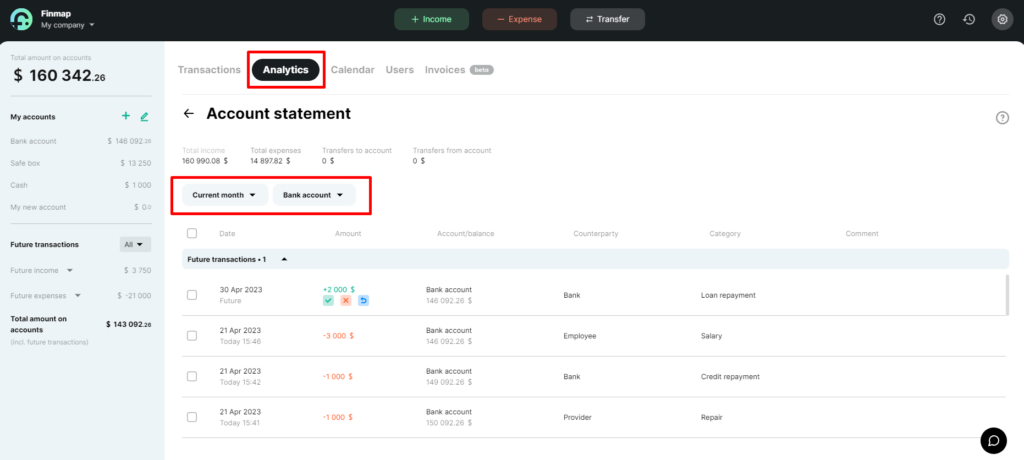
Step 4: Verify information coming into the service
Verify data for your accounts and transactions that come into the service with the person responsible for finances
- Go to the Analytics tab
- Select the Account statement
- Specify the required period and the necessary account
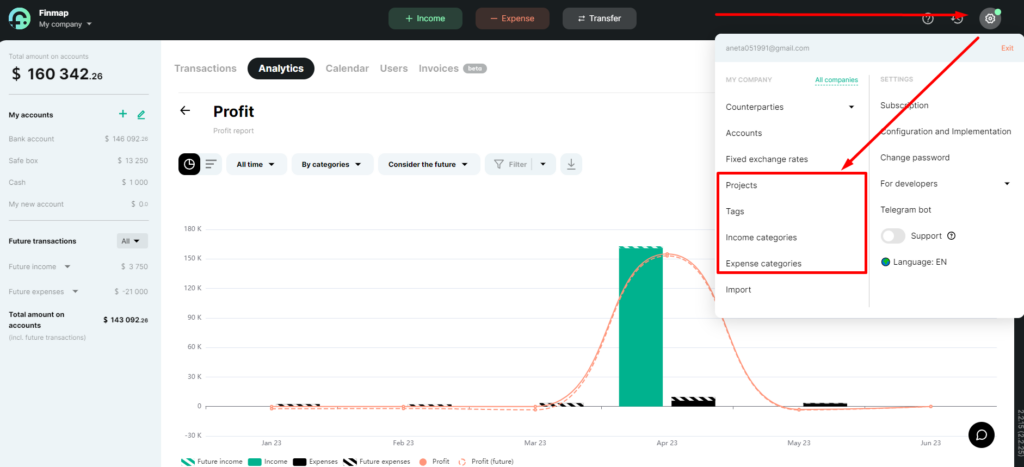
Step 5: Set up income and expense categories
It will allow you to track the effectiveness of each direction of your business and make effective management decisions.
- Income categories – channels through which your business receives money.
- Expense categories – where your business spends money.
- Projects – directions of your business, areas of activity, or branches.
- Tags – are additional tools for deep analysis of your business.
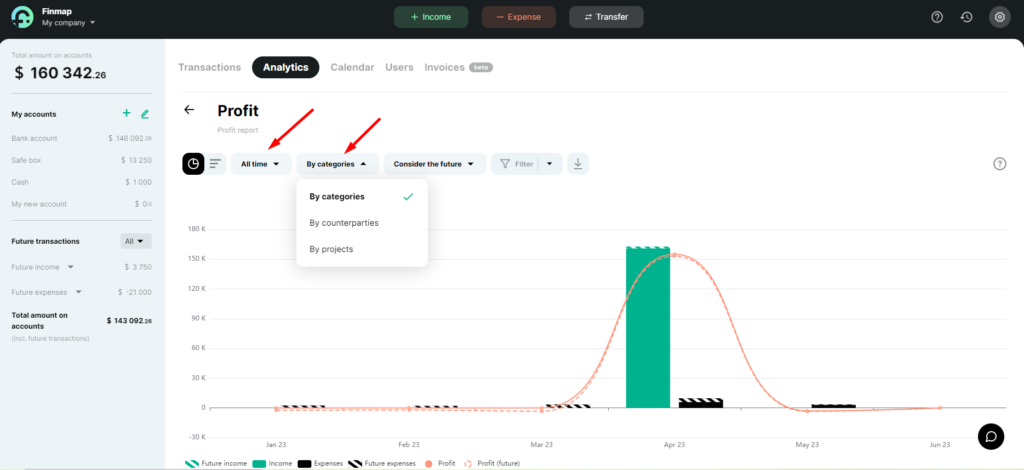
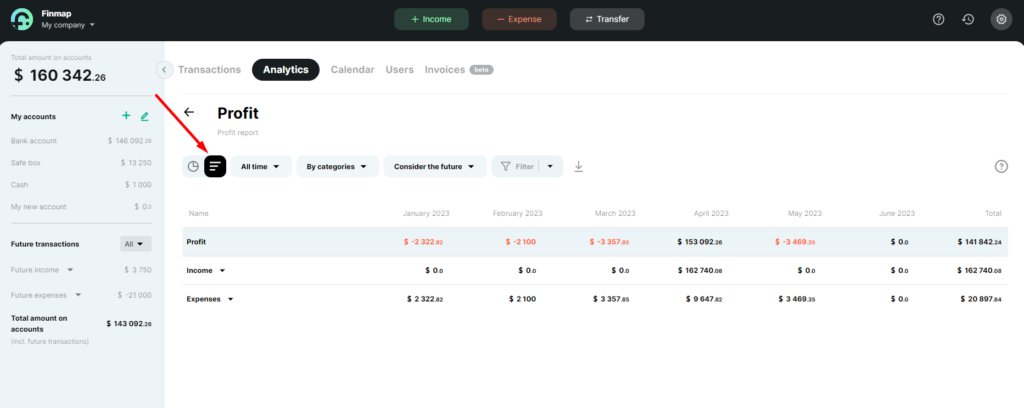
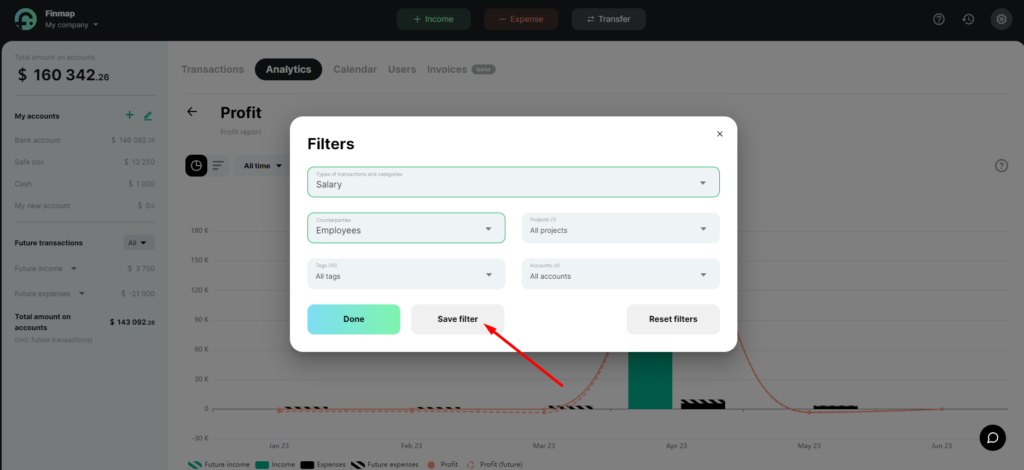
Step 6: Get income information
- Go to the Analytics tab and select the Profit Report.
- Use the time filter to choose the desired dates or periods.
- Select the display of information by categories, counterparties, or projects.
- Switch to the tabular view of the information display.
- Use advanced filters to view specific information for a particular entity in the service.
- Save the filter for later use in a couple of clicks.
This can be useful:
More on the topic:
How to start working with Finmap