This tutorial will show you how to generate receivables and payables in various ways and how to clear them.
Let’s start with receivables. Accounts receivable is the amount of money that customers owe your business.
Option 1:
1) Create an income where you specify the account, amount, category and necessarily the counterparty so that this receivable goes on the Accounts Receivable report and also specifies the future date when we expect to receive payment from the customer.
If the transaction date and fulfilment of your obligations to the client differ from the date of actual income, you can display this in the line “date of sale”. It can also be for a past period.
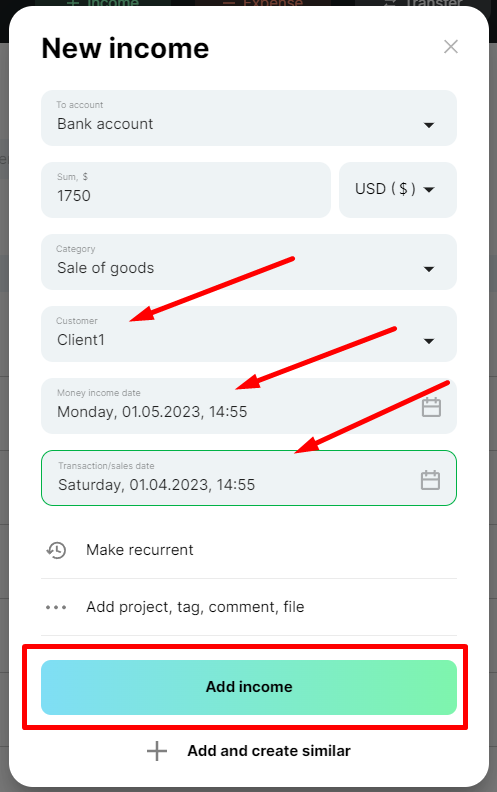
Save the payment. In the “Transaction” section, you can immediately see the future transaction, which shows that we expect a sum from the client for a certain amount.
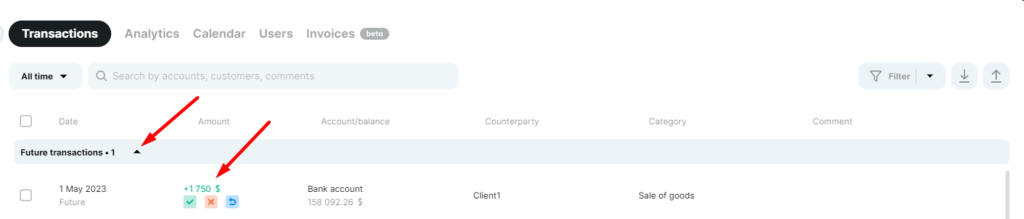
If you do not confirm the payment, it will be postponed automatically until the next day. It will happen until you approve or cancel this payment.
2) Go to the “Accounts receivable” report and see the amount receivable from the specific counterparty

If you click on the amount, you can see the payment details.
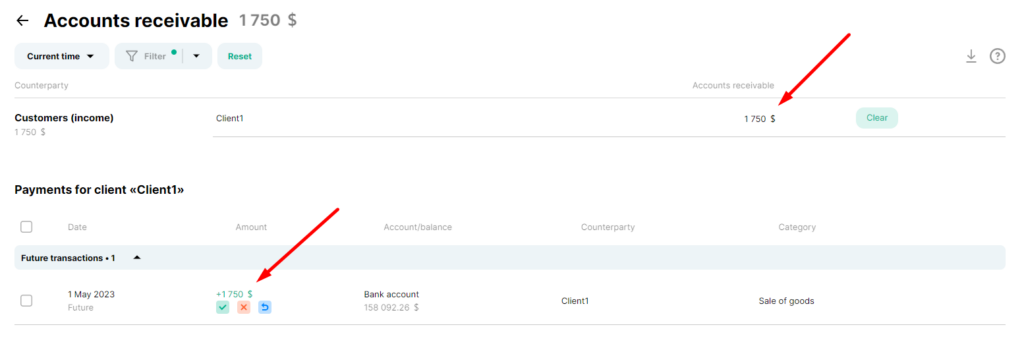
Click ” Clear” to clear all or part of the accounts receivable.
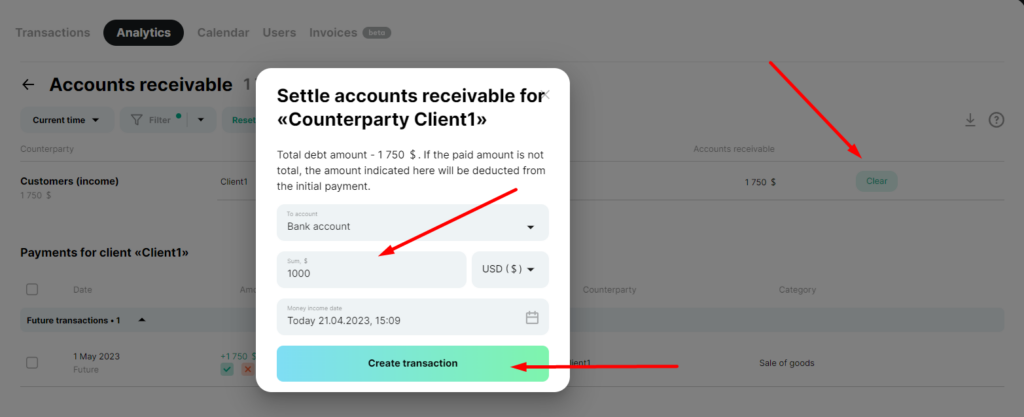
After settling the entire debt, the counterparty will disappear from the “Accounts Receivable” report.
Option 2
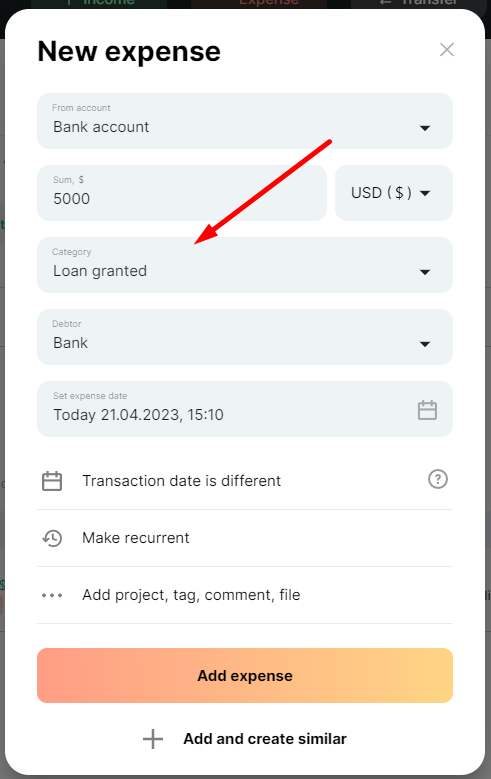
1) Create expenditure using the “Repayment of loan” system category and enter all necessary information in the payment. The expense date should be current or in the past period because we have already issued the loan.
Add the expense.
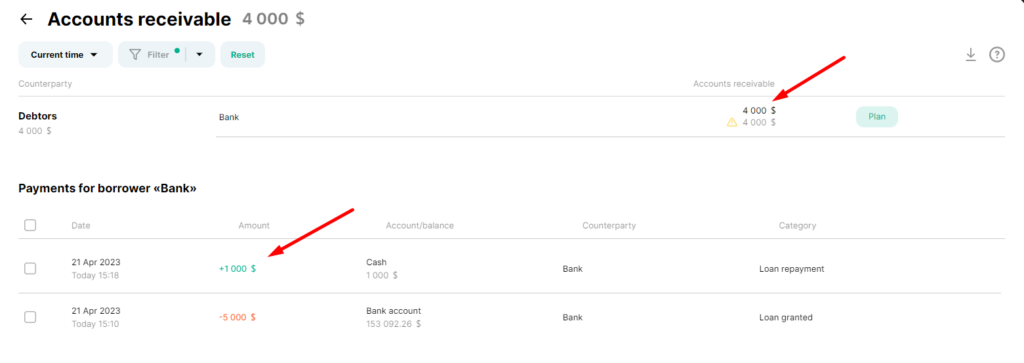
2) This transaction will also be displayed in the Receivables report, as we have given our funds and are waiting for a refund from the borrower.

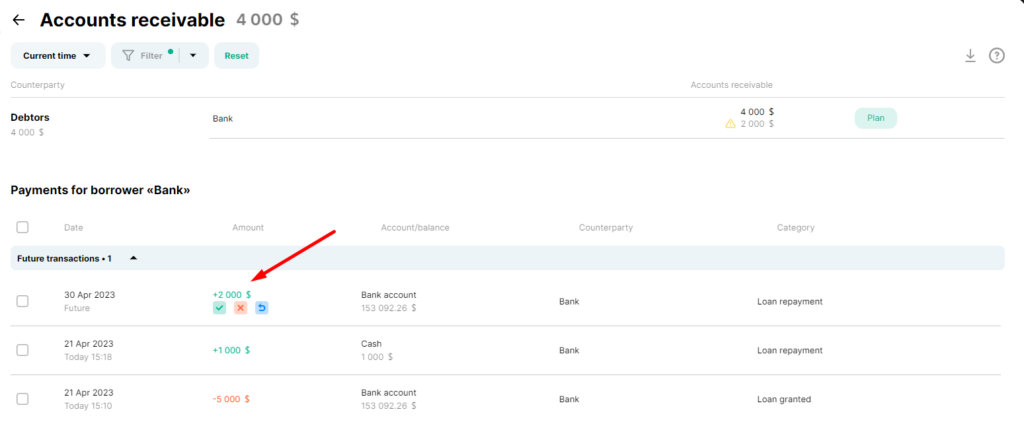
In this case, we can also schedule a refund in part or in full using the “Schedule” button and entering all the necessary data – account, amount, date, and saving the payment.

The service will automatically recalculate the amount and display it in the report.
We can schedule an upcoming payment to clear the loan by performing the steps outlined.
Now let’s look at the options to show payables in Finmap.
Option 1
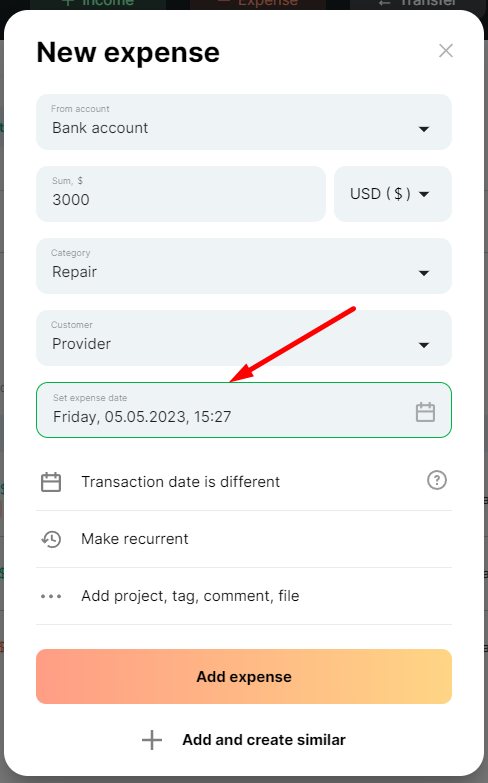
1) Create an expense with a future date and give all the payment details. Add an expense.
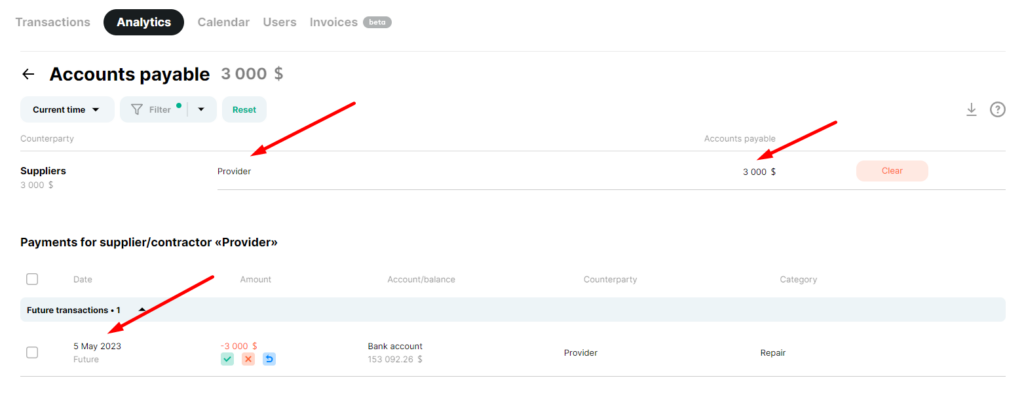
2) In the accounts payable report, we see the information about our debt to the specific supplier and when we have to pay this debt.
We can also repay the debt in full or just some part by clicking “Clear”.
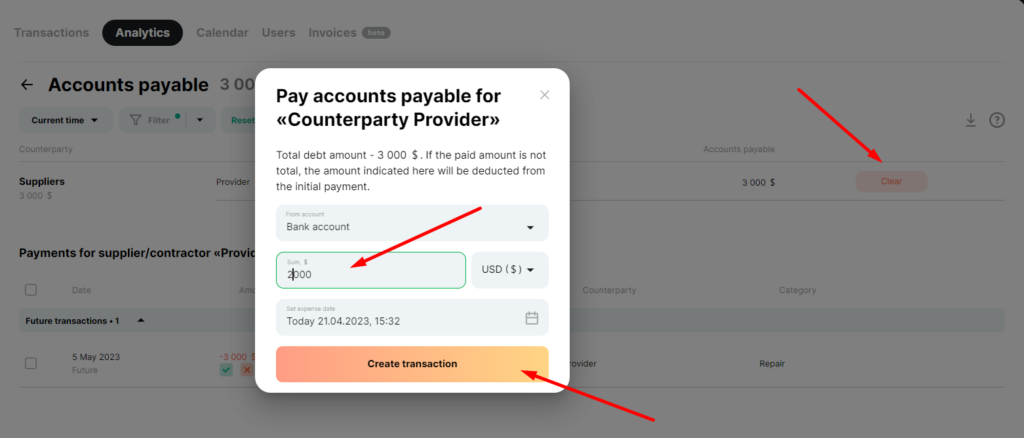
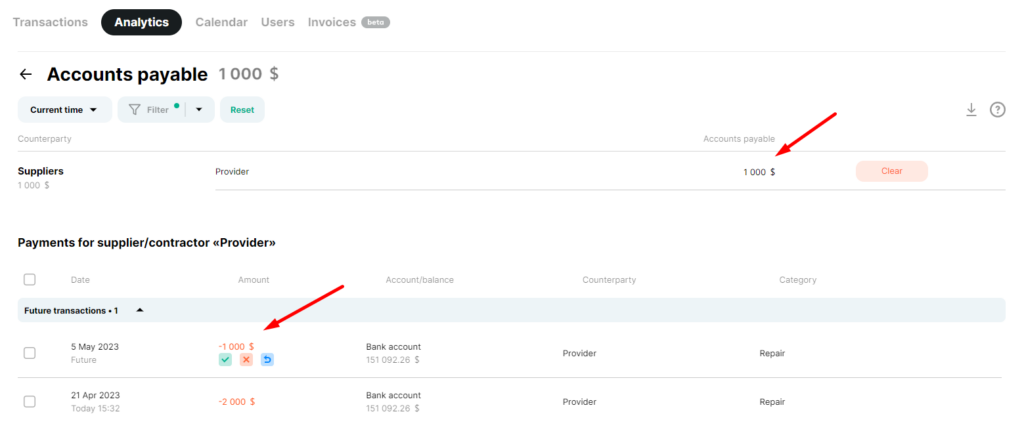
The service will automatically recalculate the amount owed to the Supplier and display all transactions you have made.
Option 2
1) Create income using the “Receive a loan” system category. Specify all necessary data. Specify a current or a past date if you received a loan. Add income.
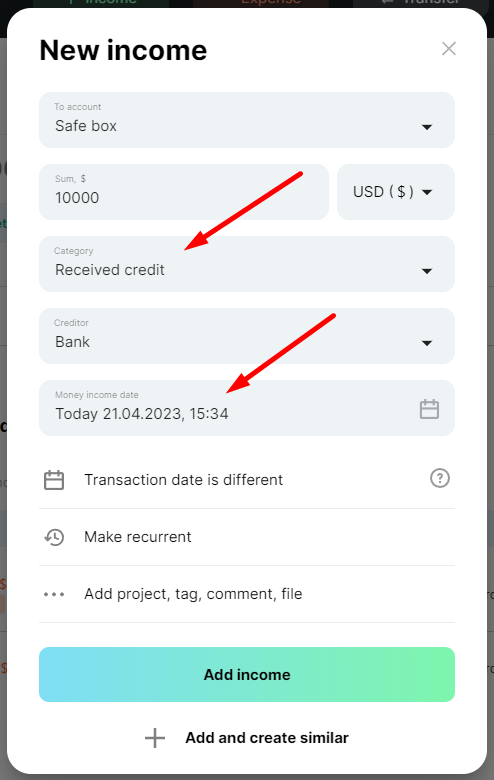
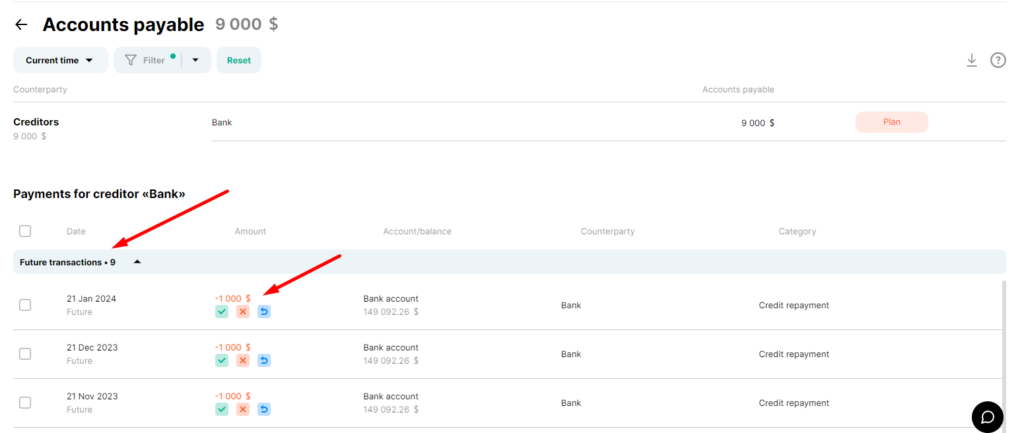
2) It also included this payment in Accounts Payable, as we have received funds from the creditor and need to repay them.
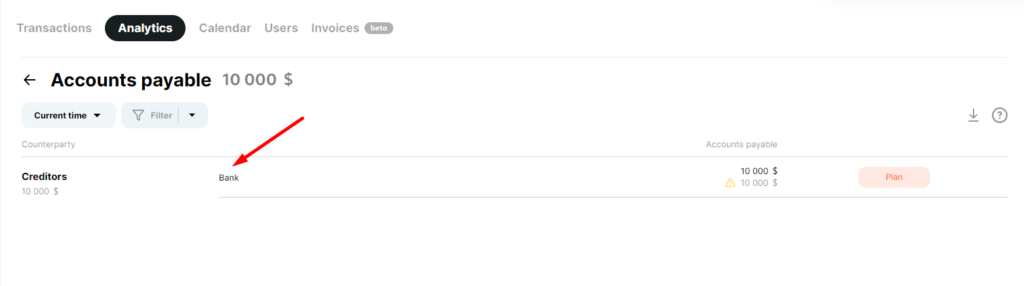
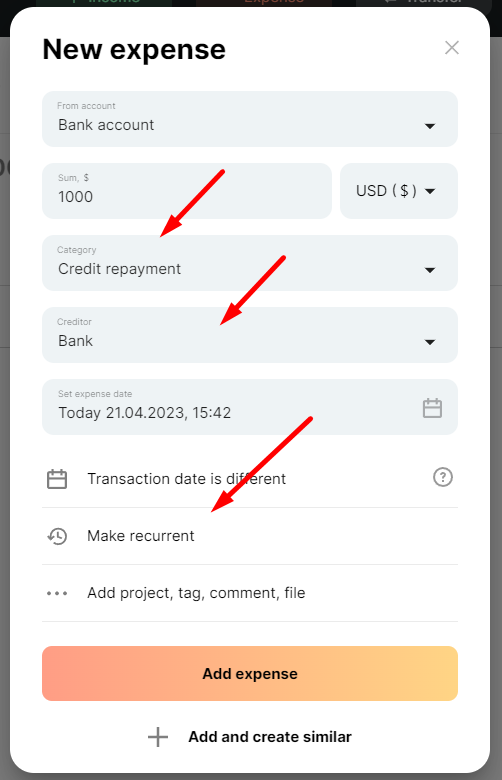
We can repay this payment through the “Plan” button, as in the loan option.
Or we can split the loan repayment into several parts. To do this, create a record of expenses where you specify the amount, the date you want to repay the loan, and other details.
Here we select “Other” and specify when and how many times the payments should repeat. We have split the loan repayment into ten returns, which we will pay once a month.
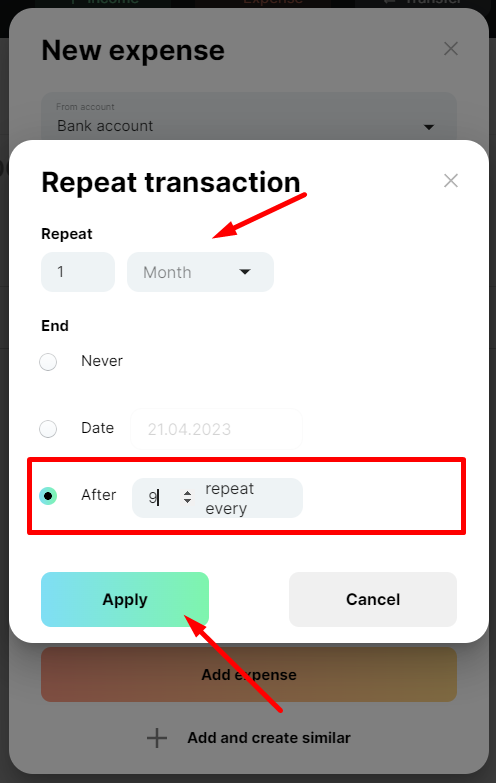
Now we can see that we have scheduled the loan repayment with ten repayments, which we have created using the recurring payments functionality.
By the way, with the recurring payments functionality, you can also plan your other income or expenses using the other systems or your categories.
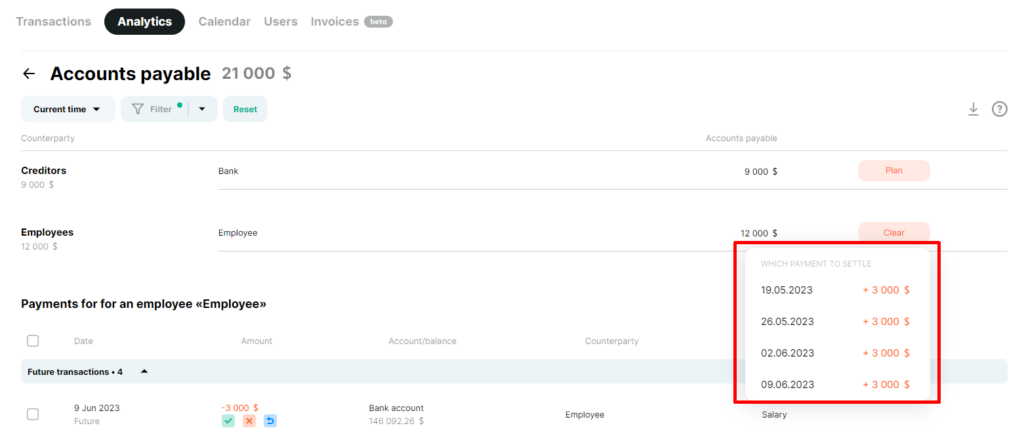
For example, let’s schedule expenses with the Salary for the “Employee” category.
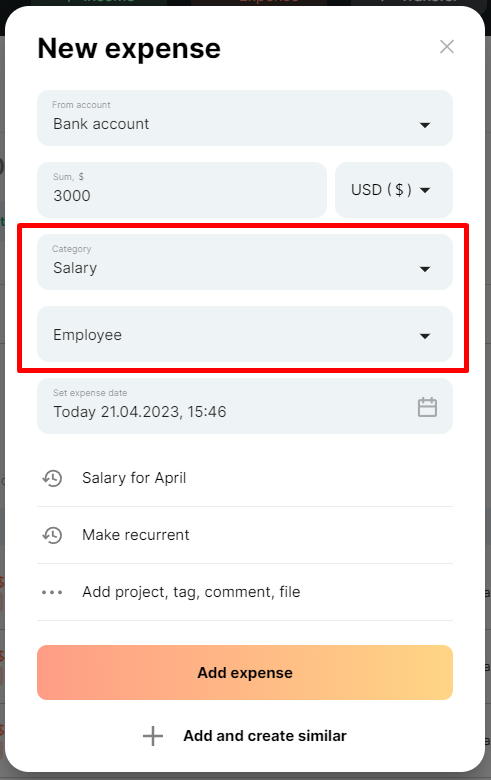
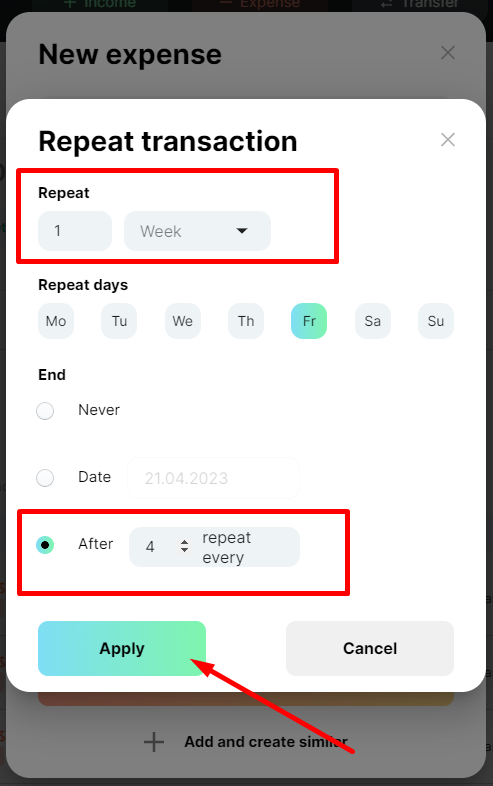
Click “Make recurring”, select “Other”, and specify the necessary information. Save the payment.
Accounts payable report allows us to see our debt to the employee with scheduled payments.
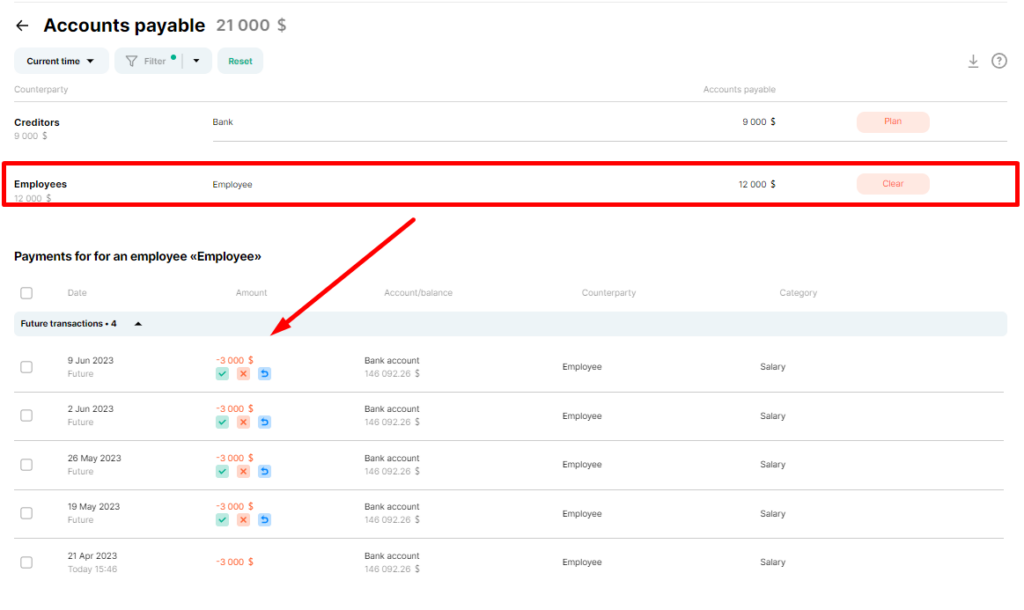
You can repay these payments individually by pressing the “Clear” button