If you previously maintained your business financial records using Excel spreadsheets, we are pleased to present our solution that can help you to optimise your time. Finmap enables you to transfer your Excel data to the Finmap tool quickly and effortlessly.
Our solution ensures you don’t lose any data in the transfer process. Finmap presents financial reports in an easy-to-understand way, in visually appealing charts and graphs, rather than extensive tables of confusing numbers and complex formulas.
While it is possible to manually transfer data to the Finmap using the Income, Expense, and Transfer buttons, we recommend utilising the convenient import function provided by our tool, which significantly simplifies the process.
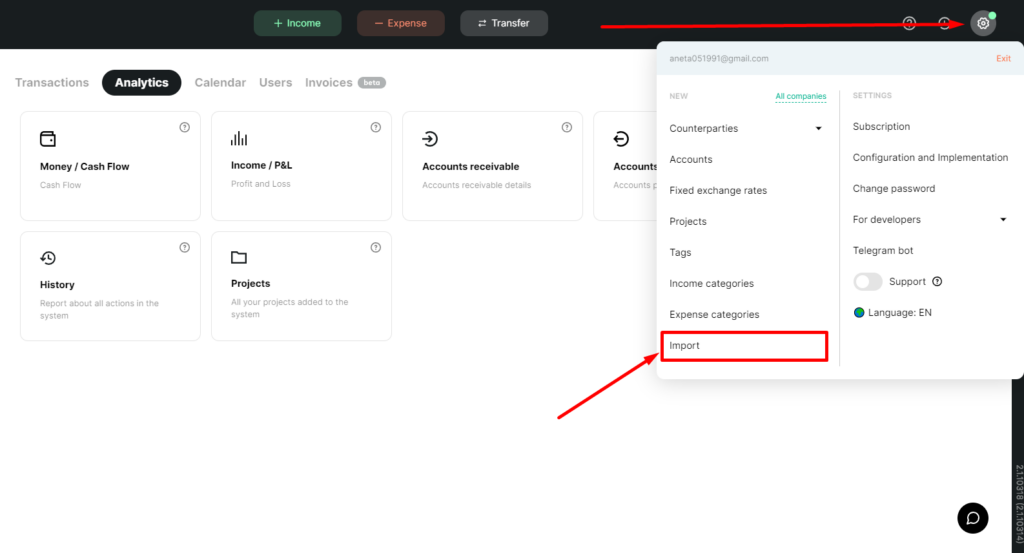
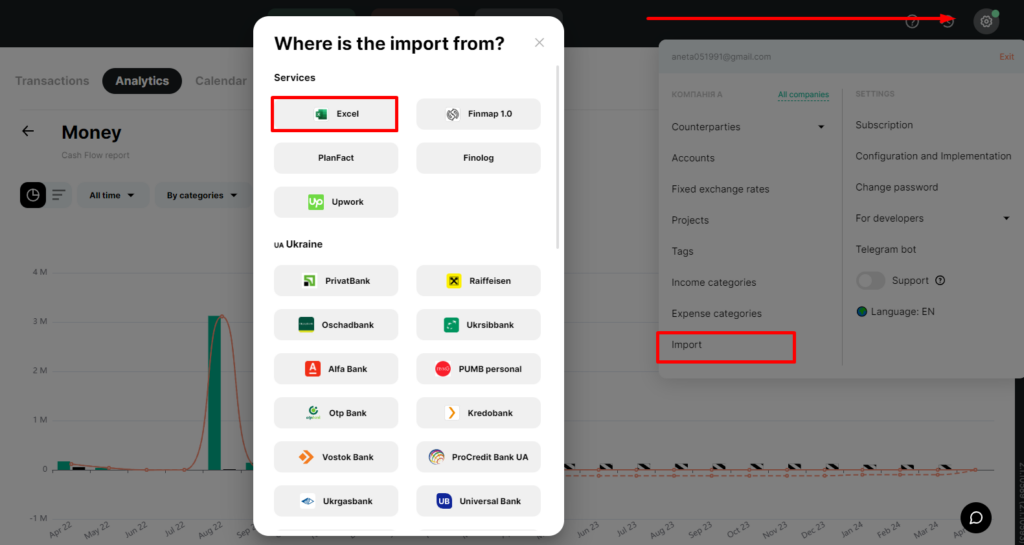
To use the import function, take a look at the Finmap dashboard and click the Settings button in the top right corner. In the window that appears, select “Import”.
With this function, you can transfer all your transactions to Finmap by completing a table template.
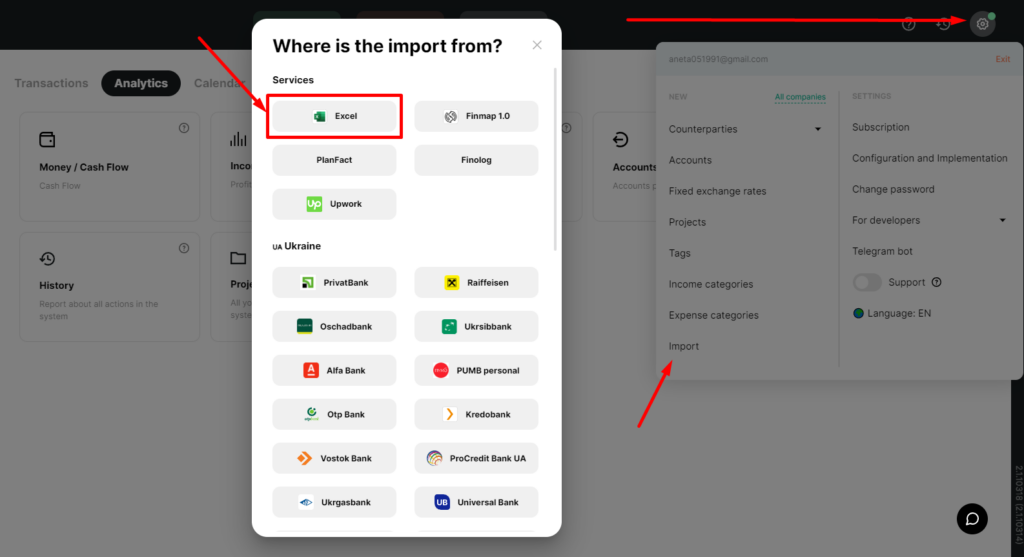
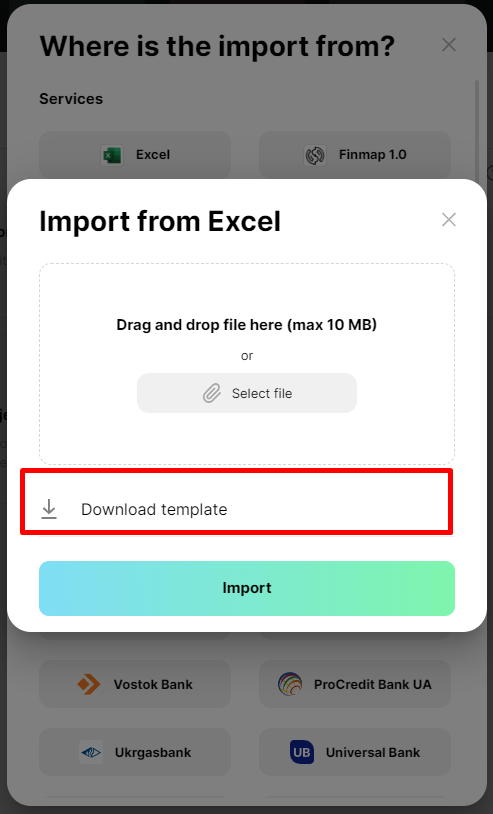
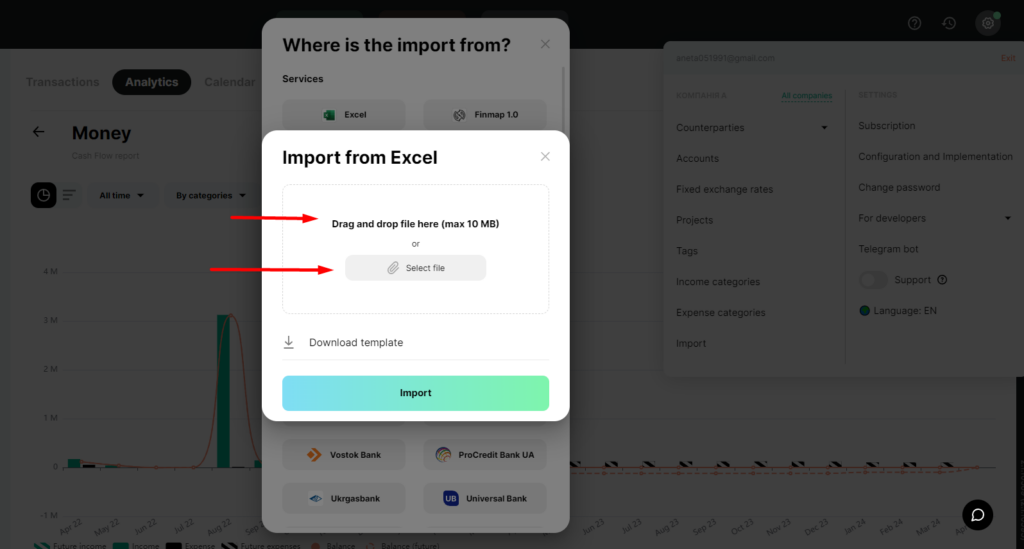
To begin with, click on the “Excel” button and select your file. You can drag and drop the file or select it from your computer.
Next, download the template provided by Finmap to make data entry easier.
Once you have downloaded our template, the next step is to fill it with the data from your old Excel file.
The template comprises two tabs: the template for data entry and the instructions tab, which provides guidance and comments for each column in the table.
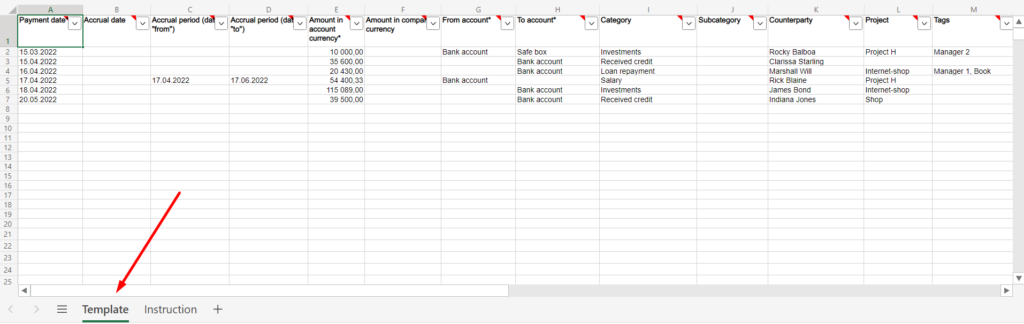
We should maintain the headers’ original names in the table, as Finmap relies on them when importing data. Additionally, ensure you fill in the “Template” page since the data will come into the tool from this spreadsheet page.
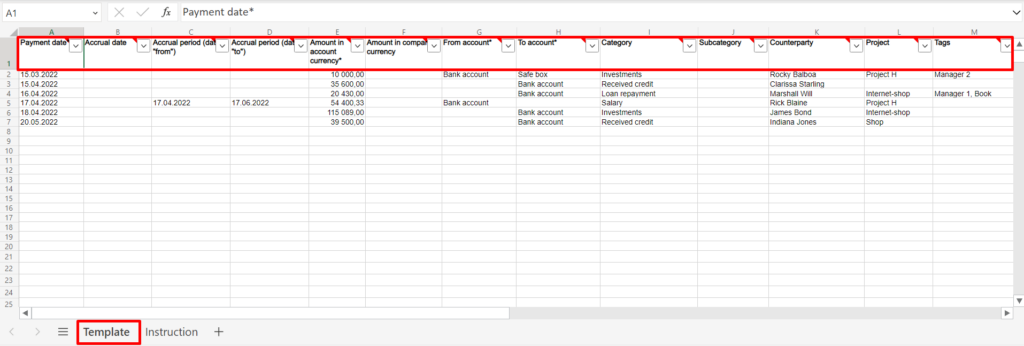
The template consists of 14 columns, labelled with various data categories, including Payment Dates, Accrual Periods, Amounts, Accounts, Categories and Subcategories, Counterparties, Projects, Tags, and Comments.
You will need to fill in the following columns:
Payment date
Amount in account currency
From account
To account
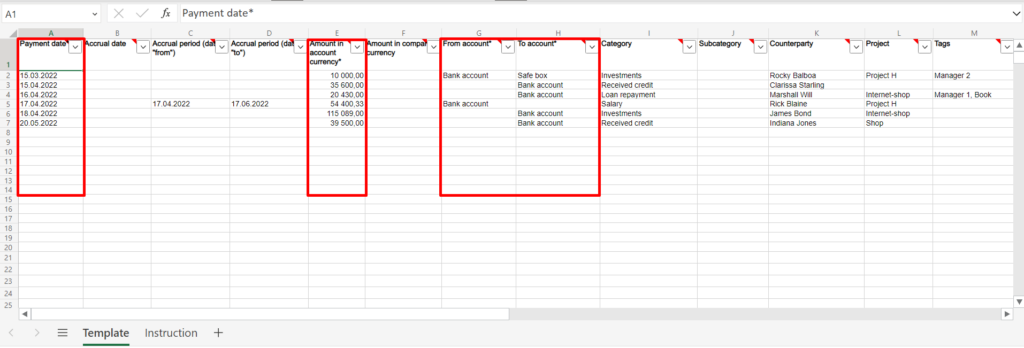
You can fill in the remaining columns at your discretion, but we recommend filling them all in for more accurate analysis.
So, let’s delete the data entered in the template for the example and put our own.
The first column is “Payment date”. It is present in all transactions. Enter it the same way as in the template examples, in the format day-month-year. You can use a “dot”, “slash”, or “hyphen” as a separator:
Dot, for example, 16.10.2022
Slash, for example, 16/10/2022
Hyphen, for example, 16-10-2022
The columns “Accrual date” and “Accrual periods” are filled in the same format.
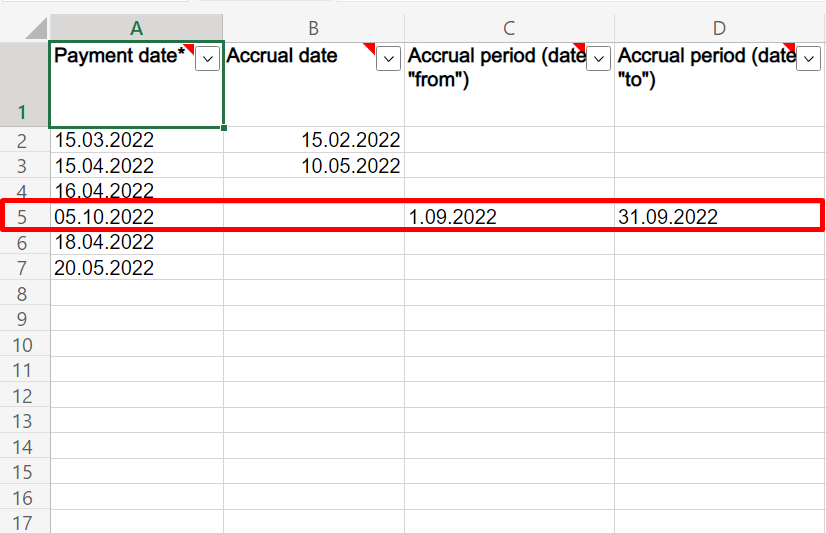
What are the accrual dates and periods? We use the Accrual date column when we need to accrue an amount not for a period but for a specific date. For example, when you signed the contract in February, the payment was expected only in March. Then the Payment date will be March, and the Accrual date will be February.

When do we use accrual periods? For example, if we need to settle with an employee on “October 5th” for “September”, we put the “Sales date” as “October 5th” and the Accrual periods (date “from” and date “to”) as the dates from which to which this salary accrued, from September 1st to September 30th.
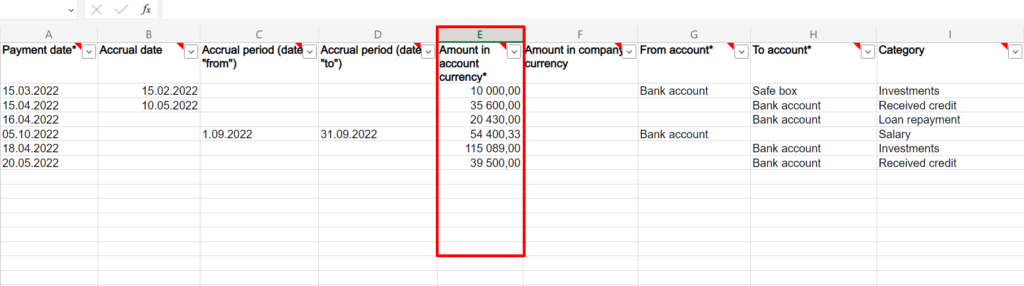
Next, we have “Amount in account currency”, which is the amount of the transaction in the currency of the account to which we imported our data.
Enter values with dots and commas. If you enter a sum with a space, for example, 10 “space” 000 dollars – in this case, the program will calculate only the digit 10. The amount is already in digital format in the template, so leave it as it is.
“Amount in company currency” – if you set up your company in another currency (for example, the account is in dollars and the company is in hryvnia), you can specify the appropriate equivalent in company currency here. This column is optional.
“From Account” and “To Account” columns.
If you fill out only the “From Account column”, you’ll get an expense as a result.
If you only fill in the “To Account column”, you’ll get an income.
If you fill in both the ‘From account’ and ‘To account’ columns, you are entering a transfer, i.e. moving an amount from one company account to another.
Be attentive: it’s important to enter names exactly as they appear in the service. If your account is named “bank” in lowercase, it should also be in lowercase in the template. If your account is named “Money” with a capital letter, you should enter it in the template in the same way. The names must be identical.
Columns “Category” and “Subcategory” – you can enter the name of the service or product, the name of the website, and so on. Also, fill in the categories and subcategories in the service or that you have created yourself in the service. The names should be the same.
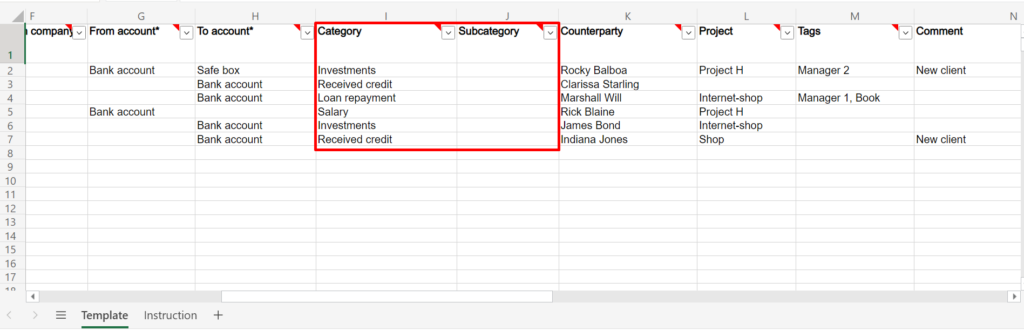
If you add a new category or subcategory, which is not already present in the service yet, Finmap will add them automatically.
Columns ‘Counterparty’ and ‘Project’ – the names should also match with existing ones. Fill in these columns to clarify the project or client/supplier.
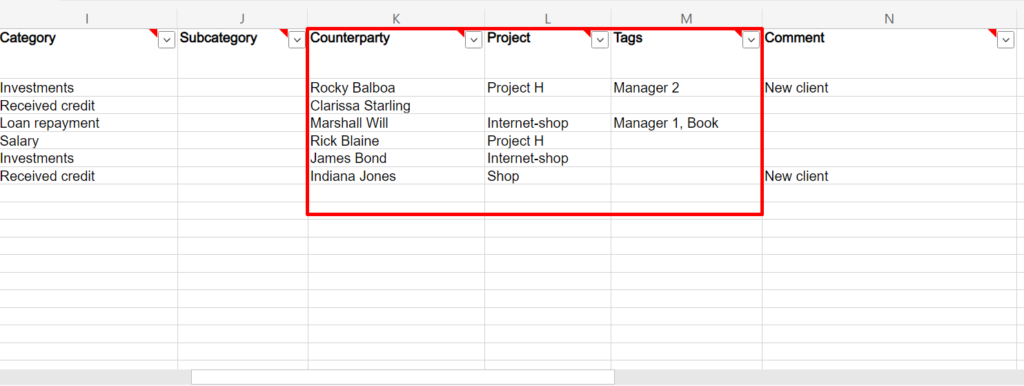
Tags. We add them to the table similar to “Categories”. Tags are a flexible tool for financial analytics in business. With them, you can specify the distinguishing characteristics of a particular project – stocks, discounts, employee names, sales channels, and much more.
Based on all these indicators, you can create an analytical slice. Please note, if you want to add a tag, for example, “discount”, name it “discount” everywhere. Do not change it to “promotion” or other synonyms. Because for you, it may be the same thing, but for Finmap, there will be two different tags.
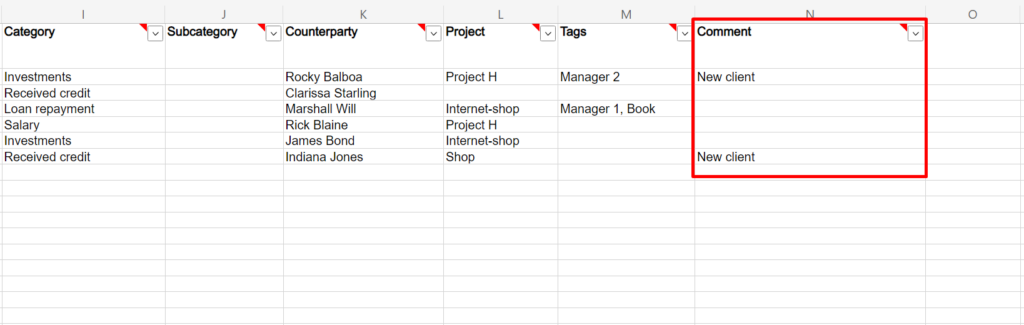
Comments. In this field, you can enter any notes about the transaction in any convenient and understandable format.
Done! We have filled in all the columns, and now let’s save the template. And after that, we can start importing our data.
Return to your Finmap account, go to Settings again, open Import, and choose Excel.
Drag your template file into the rectangle field or click the “Select File” button. The search window will open and you can choose the proper file.
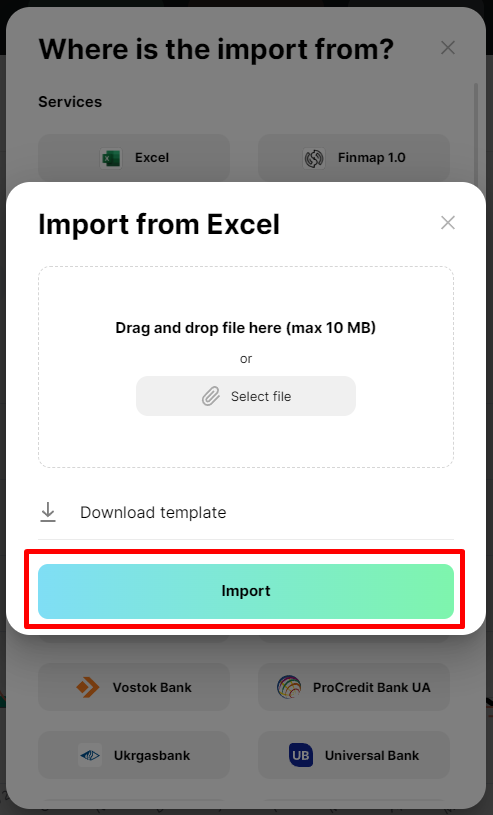
Now press the Import button and Finmap will do the rest. You can see that all operations are already in Finmap!
If you have any questions, you can contact our support channel, our specialists will always help you to figure out any issues!