You can transfer your business structure to the Finmap service using the manual integration functionality, specifically by importing an Excel file using a template.
Perhaps you have been keeping track of your finances in Google Sheets or Excel and have already categorised your income and expenses. Avoid manual work and tedious data entry of your existing structure! Use the “Import” functionality for Excel files.
1) Click on the import button in the transactions history
ㅤ

ㅤ
2) In the window that appears, select Excel.
3) Click the Excel button in the menu. A window will open, and you will find the template under the file upload button.

4) Download the file to your device and start working with it.
5) Open the template, which will look like this.
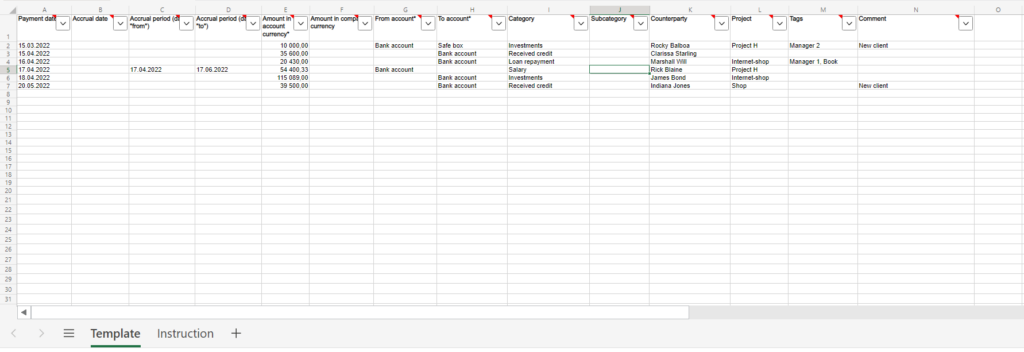
Each column corresponds to an entity and elements with operations in the service.
6) Delete all the sample information from the template.
Important! Do not delete or edit the column names.
7) To transfer data, open your reports. For convenience, you can place an empty template on one side of the screen and the report on the other side. For example:
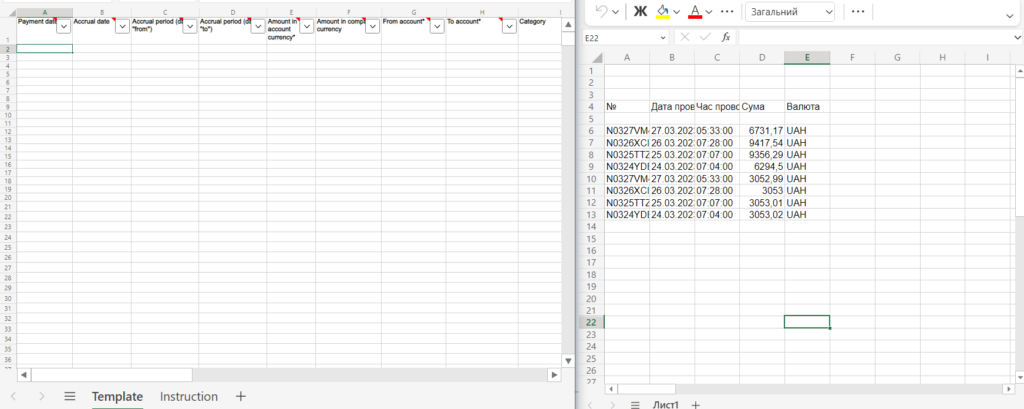
8) In the file with your report, you can immediately edit the names and remove unnecessary characters.
Let’s go through each column in order:
First column – Payment date *
Here we will enter the actual date of receipt or withdrawal of funds.
Second column – Accrual date
Here we will enter the date of the transaction. The column is not required to be filled. We can leave it blank or fill it in if necessary.
Columns Accrual period (Date “from”) and Accrual period (Date “to”)
Responsible for operations in the Salary and Taxes categories.
Column Amount in account currency *
The amount in the currency of the account you specified.
Column Amount in company currency *
The amount in the main currency of your company in Finmap.
Columns that correspond to the account
To show that these are income transactions, use the “To account” column.
In the “To Account” column, indicate the name of the account to which the money was received.

And the same for expense transactions.
In the “From account” column, indicate the name of the account from which the funds were debited. In this case, we indicate the amount without the “-” sign:

When forming a transfer operation between accounts, indicate the names of the accounts in both columns, according to which account and to which account the funds were transferred:

Category Column
In this column, we enter “what for?” in a specific case we made a payment or received a payment.
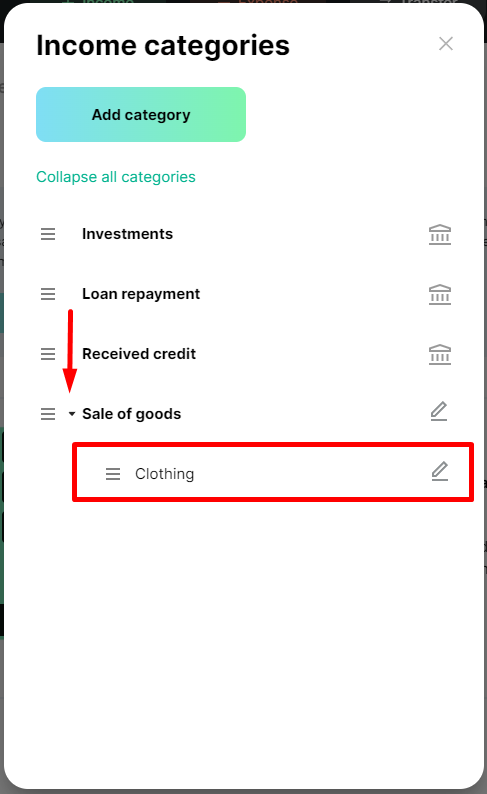
Subcategory column
A clarifying essence that is actually under your main category. In the service, for example, the general category may be “Sale of goods”, and the subcategory may be “Clothing”:
Counterparty column
The other party in the transaction. When selling – the client, when buying – the one from whom you are buying (supplier), when positions – the bank or the one who gave you this loan, etc.
Subcounterparty
A more detailed description of the other side of the operation
Project column
Projects can be your business areas, sales locations, individual projects/objects, etc.
Subproject
Industries of a specific business direction
Tags column
Tags are a similar additional tool for deep business analytics.Сontract number, promotions, discounts, manager, promotion channel – anything.
Comment Column
9) After completing, save the template file.
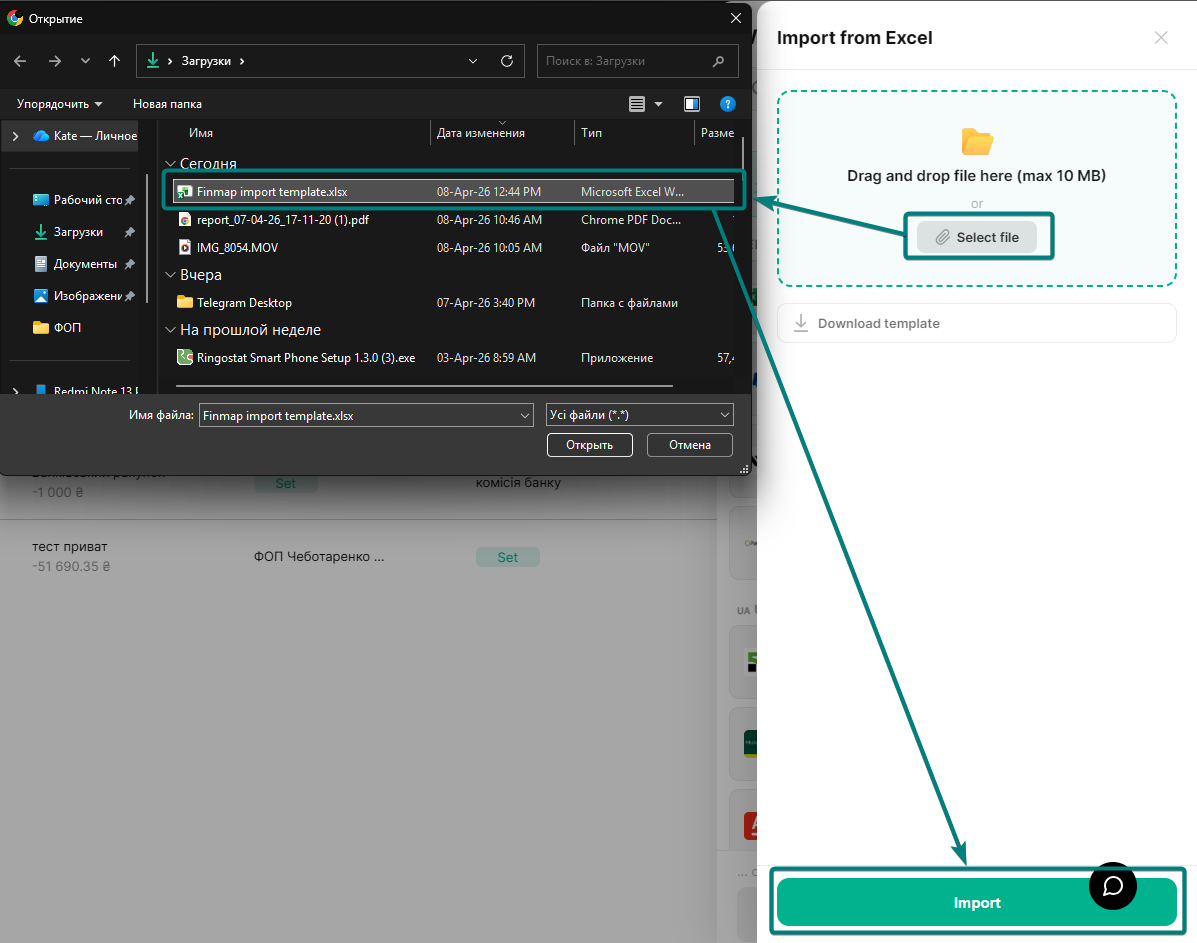
10) Next, in your Finmap account, open Settings (upper right corner) and select Integration and Excel.
You can drag and drop the file to the appropriate window or select it from the folder. Then click the “Import” button.
11) Once all the data is loaded into Finmap, you will see that all categories, subcategories, tags, counterparties, etc., necessary for accounting in your business have appeared in the service.
Now you can delete the operations entered, for example. However, the entities will remain in the service for future use.
If you have any additional questions, you can always contact us in the support chat located in the bottom right corner. We will be happy to assist you!