In this section you can ✅ : ㅤㅤ
- add new users
- customize flexible access settings for them
- change permissions for existing users
- delete users.
ㅤ
The account creator has a default access level of “Owner”, which is a position with full access to all data and reports.
ㅤ
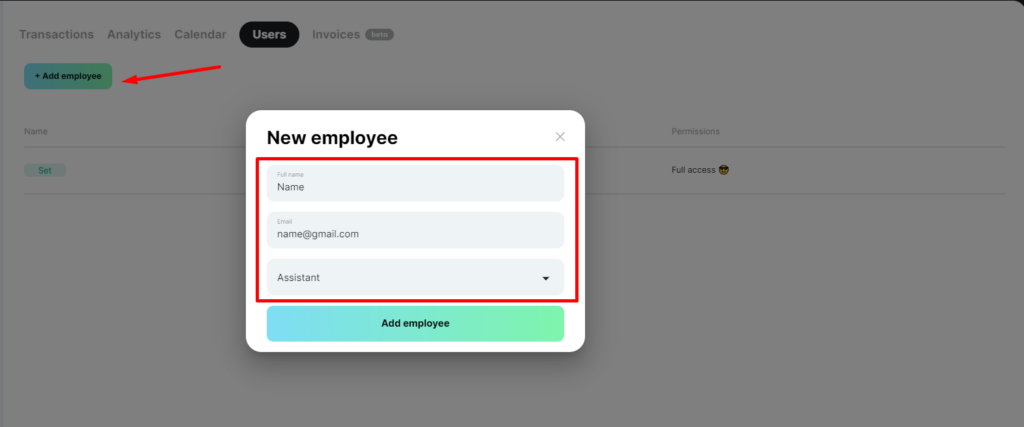
Add employee
ㅤ
- Go to the “Users” section and click “Add Employee”.
ㅤㅤ - Specify the employee’s name, which we are comfortable with, and the email through which the employee will log in to Finmap
ㅤ - Select a position for the employee
ㅤ
ㅤ
ㅤ
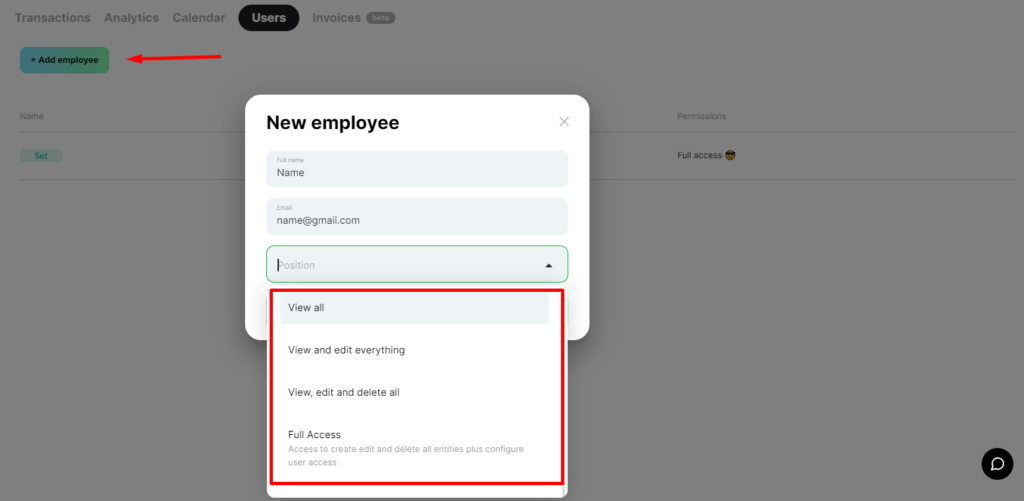
The service will offer to choose from 4 ready presets of accessibility settings:
ㅤㅤ
ㅤ
Read more about each type of standard post here
ㅤ
The “Full Access” position has the same level of access as the Owner. The only nuance is the absence of the ability to delete a created company. This option is retained only by the person who created the company in the service.
ㅤ
The “View, Edit and Delete to All” post has a similar level of access as “Full Access”, but there are differences. This access level does not include the ability to add, delete employees to the company or edit their positions.
ㅤ
“View and edit on everything” – an employee with this level of access will be able to analyze data in the company and make changes to transactions or entities, but will not be able to delete anything.
ㅤ
“View to All” – this access level allows only viewing and analyzing data in the company. The employee will also be able to use filters in the company, change the interface language and write to the support chat inside the service.
ㅤ
ㅤㅤ
ㅤ
Set up flexible access level for an employee
ㅤ
- Create a new position

ㅤ
2. Customizing the position for an employee
First block – Payment Journal
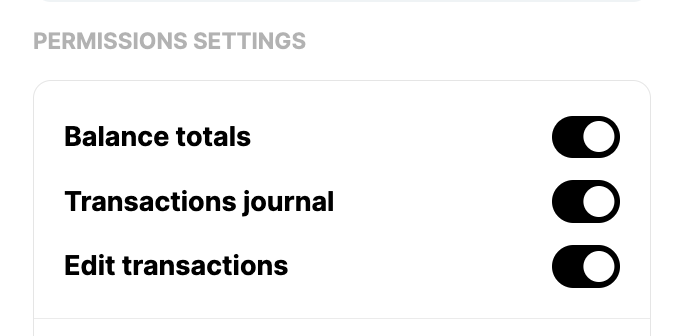
- Access to view all accounts and balances.
- If unchecked, the left panel “My Accounts” with the list of accounts and balances will not be available.
ㅤ
- If unchecked, the left panel “My Accounts” with the list of accounts and balances will not be available.
- Access to view the payment log.
- If unchecked – all transactions in the company will be hidden
ㅤ
- If unchecked – all transactions in the company will be hidden
- Permission to edit payments.
- If unchecked – all payments in the account will be displayed, but it will not be possible to open them.
ㅤ
ㅤ
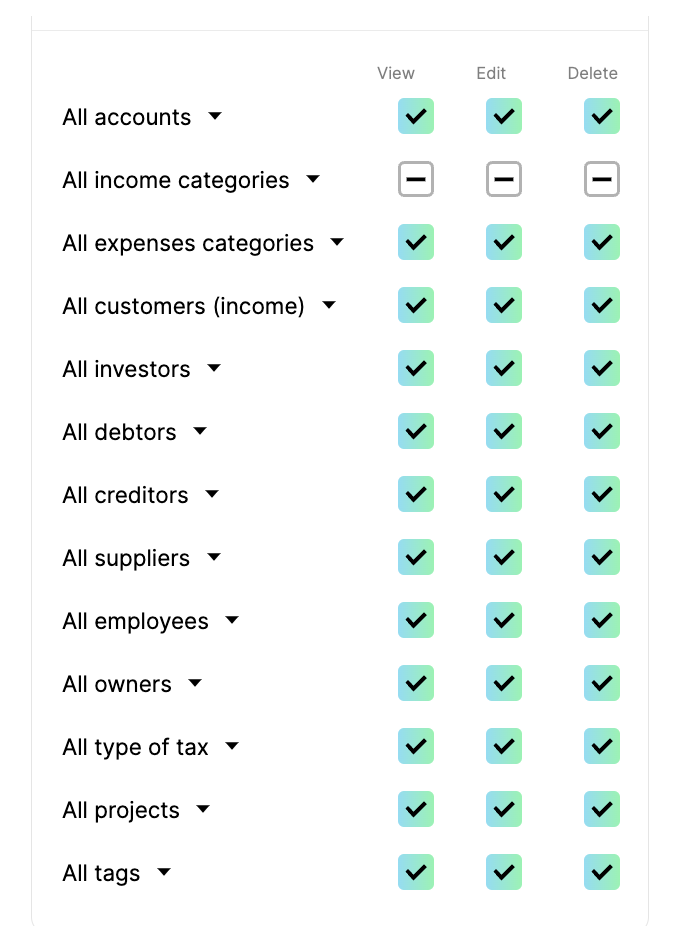
You can also customize access to only some accounts, some counterparties, some categories, etc. for different types of actions:
viewing, editing, deleting.
ㅤ
✅ – ALL items are selected in the list
ㅤ
➖ – access is NOT available to all items in the list
Second block – Analytics
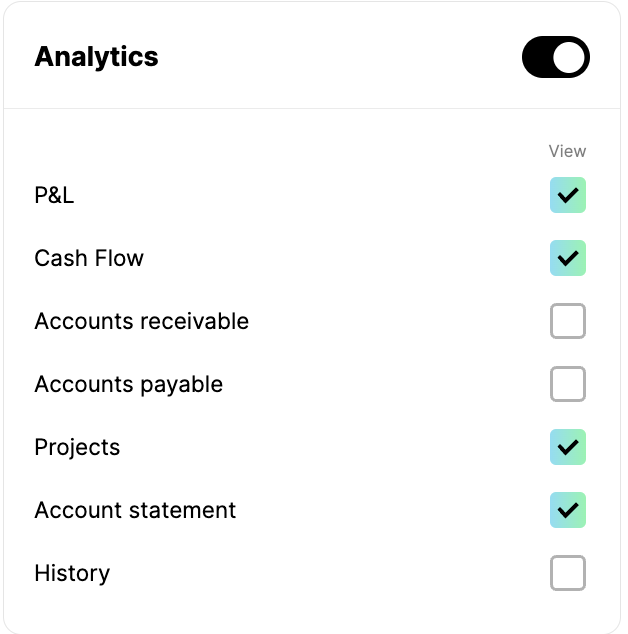
Access to reports that are relevant to the employee.
For example, access to the main reports Money and Profit, as well as to the Activity History, as the assistant will need information on who, what and when they entered what.
Block Three – Future Payments
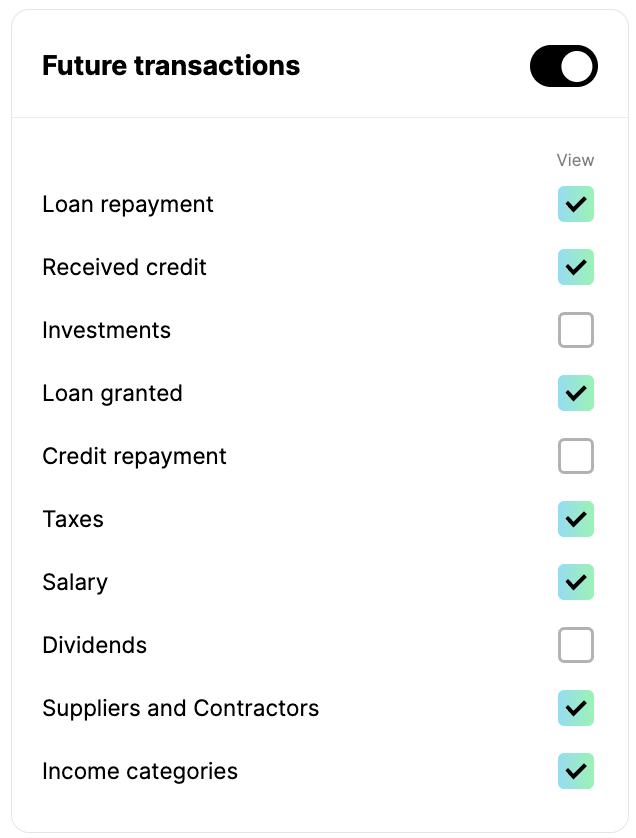
Finmap categorizes all payments into groups, so you can generate basic analytical reports and group future payments.
Select which groups of future payments your employee should have access to.
For example, hide investments and dividends, as well as credit obligations.
Fourth block – Payment Calendar
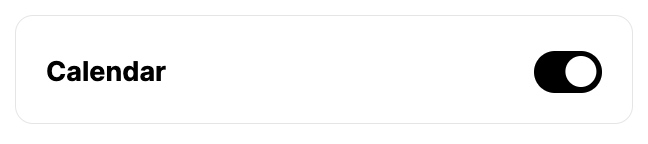
You can open or close access to the Payment Calendar data for an employee.
You can open or close access to payroll data for an employee.
Fifth block – Users
If your employee will be helping you add other employees to Finmap, leave this section available to them.
Sixth block – Settings
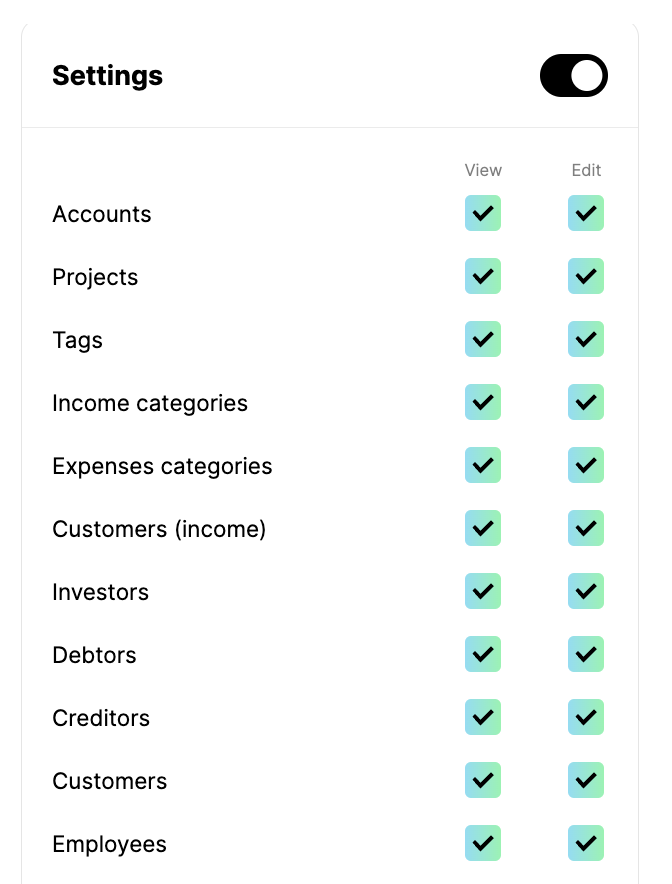
Here you can set access to the Settings menu items for the employee.
This will allow the employee to independently add new entities to the company, such as Accounts or Categories
3. Keeping the new position
ㅤ
Click save position. The employee will receive an email that they have been added to the company.
ㅤㅤ
❗️ He will only have to register his e-mail and he will already have the corresponding access to your company.
ㅤㅤ
ㅤ
User positions
ㅤ
In this settings section, you can create, edit, and delete user roles. This includes both system positions that are created by default and custom positions that you have added.
The section is easy to use because it allows you to prepare or edit a position in advance — even before adding a new user.
ㅤ
How to add a position?
ㅤ
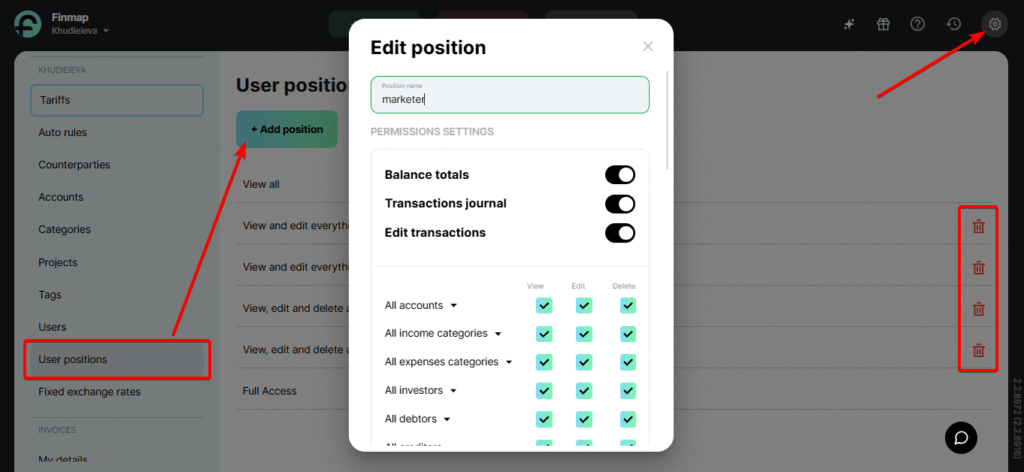
- Go to settings, then to the “User Positions” section;
- Click “Add position”;
- Add the job title and grant the appropriate access rights.
ㅤ
ㅤ
To edit access, you need to click on the name of the corresponding position.
And to delete the position, click on the trash can on the right side.
ㅤ
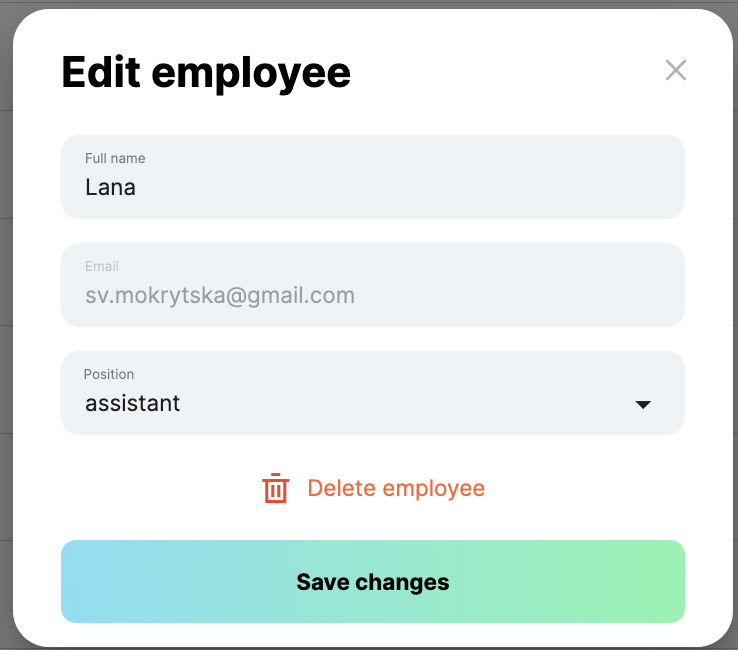
Change employee access level
ㅤ
To change a position’s access settings, go to the “Users” section, click on the employee’s position and in the window that opens, change the permissions to access the sections, reports, and data you want to access
ㅤ
You can also close previous periods for users using the “Close the period” function, you can learn more about it by following the link.
ㅤ
ㅤ
Remove an employee
ㅤ
To delete an employee (and with him/her all the accesses you have granted him/her), go to the “Users” section, click on the employee’s name and in the window that opens click “Delete”
ㅤ