ㅤCreate an account with a starting balance
ㅤ
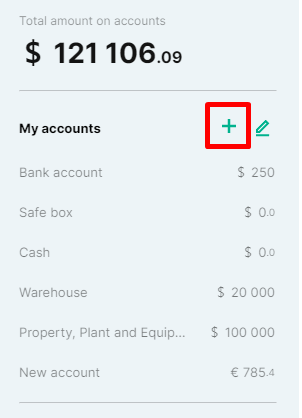
ㅤ1. Click the “plus” button on the right panel to create a new account:
ㅤ
ㅤ
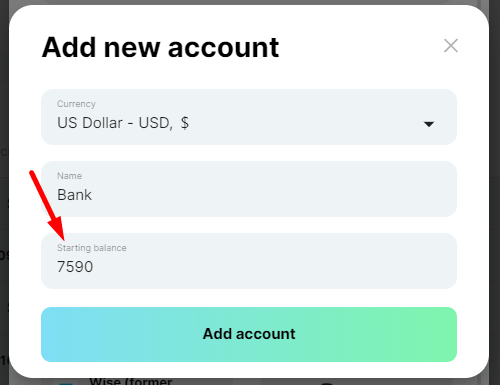
ㅤ2. A window opens in which you need to select a currency, enter the name of the new account and, if necessary, specify the starting balance
For example, we deposit 7590 UAH and click “Add account”
ㅤ

ㅤ
ㅤ
ㅤResult: The account balance is 7590 UAH, although there are no transactions on the account yet.
The balance will be taken into account on the date of this account creation
ㅤ
ㅤ
ㅤ Deposit the starting balance to a previously created account
ㅤ
ㅤLet’s say that an account has been created in the service for a long time, but without the specified starting balance, or created with an incorrect starting balance amount and there is a need to edit the amount specified in the past
ㅤ
ㅤTo do this:
ㅤ
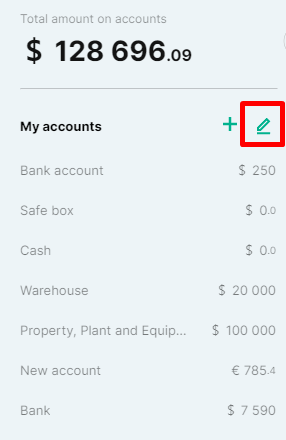
ㅤ 1. Go to the edit menu on the invoice panel and select the desired invoice from the list
ㅤ
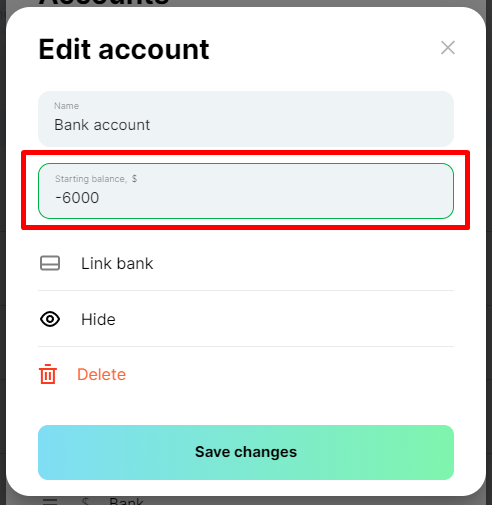
ㅤ2. In the “Starting balance” field, make the necessary changes
The starting balance can also be specified in a negative value, for example, UAH 6000
ㅤ
ㅤ
ㅤ
ㅤResult: adjusted the amount of the balance on the account by making changes to the starting balance of this account
The current balance will be taken into account on the date of account creation
ㅤ
ㅤ
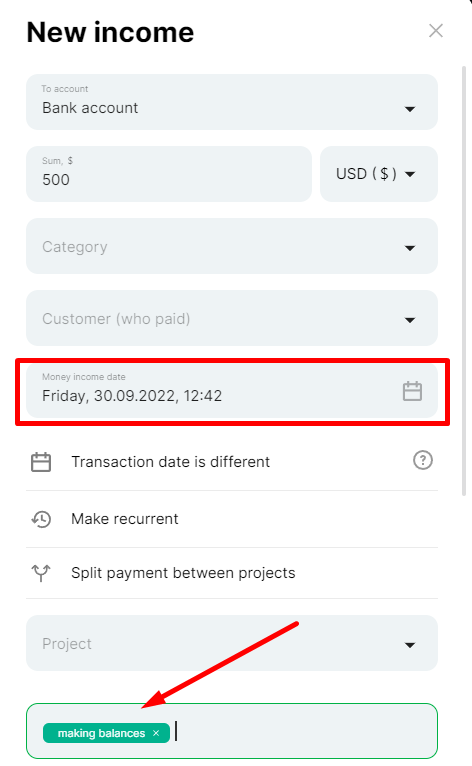
ㅤEntering the opening balance as of a certain date
ㅤ
ㅤ1. Enter the income (or expense) transaction and specify the date of the transaction, for example, September 30, 2022
ㅤ2. Choose an account and specify the amount we need, for example, 50,000 UAH
ㅤ3. Add a tag to the “entering balances” transaction to exclude this transaction from Analytics when viewing reports
ㅤ
ㅤ
ㅤ
ㅤResult: we have entered the amount of the starting balance through a separate Income or Expense transaction
The current balance will be taken into account on the date we have specified in the attached payment