Let’s review the Finmap API documentation, where you can find this information and its features.
API (Application Programming Interface) is a set of ready-made classes, procedures, functions, structures, and constants provided by an application (library, service) for use in external software products.
API acts as an intermediary between the application developer and any environment with which the application should interact.
The financial management service provides an open API that users can use for their own needs and to set up individual integrations with the service.
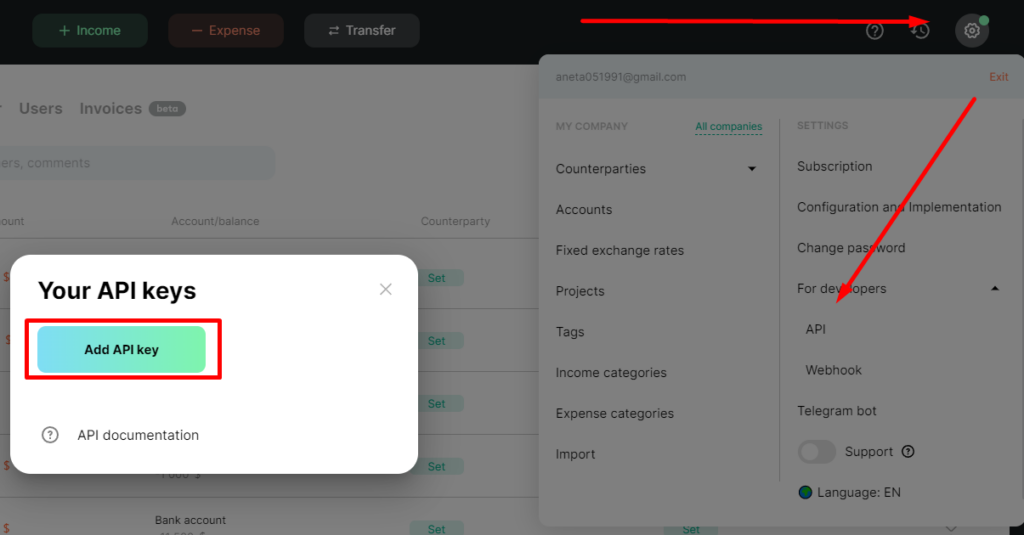
You can view information about the API in Settings under the Developers section.

Here you will find information about the API documentation.
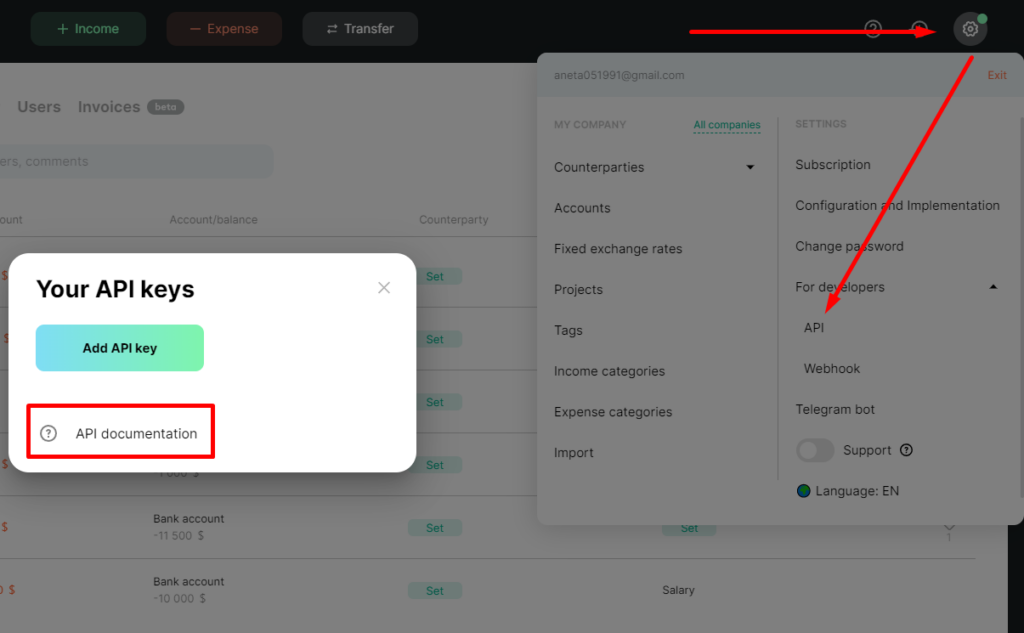
An API key is an encryption key for user authentication, similar to a login and password.
Our API documentation is based on the Swagger resource and has the following format:
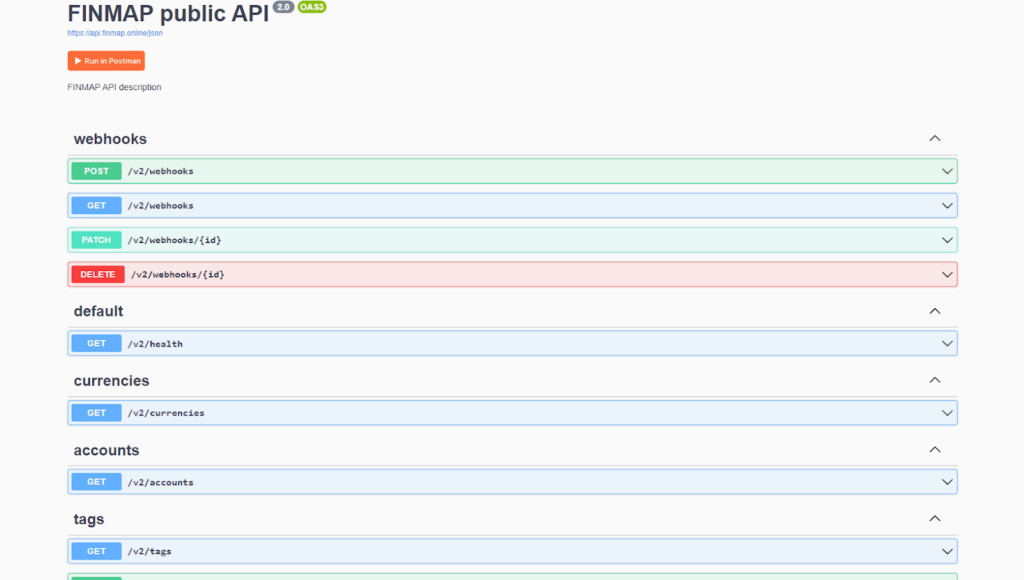
We divided the documentation into blocks:
- Webhooks: helps work with webhooks
- Default: general health check
- Currencies: shows which currency you can open a company in
- Accounts: work with accounts
- Tags: work with tags
- Projects: work with projects
- Categories/income: work with income categories
- Categories/expense: work with expense categories
- Customers: work with customers
- Investors: work with investors
- Creditors: work with creditors
- Debtors: work with borrowers
- Suppliers: work with suppliers
- Employees: work with employees
- Owners: work with owners
- Operations/income: work with income operations
- Operations/expense: work with expense operations
- Operations/transfer: work with transfers
For certain blocks, there is the ability to view, edit, delete, and add, including:
For certain blocks, the following actions are available: viewing, editing, deleting, and adding. These blocks include:
- Tags
- projects
- categories/income
- categories/expense
- customers
- investors
- creditors
- debtors
- suppliers
- employees
- owners
For the following blocks, only adding operations is available:
- operations/income
- operations/expense
- operations/transfer
The exception is the “accounts” block, through which it is only possible to obtain information about the accounts in the service.
Example queries:
Editing entities
As mentioned earlier, it is possible to get/edit/add/delete certain entities. Let’s use the “tags” entity as an example.
We need to use the GET parameter to get information about the tags in the company.

Open this parameter, then click “Try it out.”

After that, we insert the API key and click “Execute.“

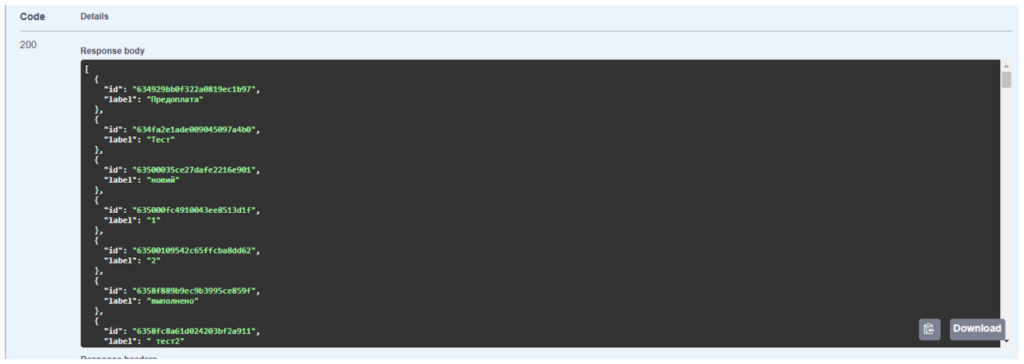
We will then receive a response with the IDs and names of the tags in our service (we will need the ID later for editing/deleting/creating an operation). Here is an example response:
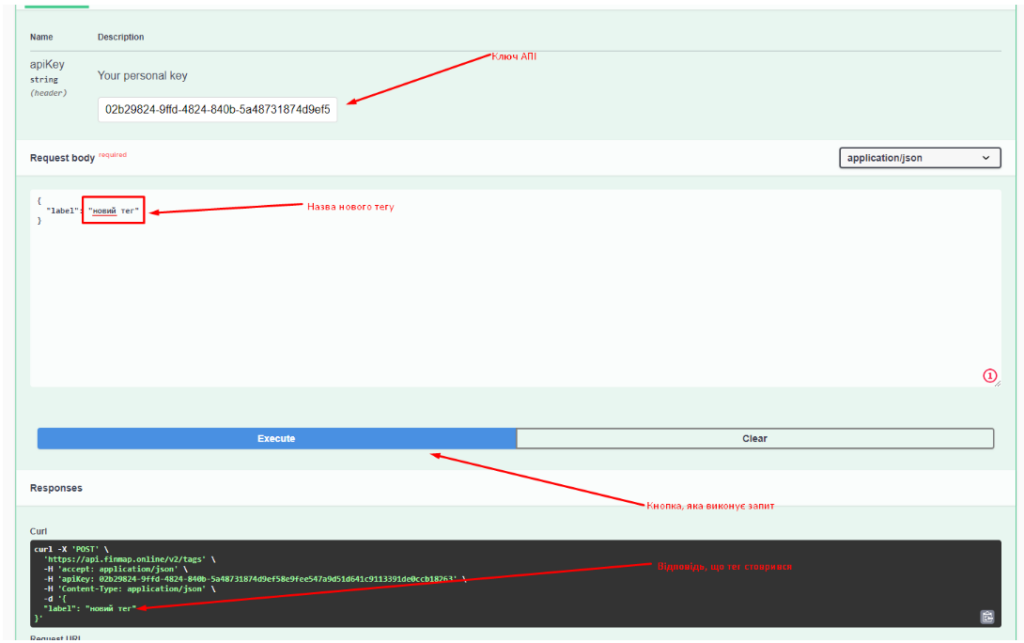
Adding entities works on the same principle as obtaining data. To add an entity, we use the POST parameter and follow the same steps as the first query, but now we need to fill in the “label” field with the entity name. After that, we click “Execute,” and we will receive a response with the new tag.
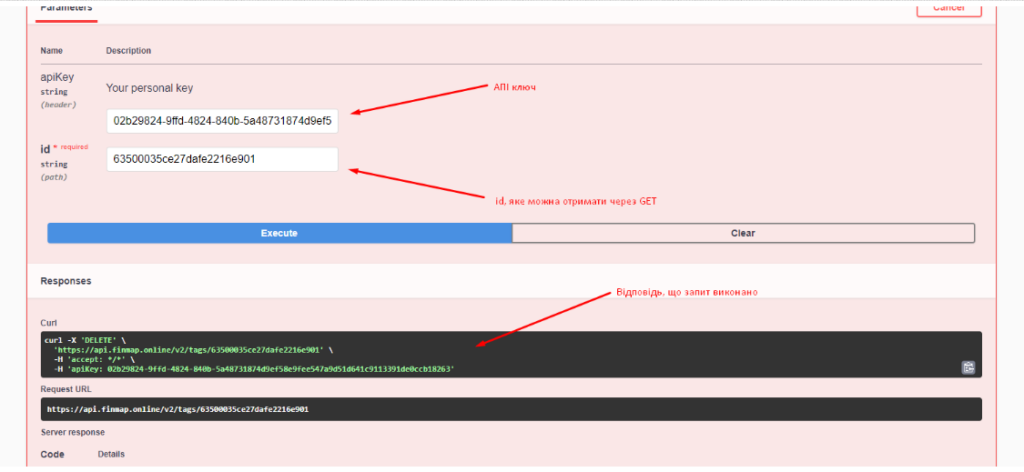
Editing and deleting entities work on the same principle, but now we need the ID we previously obtained using the GET parameter. Let’s look at an example of deletion with the DELETE parameter. Open this parameter, click “Try it out,” insert the API key and the ID of the entity you want to delete, and then click “Execute.” We will receive a response that the request was successful.
Operations addition
You can use the following blocks to add the operations:
- operations/income
- operations/expense
- operations/transfer
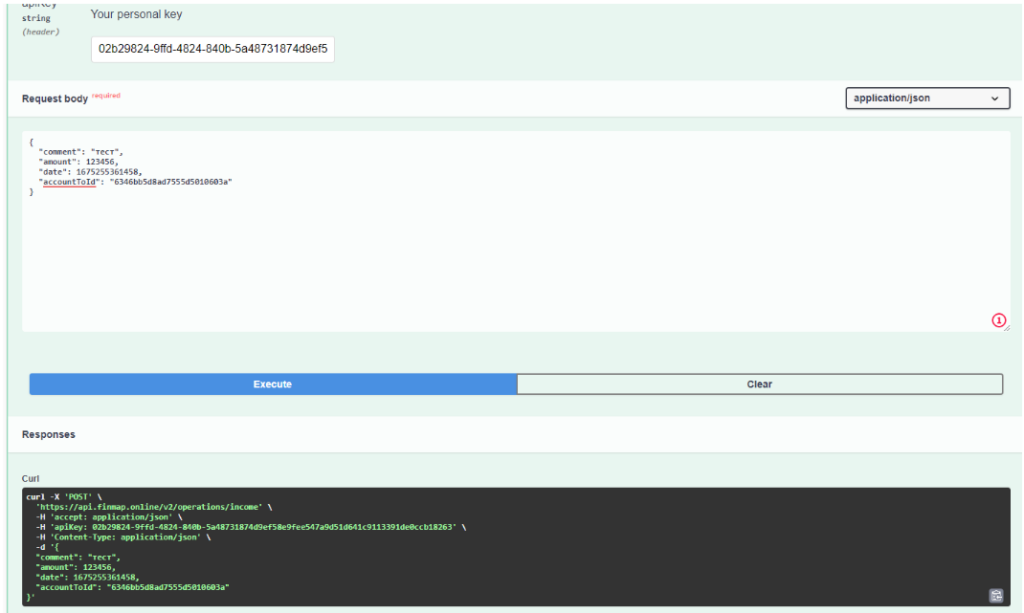
Let’s consider an example with the operations/income block: Access is only available to the POST parameter since it is responsible for adding. To start, we open this parameter – click on Try it our – specify the API key – a window will immediately open for entering information.

“comment”: “string”, – comment field, not required
“amount”: 0, – amount field, required
“date”: “current date in utc”, – payment date field, required
“projectId”: “string”, – project, not required
“tagIds”: [“string”], – tag, not required
“externalId”: “new uuid v4”, – this parameter is automatically generated, not required “periodStartTimestamp”: 0, – start of the period, not required
“periodEndTimestamp”: 0, – end of the period, not required
“dateOfPayment”: “date”, – agreement date, not required
“accountToId”: “string”, – account, not required
“categoryId”: “string”, – category, not required
“borrowerId”:“string”, – borrower, not required
“creditorId”:“string”, – creditor, not required
“custumerId”:“string”, – customer, not required
“investorId”:“string” – investor, not required
To add an operation, it is enough to specify the following data:
“Comment”:”test”,
“amount”:123456,
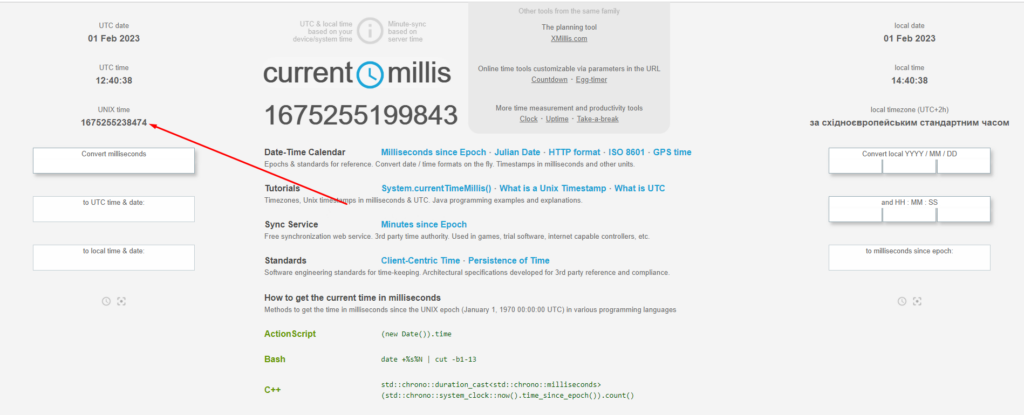
“date”:1675255361458, – take it in UTC format, use the service https://currentmillis.com/, the required information
“accountToId”:”606ff2357454e1bab63882e3″ – the ID of our account, can be obtained using the GET parameter, in the account block – after we have specified this data, click on the Execute button – our request is successfully executed.
