ㅤ
Step 1. Check the date when transactions started to be received by the service
ㅤ
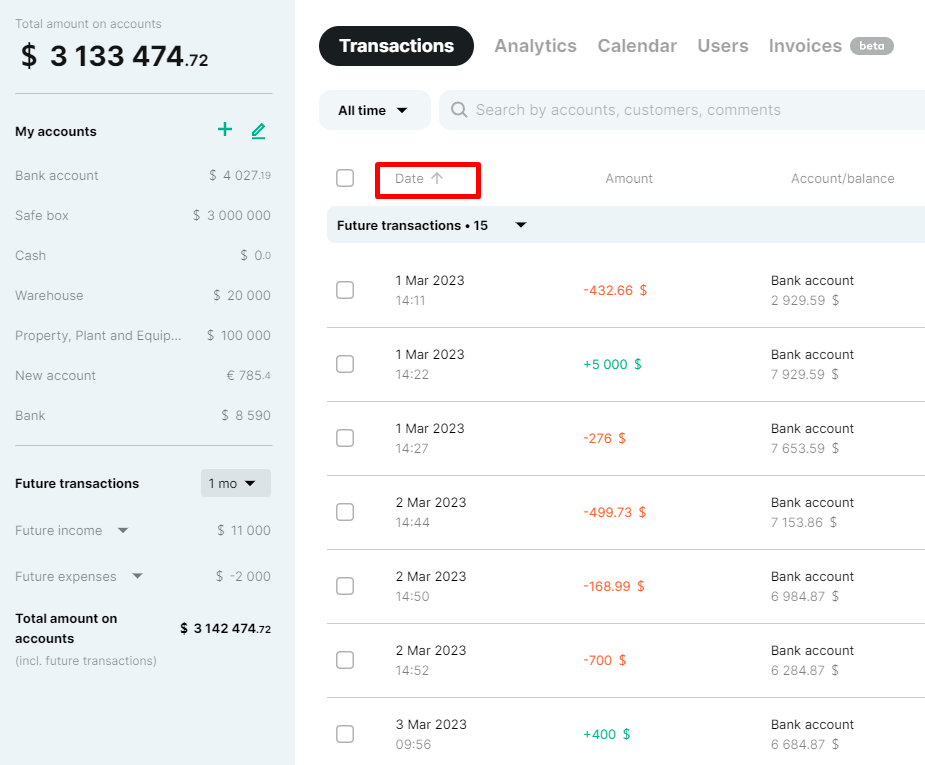
To do this, we find the “Date” column in the payment journal and click on “Date” with the down arrow.
ㅤ
The example shows that the first transaction was credited to the account on August 1, 2022.
It is from this date that we will need to take an extract from the bank that is integrated into the account to conduct the verification. The format of the statement is requested in xls.
This format will allow you to conduct the check more conveniently and efficiently
ㅤ
ㅤ
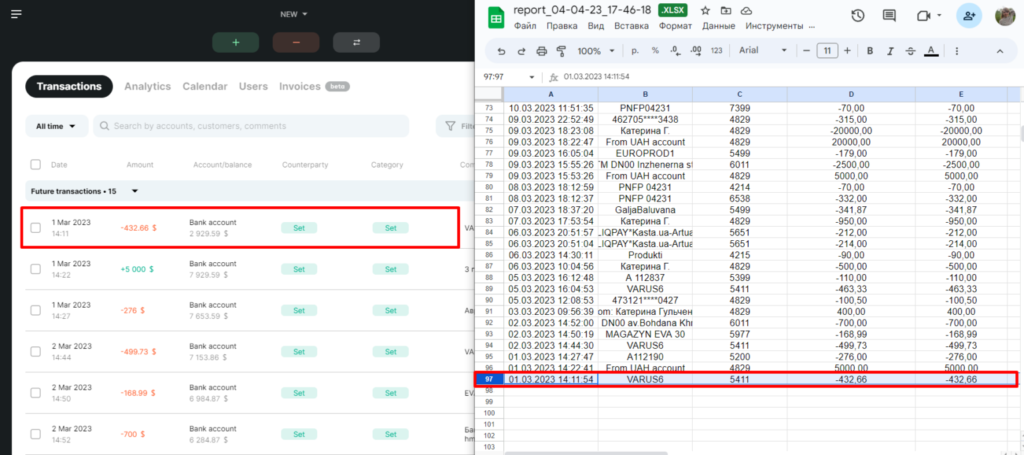
Step 2. Reconciliation of transactions in Finmap and statement
ㅤ
As a rule, the statement already contains all the information we need:
● Date and time of the operation
● Transaction amount
● Account balance after the transaction
ㅤ
*For convenience, you can split the screen into two parts if your device allows it. On the one hand, there will be a window with the Finmap service, and on the other hand, your statement
ㅤㅤ
ㅤ
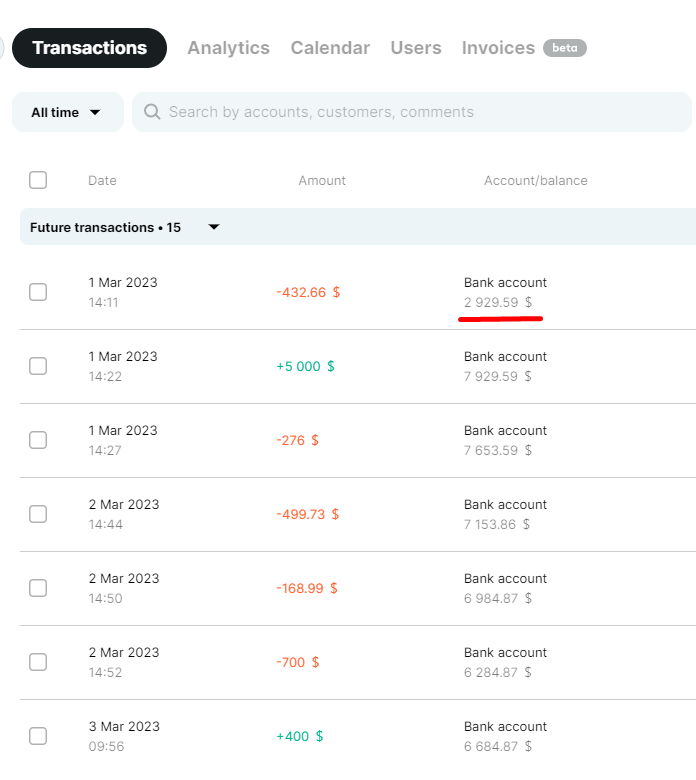
You can verify the data for each transaction separately by amount (in the statement = in the service), or you can view the account balance on a weekly basis (if everything is fine, move on, if there are differences, look for the reasons within this week).
ㅤ
This balance will be displayed under the account name
Step 3. Possible causes of discrepancies and their elimination
ㅤ
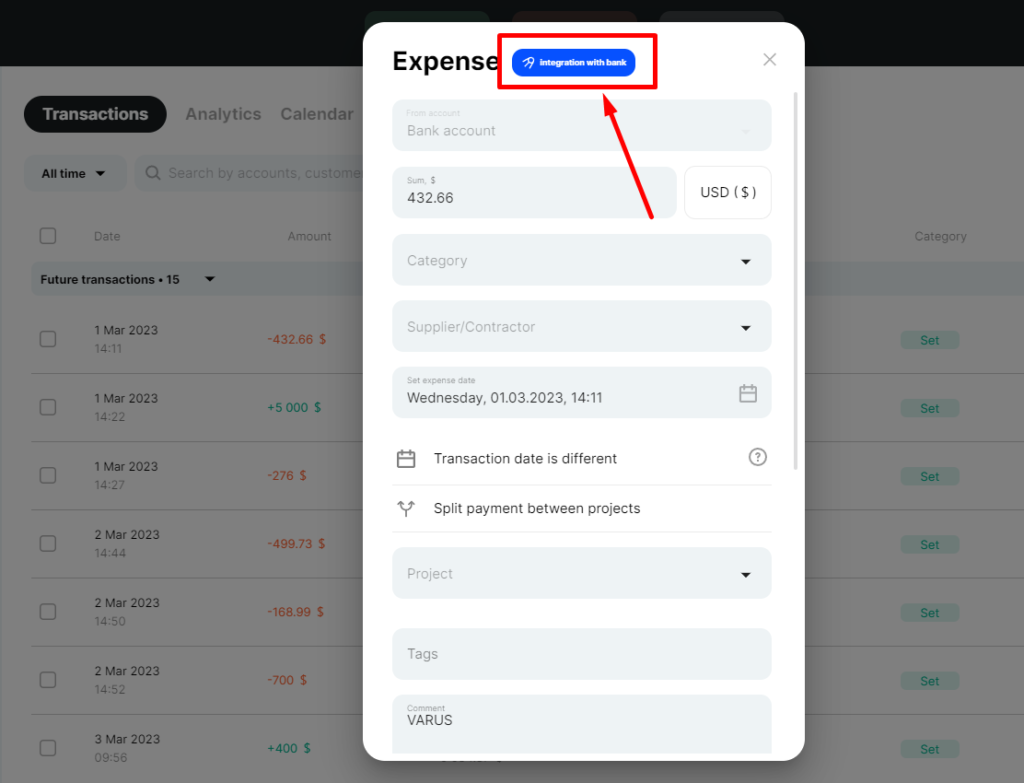
1 ➡️ The transaction was entered into the account manually and does not appear in the statement. That is, the transaction did not take place on the bank account, but it is available in the service
ㅤ
It’s easy to check whether a transaction was entered through integration or manually. Open the transaction by clicking on it in the service. The blue “Bank integration” mark next to the transaction type always indicates that the transaction was downloaded from the bank.
ㅤ
Transactions entered manually to an integrated account directly affect its balances. Therefore, if you find such a transaction, you can either correct it (if it was entered into the account by mistake) or adjust the account balances (if the transaction was entered correctly in terms of accounting in your business).
ㅤㅤ
2 ➡️ The transaction was entered into the service, but was deleted by mistake or its amount was edited
ㅤ
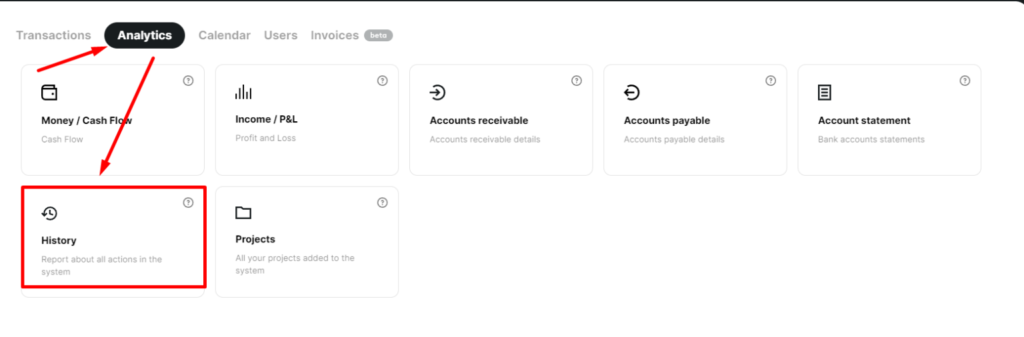
To check, we go to Analytics, the Action history section
ㅤ
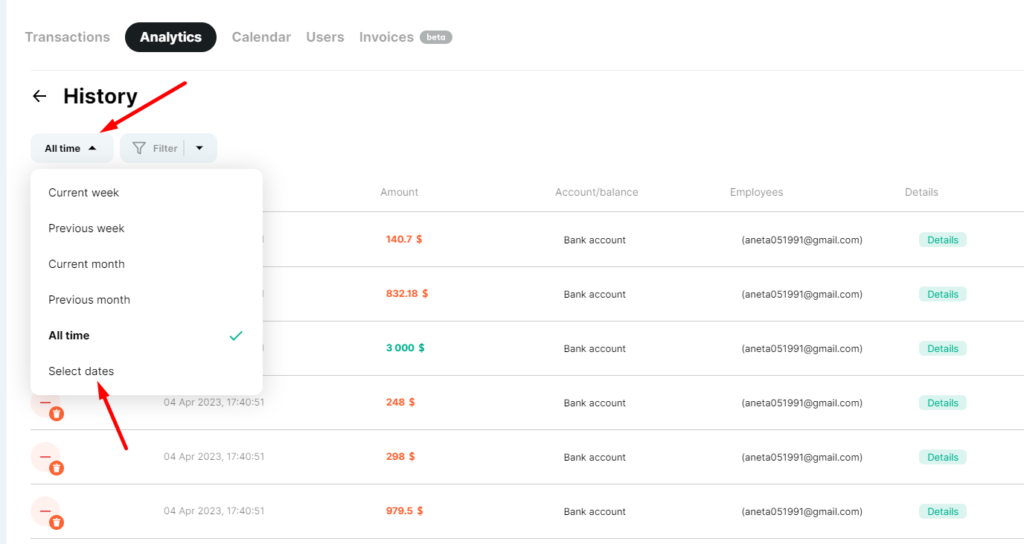
Set additional filters to narrow the search: account, transaction type, action type, time filter
ㅤ
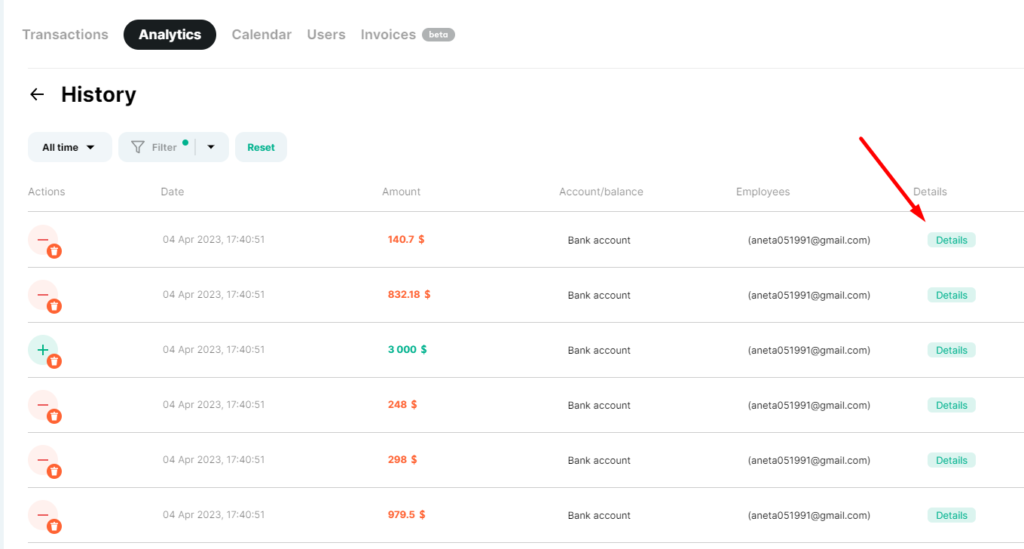
To view the changed information, we can click on “Details”
ㅤ
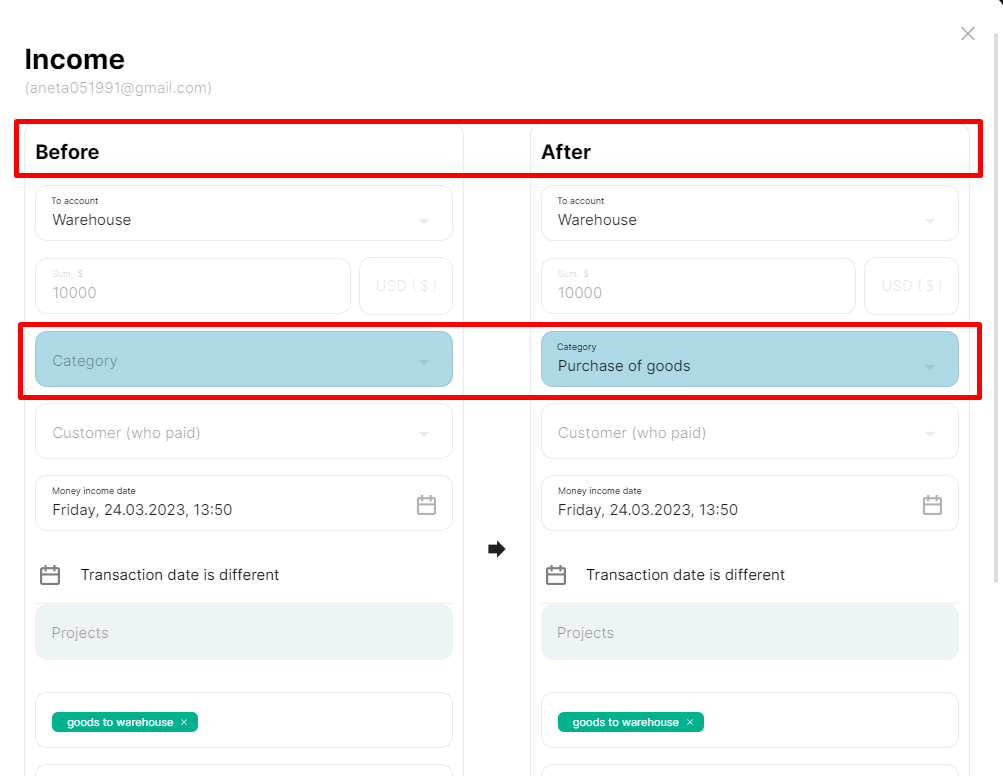
Here you will see what changes have been made to the transaction.
If necessary, you can undo the changes or edit the operation as you need.
ㅤ
ㅤ
3 ➡️ All transactions in the payment journal are equal to the statement, but the account balance is still incorrect
ㅤ
The reason for this could be the incorrect starting balance of the account in the service.
ㅤ
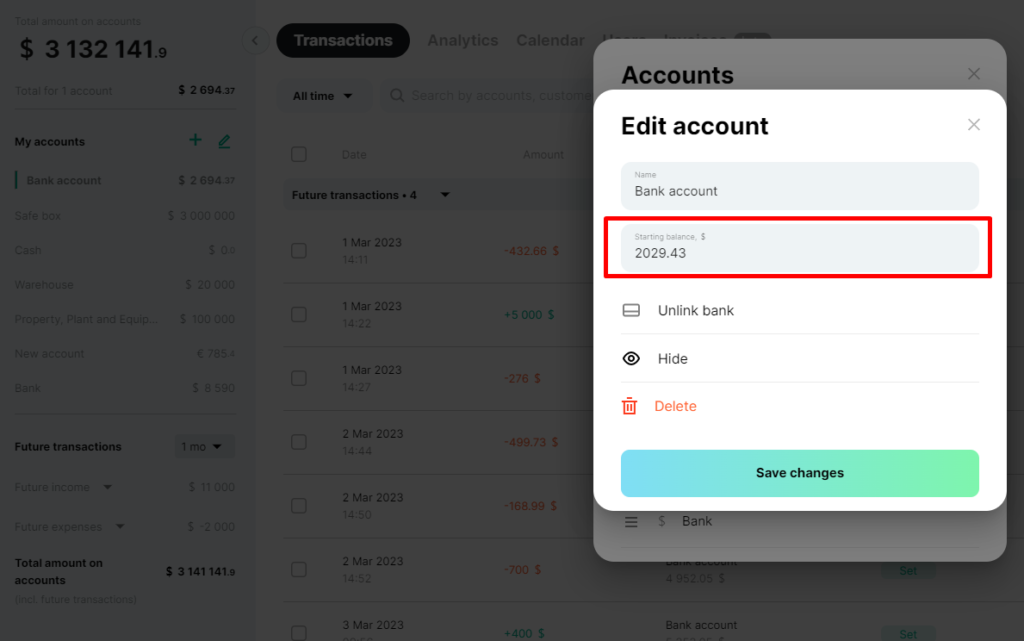
To check, go to the edit invoices mode, select the invoice you need from the list, and click on it:
ㅤ
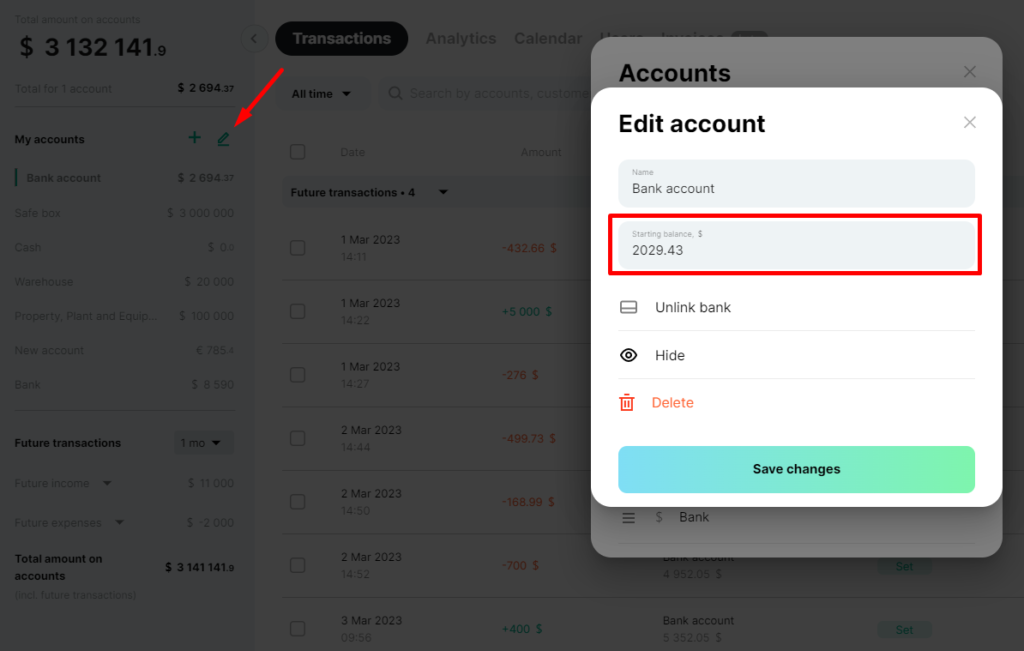
Now you can edit the starting balance.
Namely, you can enter the value according to the account balance on the bank statement as of the date from which the transactions were uploaded to Finmap.
ㅤ
ㅤ
4 ➡️ The discrepancies between the account in the service and the bank are insignificant, so you don’t want to look for an error
ㅤ
In this case, the option is to reconnect the synchronization, which will help to equalize the balance automatically
ㅤ
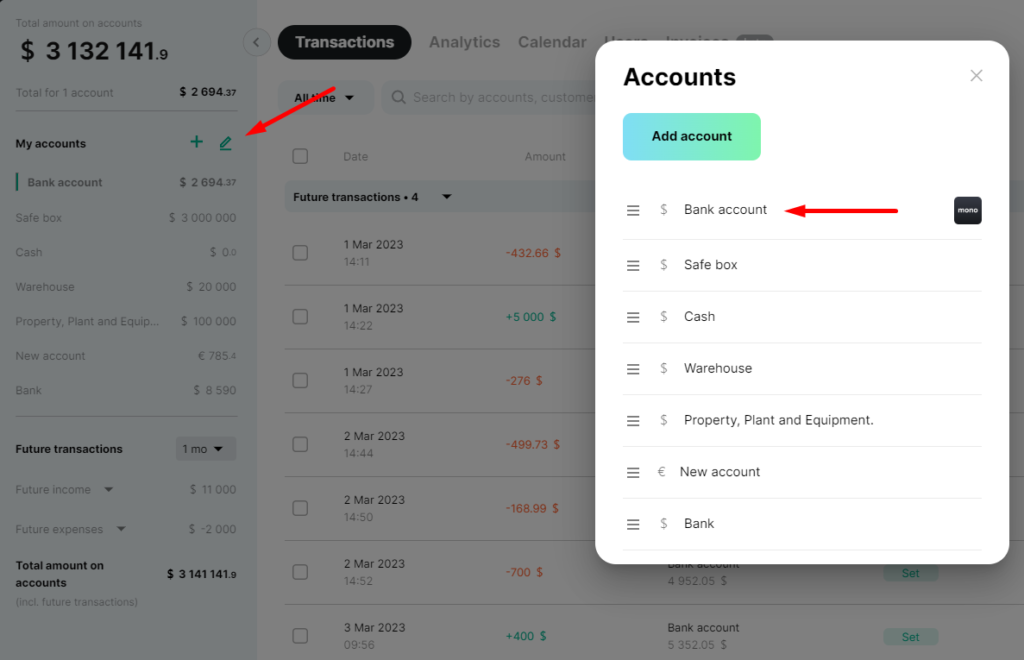
- Go to the right pane of accounts and click the Edit icon.
- Find the account you need and click on it;
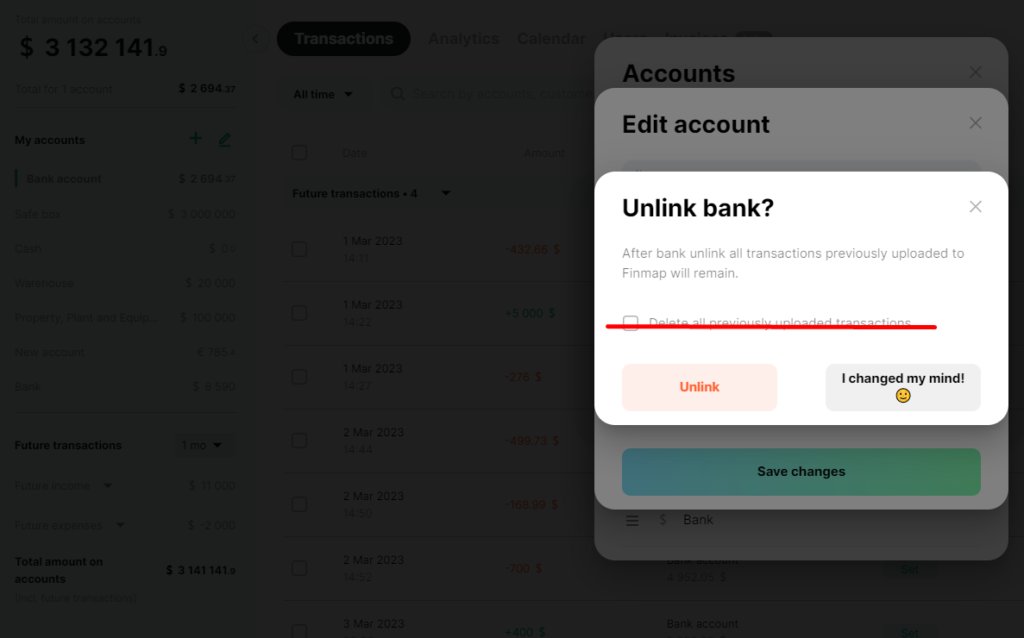
- Click on “Disconnect bank”
ㅤ
The service will offer you to “Delete transactions that have already been included in the service”.
Do not agree to the deletion and simply disconnect the bank, leaving all transactions in the service.
ㅤ
After these steps, reconnect the bank to the account:
- Select the current connection date.
- Select the required account if we have several in the bank.
- Click “Connect bank” and the account balance will be updated.
ㅤ